Publish continuous integration status on Desktop

In one of my last tutorials, i show how to develop test tools for software tester with Python. Now i will show you, how to publish continuous integration status information for other team members like Scrum master, Product owner or Test manager.

Preconditions

Note

If you don`t have Jenkins or Hudson running, search some public services with Google!

Example: inurl:8080 intitle:”Dashboard [Jenkins]”

Steps

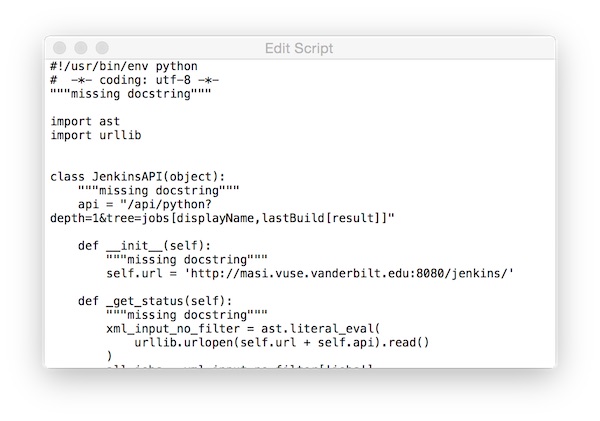
Create a python script like this:

#!/usr/bin/env python
#  -*- coding: utf-8 -*-

import ast
import urllib


class JenkinsAPI(object):

    api = "/api/python?depth=1&tree=jobs[displayName,lastBuild[result]]"

    def __init__(self):
        self.url = 'http://masi.vuse.vanderbilt.edu:8080/jenkins/'

    def _get_status(self):
        xml_input_no_filter = ast.literal_eval(
            urllib.urlopen(self.url + self.api).read()
        )
        all_jobs = xml_input_no_filter['jobs']
        return all_jobs

    def show_results(self):
        job = self._get_status()
        fail = [row for row in job if 'SUCCESS' != row['lastBuild']['result']]
        passed = len(job) - len(fail)
        print "Jenkins: %s" % self.url
        print "Jobs: %s - Successful: %s - Failed: %s" % (
            len(job), passed, len(fail)
        )
        if len(fail) > 0:
            for (i, item) in enumerate(fail):
                print " > Job: %s - %s" % (
                    item['displayName'], item['lastBuild']['result']
                )
            del i


if __name__ == '__main__':
    RUN = JenkinsAPI()
    RUN.show_results()

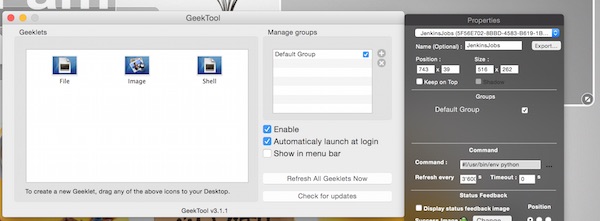
Now start GeekTool and create a new Geeklet. Drag a Shell Geeklet on you Desktop. Now insert values for name, size, set colors and so on and add the python script on “Command”.

Create Geeklet

… the script.

Geeklet Command

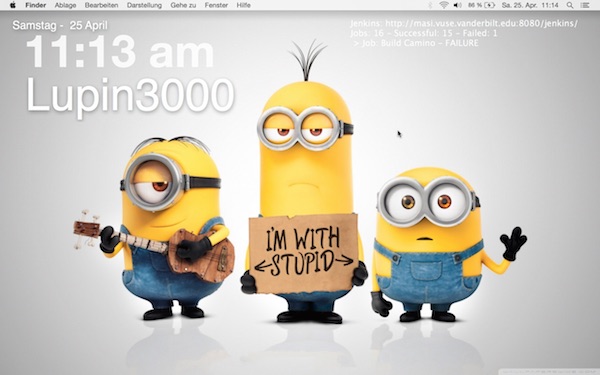
Thats it! Now you can export the Geeklet and share it with you team members. My current screen looks like:

Geeklet result

Simple ssh brute-force attack with Hydra

With Hydra you can recover your SSH credentials. Here a tiny tutorial how it works.

Installation

I do install via ports but also different other possibilities are available.

# update macports (optional)
$ sudo port selfupdate

# search port (optional)
$ port search hydra

# check dependencies (optional)
$ port rdeps hydra

# install port
$ sudo port install hydra

Test preparation

Now create two files (or download anywhere)

# create password file
$ vim passwords.txt

# create users file
$ vim users.txt

Create some content (by line) and start the ssh brute-force with Hydra.

Run SSH password recover

# use password.txt only
$ hydra -l root -P passwords.txt <target> ssh

# use user.txt only
$ hydra -L users.txt -p 12345 <target> ssh

# use user and password files
$ hydra -L users.txt -P passwords.txt <target> ssh

If Hydra found something, the message looks like:

[22][ssh] host: <target> login: <user> password: <password>

Note: for legal purposes only!

Create your own test application

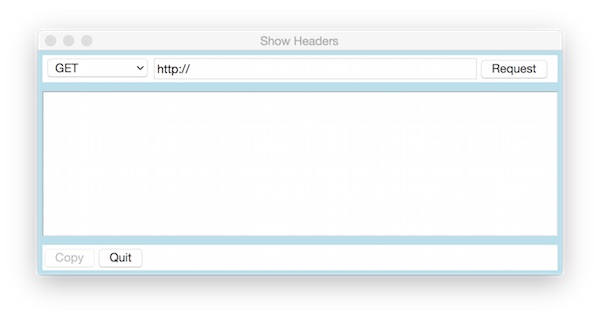
A lot of software testers do have no or less development skills. They also have less skills to use commandline tools and need GUI applications. In addition, the test applications for the respective claims should be easy to use. This guide will show you how to easily deploy software testers the needed test tools. This is just an example, please feel free to expand it!

Precondition

Let`s go

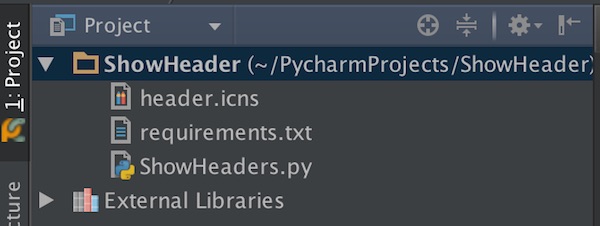
After create a new PyCharm project (with virtualenv), create 2 new empty files (requirements.txt, ShowHeaders.py) and import a icon. You can found icons (*.icns) on iconarchive for free.

application project files

Open the “requirements.txt” file and add Requests library.

requests==2.6.0

Open the “ShowHeader.py” and add the following content.

#!/usr/bin/env python
#  -*- coding: utf-8 -*-
"""
This is a main script

Usage:
    python ShowHeaders.py
"""
import requests
from Tkinter import (Tk, Frame, StringVar, OptionMenu, Button, Entry, Text,
                     END, DISABLED, NORMAL, SUNKEN, E, W)


class ShowHeaders(object):
    """
    ShowHeaders class
    """

    OPTIONS = ["GET", "POST", "PUT", "DELETE"]

    def __init__(self):
        """
        Constructor for Tk GUI
        """
        self.root = Tk()
        self.root.title('Show Headers')
        self.root.configure(bg="light blue")
        self.option = StringVar(self.root)
        self.option.set(self.OPTIONS[0])
        self.methods = None
        self.url = None
        self.response = None
        self.copy = None

    def create_gui(self):
        """
        Create Tk GUI
        """
        self._create_top_frame()
        self._create_middle_frame()
        self._create_bottom_frame()
        self.root.mainloop()

    def close_app(self):
        """
        Close & Quit Application
        """
        self.root.quit()

    def _print_response(self, response_txt):
        """
        Print response
        """
        self.response.config(state=NORMAL)
        self.response.delete(1.0, END)
        self.response.insert(END, response_txt)
        self.response.config(state=DISABLED)

    def _copy_to_clipboard(self):
        """
        Copy to text clipboard
        """
        text = self.response.get("1.0", END)
        self.root.clipboard_clear()
        self.root.clipboard_append(text)

    def _make_request(self):
        """
        Run http request and print
        """
        self.copy.config(state="normal")
        methods = self.option.get()
        url = self.url.get()
        if methods == 'GET':
            req = requests.get(url)
        elif methods == 'POST':
            req = requests.post(url)
        elif methods == 'PUT':
            req = requests.put(url)
        elif methods == 'DELETE':
            req = requests.delete(url)
        else:
            req = dict()
        header = req.headers
        self._print_response(header)

    def _create_top_frame(self):
        """
        Create top frame
        """
        top_frame = Frame(self.root)
        top_frame.grid(row=0, column=0, padx=5, pady=5, sticky=W+E)

        self.methods = OptionMenu(top_frame, self.option, *self.OPTIONS)
        self.methods.config(width=15)
        self.methods.grid(row=0, column=0)

        self.url = Entry(top_frame, width=50)
        self.url.insert(0, "http://")
        self.url.grid(row=0, column=1)

        Button(top_frame, text='Request', command=self._make_request).grid(
            row=0, column=2)

    def _create_middle_frame(self):
        """
        Create middle frame
        """
        middle_frame = Frame(self.root, height=75, bd=1, relief=SUNKEN)
        middle_frame.grid(row=1, column=0, padx=5, pady=5)

        self.response = Text(middle_frame, height=10)
        self.response.config(state=DISABLED)
        self.response.grid(row=1)

    def _create_bottom_frame(self):
        """
        Create bottom frame
        """
        bottom_frame = Frame(self.root)
        bottom_frame.grid(row=2, column=0, padx=5, pady=5, sticky=W+E)

        self.copy = Button(bottom_frame, text="Copy", state=DISABLED,
                           command=self._copy_to_clipboard)
        self.copy.grid(row=0, column=0)

        Button(bottom_frame, text='Quit', command=self.close_app).grid(
            row=0, column=1)


if __name__ == '__main__':
    APP = ShowHeaders()
    APP.create_gui()

For first test, run the application. If there are no issues – open the PyCharm terminal and run the following command.

$ py2applet --make-setup ShowHeaders.py

# or if you use virtualenv
$ /Users/<username>/ShowHeaderEnv/bin/py2applet --make-setup ShowHeaders.py

Now you should see the generated file “setup.py” in the Project. Open the file and add the icon. The content should look like this:

"""
This is a setup.py script generated by py2applet

Usage:
    python setup.py py2app
"""

from setuptools import setup

APP = ['ShowHeaders.py']
DATA_FILES = []
OPTIONS = {'argv_emulation': True, 'iconfile':'header.icns'}

setup(
    app=APP,
    data_files=DATA_FILES,
    options={'py2app': OPTIONS},
    setup_requires=['py2app'],
)

Now execute the following command to build, for first test.

$ python setup.py py2app -A

After some messages in terminal, your Project should show 2 new folders (build, dist). The alias mode (-A / –alias) instructs py2app to build an application, but it is not portable to other machines! You can open the Application in Finder or from terminal for your tests. If there are changes, just run the build-command again.

$ open dist/ShowHeaders.app

If everything is fine and your Application is ready for ship, run the following command.

# remove build and dist folder
$ rm -fr build/ dist/

# build application
$ python setup.py py2app

Again the Application can be found on folder “dist”. The result should look like this:

example application

Have fun and be creative! Too ship the test application for Windows users, look at py2exe.

PyCharm with Virtualenv on Mac OS X

This guide shows you how to use PyCharm with virtualenv on Mac OS X.

Preconditions

PyCharm installed

Steps

First install we install Virtualenv and Virtualenvwrapper.

# if pip not installed
$ sudo easy_install pip

# install virtualenv
$ sudo pip install virtualenv

# install virtualenvwrapper
$ sudo pip install virtualenvwrapper

Now we start PyCharm to create new project.

PyCharm Virtualenv

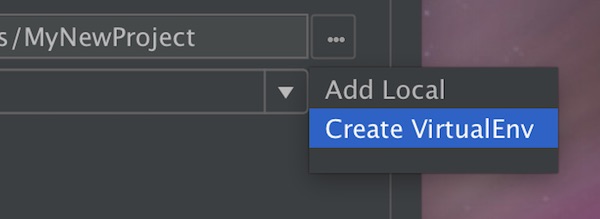
After given the new name for the project on Location, select for Interpreter “Create VirtualEnv”.

PyCharm Create Virtualenv

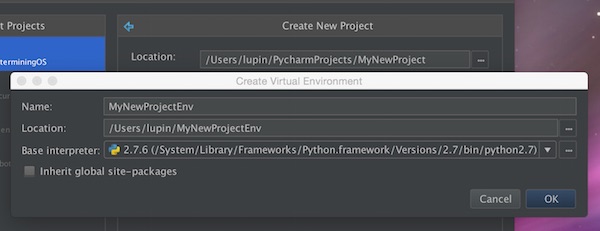
Create Virtual Environment dialog box opens. Here type the name of the new virtual environment and specify the target directory for he new virtual environment on Location. Select one “Base interpreter” and if needed, select the check box “Inherit global site-packages”.

PyCharm Virtualenv Setup

Press “OK” button to apply changes and close the dialog box. After press the  “Create” button – PyCharm create the new project.

Textmate with Puppet syntax highlighting

To enable syntax highlighting for puppet in textmate, follow this guide.

Preconditions

  • Textmate installed
  • Git installed (available with command line developer tools)

Steps

Create new folder somewhere on your directories. I do directly on Desktop.

# create new directory
$ mkdir ~/Desktop/Bundles

Go inside created folder and clone from Git repository.

# change directory
$ cd ~/Desktop/Bundles

# run git clone
$ git clone https://github.com/masterzen/puppet-textmate-bundle.git Puppet.tmbundle

Move the “Puppet.tmbundle” file into specific folder and delete created folder on desktop.

# move file
$ mv ~/Desktop/Bundles/Puppet.tmbundle ~/Library/Application\ Support/TextMate/Bundles/

# delete created directory
$ rm -fr ~/Desktop/Bundles

Now select a *.pp file and open with Textmate. In the Textmate dialog, select “Puppet” and “Install Bundle”.

Yosemite – Apache and PHP at user level

Mac OS X include Apache server and PHP, but since some version by default only at root level. To start the Apache on root level simple use the following commands.

# start Apache
$ sudo apachectl start

# restart Apache
$ sudo apachectl restart

# stop Apache
$ sudo apachectl stop

After starting the Apache server, on browser you can use the URL “http://localhost”. You should see something like: “It Works”. The location for files is “/Library/WebServer/Documents/”.

Small note
I have to apologize! The security policies of my provider do not allow the usage or combination for special words. Therefore, at various points images were used.

User level

Now we create the Apache on user level with a few configuration steps.

# Create folder (if not exists)
$ mkdir ~/Sites

Inside this folder create a simple PHP file (index.php)

<?php phpinfo(); ?>

In the third step, the configuration file of the user is created. The name always includes the user name!

$ cd /etc
$ vi /apache2/users/<username>.conf

Add the following content and save

<Directory "/Users/<username>/Sites/">
  AllowOverride All
  Options Indexes MultiViews FollowSymLinks
  Require all granted
</Directory>

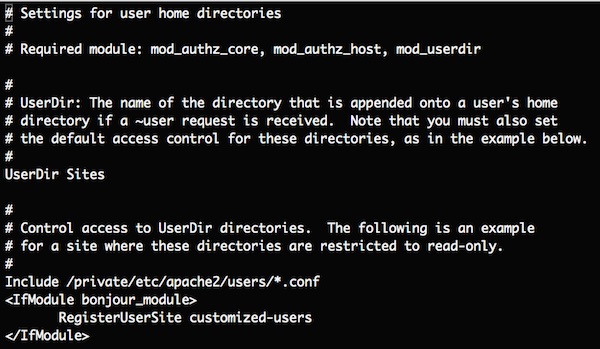
Check the access permissions for “-rw-r–r–” or “664”! To enable the configuration, open the “httpd-userdir.conf” and uncomment one line above <IfModule>.

$ cd /etc
$ sudo vi apache2/extra/httpd-userdir.conf

httpd-userdir.conf

In the last step, only the correct modules must be loaded.

configuration

Now uncomment the LoadModule lines for “mod_userdir.so” and “libphp5.so” and include for user home.

LoadModule userdir_module libexec/apache2/mod_userdir.so
LoadModule php5_module libexec/apache2/libphp5.so

user home include

Thats it! If you now start/restart the Apache and call the URL “http://localhost/~<username>/” in your browser, you should see the parsed content of PHP file.

Run programming languages from finder

On double-click the Mac OS X finder opens the default editor for script files. With the Automator you can very easy create services, which run these scripts. This example shows how to run python direct from finder.

Steps

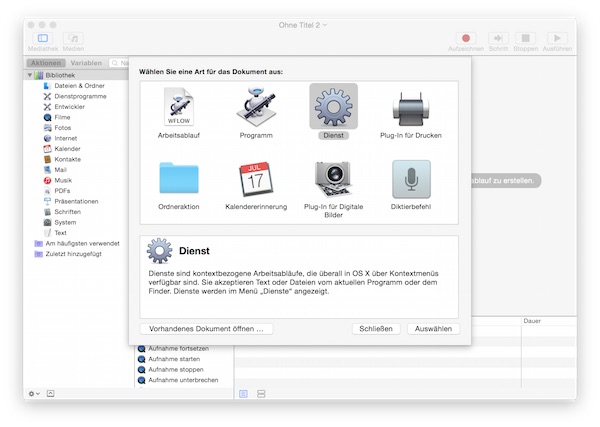
Start Automator and select “Service”

automator service

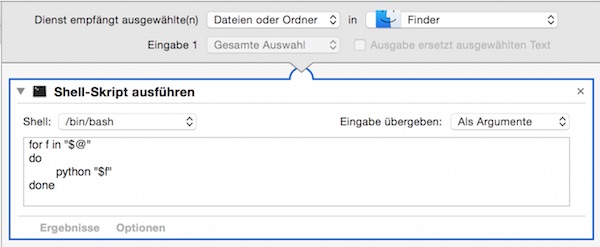
The service should receive “Files and Folder” on “Finder”.

Service receive files and folders

Now add from library “Run as Shellscript” with following content.

Run Shell Script

for f in "$@"
do
    python "$f"
done

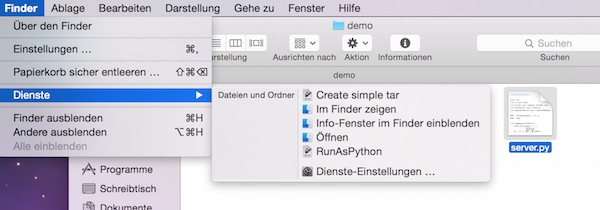
Now save your Automator workflow. The location should be automatically set to: “/Users/<user>/Library/Services”. Now select a python file, over the context menu or navigation item service, you can run it directly. My service is called “RunAsPython.

automator service for python

Create PDF documentation on the fly

In software development, testers need to create a lot of documentation. Mac users can create very comfortable the documentation in PDF.

manpage to PDF

# Create PDF from manpage ping and open in Preview.app
$ man -t ping | open -f -a /Applications/Preview.app

Text to PDF

# Create PDF from text file
$ cupsfilter foo.txt > lorem.pdf 2> /dev/null

# Create PDF from text file and open in Preview.app
$ cupsfilter foo.txt 2>/dev/null | open -f -a /Applications/Preview.app

Image to PDF

# Create PDF from JPG
$ sips -s format pdf test.jpg --out test.pdf

Command’s to PDF

Many test steps would be carried out via command line and again later documented. This takes a lot of time and can lead to errors in documentations.

# Create file from history
$ history > history.txt

# Create PDF from history.txt
$ cupsfilter history.txt 2>/dev/null | open -f -a /Applications/Preview.app

PostScript to PDF

# Convert PostScript into PDF
$ pstopdf foo.ps

# Convert PostScript into PDF with specific name
$ pstopdf foo.ps -o bar.pdf