Monitor running docker containers with cAdvisor

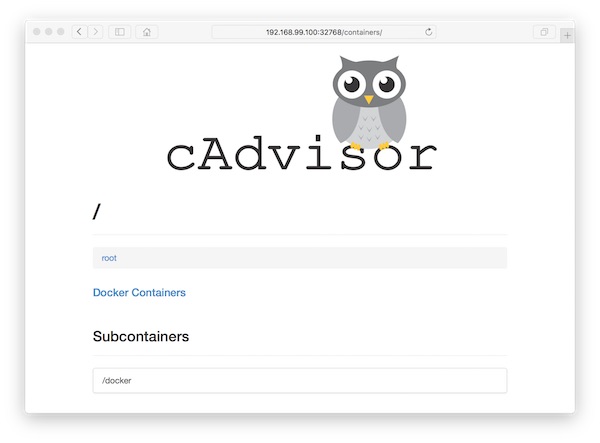
As a software tester, you have several containers run in your environment. Here is an example how easily and quickly you can monitor your test-environment with cAdvisor.

Preconditions

Preparation

# create project (local)
$ mkdir -p ~/Projects/Monitoring && cd ~/Projects/Monitoring

# create shell script (local)
$ vim start-demo.sh
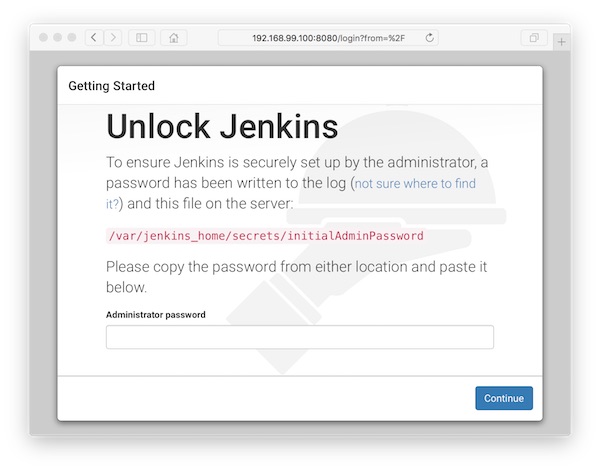
#!/usr/bin/env sh

docker run -d --name cadvisor -P -v /:/rootfs:ro -v /var/run:/var/run:rw -v /sys:/sys:ro -v /var/lib/docker/:/var/lib/docker:ro google/cadvisor:latest
docker run -d --name jenkins -P jenkins
docker run -d --name selenium-hub -P selenium/hub:2.53.0
docker run -d --name selenium-node_1 --link selenium-hub:hub selenium/node-chrome:2.53.0
docker run -d --name selenium-node_2 --link selenium-hub:hub selenium/node-firefox:2.53.0

Note: You can also assign the respective ports!

Run docker containers

# create new VM (local)
$ docker-machine create -d virtualbox monitor

# show status (local)
$ docker-machine ls
...
NAME      ACTIVE   DRIVER       STATE     URL                         SWARM   DOCKER    ERRORS
monitor   -        virtualbox   Running   tcp://192.168.99.100:2376           v1.11.1  

# copy into VM (local) 
$ docker-machine scp ~/Projects/Monitoring/start-demo.sh monitor:/home/docker/

# ssh into VM (local into VM)
$ docker-machine ssh monitor

# change rights (VM)
$ chmod +x start-demo.sh && ls -la

# run shell script (VM)
$ ./start-demo.sh

# list running docker container (VM)
$ docker ps -a
...
CONTAINER ID        IMAGE                          COMMAND                  CREATED              STATUS              PORTS                                               NAMES
57c2598b4261        selenium/node-firefox:2.53.0   "/opt/bin/entry_point"   4 seconds ago        Up 4 seconds                                                            selenium-node_2
d79a5123bcfc        selenium/node-chrome:2.53.0    "/opt/bin/entry_point"   29 seconds ago       Up 29 seconds                                                           selenium-node_1
095f9844346d        selenium/hub:2.53.0            "/opt/bin/entry_point"   About a minute ago   Up About a minute   0.0.0.0:32771->4444/tcp                             selenium-hub
8db3ad58d8ce        jenkins                        "/bin/tini -- /usr/lo"   About a minute ago   Up About a minute   0.0.0.0:32770->8080/tcp, 0.0.0.0:32769->50000/tcp   jenkins
d1e1e1c36d6d        google/cadvisor:latest         "/usr/bin/cadvisor -l"   2 minutes ago        Up 2 minutes        0.0.0.0:32768->8080/tcp                             cadvisor

Open browser

cAdvisor

docker-compose and Jenkins

In this tutorial i show an example, how to install Jenkins (version 2.0) via docker-compose (and docker-machine).

Preconditions

Preparation

# create example directories
$ mkdir -p ~/Projects/Example/Jenkins_HOME && cd ~/Projects/Example

# create new and edit compose files
$ vim docker-compose.yml
---
version: '2'
services:
  jenkins:
    image: jenkins:2.0
    container_name: jenkins
    restart: always
    ports:
      - 8080:8080
    volumes:
      - ./FOR_JENKINS:/var/jenkins_home

Build and run

# create new VM
$ docker-machine create -d virtualbox --virtualbox-memory "2048" example-vm

# point shell
$ eval $(docker-machine env example-vm)

# show current state
$ docker-machine ls
...
NAME         ACTIVE   DRIVER       STATE     URL                         SWARM   DOCKER    ERRORS
example-vm   *        virtualbox   Running   tcp://192.168.99.100:2376           v1.11.0 

# run docker-compose
$ docker-compose up -d

# show state
$ docker-compose ps
...
Name                Command               State                 Ports               
------------------------------------------------------------------------------------
jenkins   /bin/tini -- /usr/local/bi ...   Up      50000/tcp, 0.0.0.0:8080->8080/tcp

# get administrator password
$ docker exec jenkins cat /var/jenkins_home/secrets/initialAdminPassword

Run Browser

docker jenkins container

Vagrant and YAML

Ruby`s stdlib provides an YAML module for data serialization. By using this module, we can create only one Vagrantfile which reads the configuration from YAML files. If you are thinking of build servers – so only YAML files are needed for generating complete environments.

Preconditions

Preparation

# create new directory
$ mkdir ~/Projects/Tutorial && cd ~/Projects/Tutorial

# create new files
$ touch Vagrantfile && touch server-config.yml

# list available BaseBoxes (optional)
$ vagrant box list

# edit Vagrantfile
$ vim Vagrantfile

# edit server-config.yml
$ vim server-config.yml
# -*- mode: ruby -*-

require 'yaml'
servers = YAML.load_file('server-config.yml')
API_VERSION = "2"

Vagrant.configure(API_VERSION) do |config|

  servers.each do |servers|

    config.vm.define servers["name"] do |machine|

      machine.vm.box = servers["box"]
      machine.vm.network :forwarded_port, guest: 22, host: servers["ssh"], id: 'ssh'
      
      machine.vm.provider :virtualbox do |vb|
        vb.name = servers["name"]
        vb.memory = servers["memory"]
        vb.cpus = servers["cpus"]
      end

    end

  end

end
---
- name: box_centos7_a
  box: lupin/centos7
  ssh: 2221
  memory: 1024
  cpus: 2
- name: box_centos7_b
  box: lupin/centos7
  ssh: 2222
  memory: 1024
  cpus: 2

Usage

# start run
$ vagrant up

# check status
$ vagrant status

# SSH example
$ vagrant ssh [name]

Deploy with Vagrant on KVM/libvirt

In this tutorial i show, how to extend Vagrant, to convert BaseBoxes and deploy to KVM/libvirt.

Preconditions

  • Vagrant installed (min. version 1.5)

Install Vagrant-Mutate and Vagrant-Libvirt

# Ubuntu, Debian etc.
$ apt-get install qemu-utils libvirt-dev libxslt-dev libxml2-dev zlib1g-dev ruby-dev

# CentOS, Fedora, Red Hat etc.
$ yum install qemu-img libvirt-devel ruby-libvirt ruby-devel libxslt-devel libxml2-devel libguestfs-tools-c

# install Vagrant-Mutate
$ vagrant plugin install vagrant-mutate

# install Vagrant-libvirt
$ vagrant plugin install vagrant-libvirt

Convert existing VirtualBox BaseBox

# Syntax
$ vagrant mutate [box-name | url] [target provider]

# Example for libvirt
$ vagrant mutate lupin/centos7 libvirt

# Show boxes
$ vagrant box list

Supported conversions by Vagrant-mutate

  • VirtualBox to KVM
  • VirtualBox to libvirt
  • libvirt to KVM
  • KVM to libvirt

Vagrantfile example

# -*- mode: ruby -*-
ENV['VAGRANT_DEFAULT_PROVIDER'] = 'libvirt'

Vagrant.configure("2") do |config|

  config.vm.provider :libvirt do |libvirt|
    libvirt.host = '<target>'
    libvirt.username = '<user>'
    libvirt.id_ssh_key_file = '<key>'
    libvirt.connect_via_ssh = true
  end

  config.vm.define :my_vm do |machine|

    machine.vm.box = "trusty64"
    machine.vm.network :public_network, :dev => "br0", :mode => 'bridge'

    machine.vm.provider :libvirt do |setting|
      setting.memory = 1024
      setting.cpus = 1
      setting.random_hostname = true
    end

  end

end

Note: Read the documentation, there are many settings more available!

Usage

Common Vagrant commands like: up, destroy, suspend, resume, halt, ssh etc are available.

Easier work with docker-machine

Okay,… I think now everyone knows that i like it to work with docker-machine. This tutorial should give some hints – how to put local files and directories into a Docker container and change the default VM settings.

Preconditions

Let’s start local

# create new project (local)
$ mkdir -p ~/Projects/tutorial-project/config && cd ~/Projects/tutorial-project

# create some files and directory (local)
$ touch Dockerfile && touch .dockerignore && touch .git && touch config/file_{1..5}

# show content (local)
$ tree -a .
.
├── .dockerignore
├── .git
├── Dockerfile
└── config
    ├── file_1
    ├── file_2
    ├── file_3
    ├── file_4
    └── file_5

# edit Dockerfile (local)
$ echo -e "FROM centos:7\nRUN yum install -y tree\nCOPY . /home/docker-target" > Dockerfile

# edit .dockerignore (local)
$ echo -e ".*\nDockerfile\n*/file_5" > .dockerignore

Create new VM with specific settings

# create new VM (local)
$ docker-machine create -d virtualbox --virtualbox-cpu-count "2" --virtualbox-memory "2048" tutorial-vm

Note: there is a very well documented reference for all supported drivers!

Copy local stuff into vm

# copy local folder into VM (local)
$ docker-machine scp -r ~/Projects/tutorial-project tutorial-vm:tutorial-project

# ssh into VM (local)
$ docker-machine ssh tutorial-vm

# show content of directory (VM)
$ ls -la ~/tutorial-project/
$ ls -la ~/tutorial-project/config/

Create Docker image and container

# create Docker image from Dockerfile (VM)
$ docker build -t centos/tutorial ~/tutorial-project/

# create Docker container from image (VM)
$ docker run -ti --rm centos/tutorial

# show content of directory (Container)
$ tree -a /home/docker-target/
/home/docker-target/
`-- config
    |-- file_1
    |-- file_2
    |-- file_3
    `-- file_4

Bang… this is just one way… !

Create desktop environments on the fly

In this tutorial we will create desktop environments via docker on the fly. This environments could be used for development and/or testing purposes. For example you could expand it with Selenium-Grid nodes or provide manual testers all they need.

Preconditions

Steps

# create new VM
$ docker-machine create -d virtualbox xserver

# ssh into VM
$ docker-machine ssh xserver

# create Dockerfile
$ vi Dockerfile
FROM centos:centos7

MAINTAINER Lupin3000

RUN yum update -y
RUN yum install -y epel-release
RUN yum install -y x2goserver x2goserver-xsession
RUN yum groupinstall -y Xfce
RUN yum install -y firefox

RUN /usr/bin/ssh-keygen -t rsa -f /etc /ssh/ssh_host_rsa_key -N ''
RUN /usr/bin/ssh-keygen -t ecdsa -f /etc /ssh/ssh_host_ecdsa_key -N ''
RUN /usr/bin/ssh-keygen -t ed25519 -f /etc /ssh/ssh_host_ed25519_key -N ''

RUN adduser testuser
RUN echo 'testuser:test123' | chpasswd
RUN echo 'root:test123' | chpasswd

EXPOSE 22

CMD ["/usr/sbin/sshd", "-D"]

* Note: the space after etc is because of the security settings of my provider!

# build Docker image from Dockerfile
$ docker build -t centos7/xserver .

# run Docker container from image
$ docker run -p 2222:22 -d --name centos7-xserver centos7/xserver

Connect with x2go client

The following example shows the client configuration. Important are values ​​for host (192.168.99.100), port (2222) and session type (XFCE).

x2go client settings

Now it’s up to you to add more users, tools etc. – or to integrate everything into a build process.

Create private docker registry with UI

Today I’ll show you how to create a private Docker registry. Note however you should use it only for development and testing purposes!

Preconditions

Preparation

# create new vms my-registry and my-workspace
$ docker-machine create -d virtualbox my-registry && docker-machine create -d virtualbox my-workspace

# show created vms 
$ docker-machine ls

NAME           ACTIVE   DRIVER       STATE     URL                         SWARM   DOCKER    ERRORS  
my-registry    -        virtualbox   Running   tcp://192.168.99.100:2376           v1.11.0   
my-workspace   -        virtualbox   Running   tcp://192.168.99.101:2376           v1.11.0

Create and run Docker registry container

# pointing shell to my-registry
$ eval $(docker-machine env my-registry)

# create new container (registry version 2)
$ docker run -d -p 5000:5000 --name registry-v2 --restart=always registry:2

# show created container on my-registry
$ docker ps -a

Prepare and push into registry

# ssh into my-workspace
$ docker-machine ssh my-workspace

# modify profile
$ sudo vi /var/lib/boot2docker/profile

# add new content like:
EXTRA_ARGS='
--label provider=virtualbox
--insecure-registry 192.168.99.100:5000
'

# close ssh
$ exit

# restart my-workspace
$ docker-machine restart my-workspace

# pointing shell to my-workspace
$ eval $(docker-machine env my-workspace)

# pull a public image
$ docker pull centos:centos7

# create new tag
$ docker tag centos:centos7 192.168.99.100:5000/lupin/centos7

# show images (2 images should be there)
$ docker images

# push image
$ docker push 192.168.99.100:5000/lupin/centos7

Create registry Browser-UI

# create new vm my-registry-gui
$ docker-machine create -d virtualbox my-registry-gui

# pointing shell to my-registry-gui
$ eval $(docker-machine env my-registry-gui)

# create new container
$ docker run -d -p 8080:80 -e ENV_DOCKER_REGISTRY_HOST=192.168.99.100 -e ENV_DOCKER_REGISTRY_PORT=5000 --name registry-v2-gui --restart=always konradkleine/docker-registry-frontend:v2

# show created container
$ docker ps -a

# show created vms
$ docker-machine ls

NAME              ACTIVE   DRIVER       STATE     URL                         SWARM   DOCKER    ERRORS
my-registry       -        virtualbox   Running   tcp://192.168.99.100:2376           v1.11.0   
my-registry-gui   *        virtualbox   Running   tcp://192.168.99.102:2376           v1.11.0   
my-workspace      -        virtualbox   Running   tcp://192.168.99.101:2376           v1.11.0

Run browser

docker registry gui

create docker swarm

In this tutorial I will show how easy it is to create a Docker Swarm.

Precondition

Instructions

# create a new cluster identifier
$ docker-machine create -d virtualbox local
$ eval "$(docker-machine env local)"

# generate discovery token
$ docker run --rm swarm create

Copy the resulting value for <TOKEN-ID>. The following commands will create a Swarm cluster.

# create swarm master
$ docker-machine create -d virtualbox --swarm --swarm-discovery token://<TOKEN-ID> --swarm-master swarm-manager

# create swarm nodes
$ docker-machine create -d virtualbox --swarm --swarm-discovery token://<TOKEN-ID> swarm-node-01
$ docker-machine create -d virtualbox --swarm --swarm-discovery token://<TOKEN-ID> swarm-node-02
$ docker-machine create -d virtualbox --swarm --swarm-discovery token://<TOKEN-ID> swarm-node-03

# delete unused cluser identifier vm
$ docker-machine rm local

# pointing shell to swarm master
$ eval $(docker-machine env --swarm swarm-manager)

# show information
$ docker-machine ls
$ docker info