What’s new? I have received various inquiries as to whether this blog is still being maintained. Yes he still will! Currently, however, a lot has changed in my life and through various security settings of my provider I have created a few tutorials directly on GitHub. So here are 2 categories which I would like to introduce to you.
In this GitHub repository you will find instructions on how to use the small development board as a security analysis device. These instructions are simply intended to show which options the Raspberry PI offers and to provide an introduction to the topic of cyber security.
I love the Adafruit Matrix LED! With a little python you can achieve everything your heart desires super quickly and easily. To make the start a little easier for you, I’ve created a few examples with Python. You are welcome to use these or (even better) develop them further.
More???
I also started to post some pictures and videos of my work on Instagram … Yes, I have to go with time too. 😉
So if you find the time and feel like it, just drop by these platforms and let yourself be inspired for your projects.
In a previous tutorial, I showed you how to set up a security learning environment quickly. Since there are some changes now (ex: Webswing), I’ll do the tutorial again. By the way i use macOS, some commands could be different but similar for Linux or Windows.
# run DVWA container
$ docker run -d -p 8081:80 --name dvwa citizenstig/dvwa
# check DVWA logs for startup (optional)
$ docker logs -f dvwa
# get local ip
$ ipconfig getifaddr en0
...
192.168.192.39
...
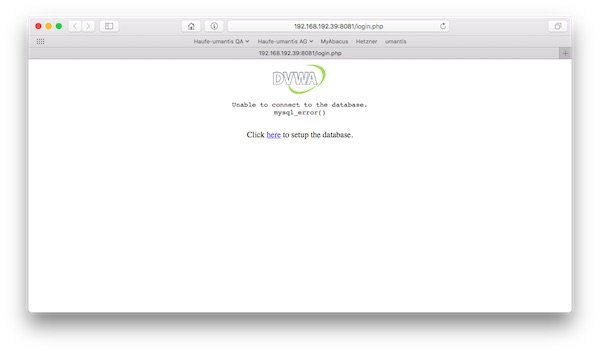
# start DVWA in browser
$ open -a Safari http://192.168.192.39:8081/
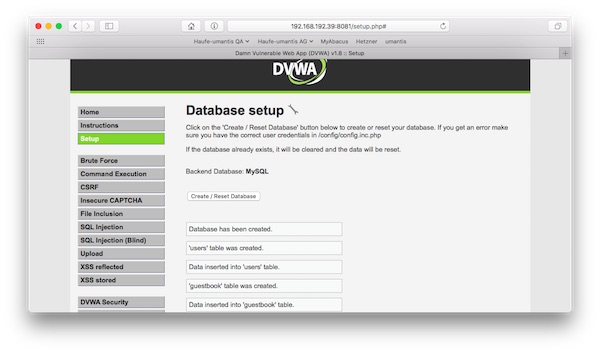
…Setup/create new database…
Run ZAP container
# create folder
$ mkdir -p /tmp/reports
# run ZAP container
$ docker run -u zap -i -p 8080:8080 -p 8090:8090 -v /tmp/reports:/home/zap/reports --name zap owasp/zap2docker-stable zap-webswing.sh
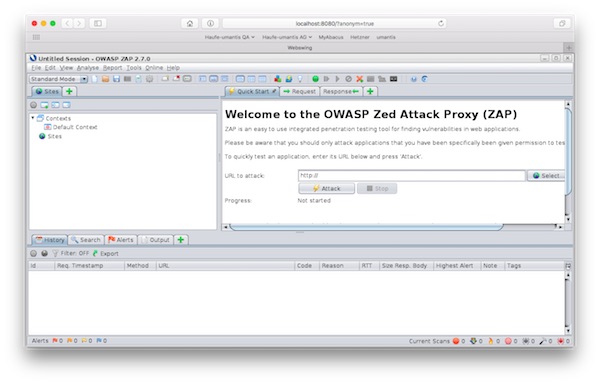
# start ZAP in Browser
$ open -a Safari http://localhost:8080/?anonym=true&app=ZAP
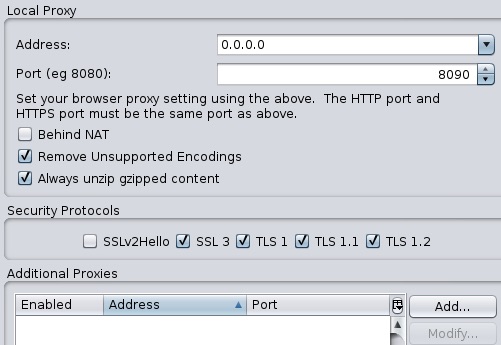
Please check via “Tools” -> “Options” -> “Local Proxies” the right configuration!
You need do use the non-routable meta address (0.0.0.0)!
Run ThreadFix container
# run ThreadFix container
$ docker run -d -p 8443:8443 --name threadfix jmbmxer/threadfix start

# check ThreadFix logs for startup (optional)
$ docker logs -f threadfix
...
Jan 30, 2018 8:56:40 AM org.apache.catalina.startup.Catalina start
INFO: Server startup in 49986 ms
...

# start ThreadFix in Browser
$ open -a Safari https://localhost:8443/threadfix/
Login into ThreadFix with “user/password”
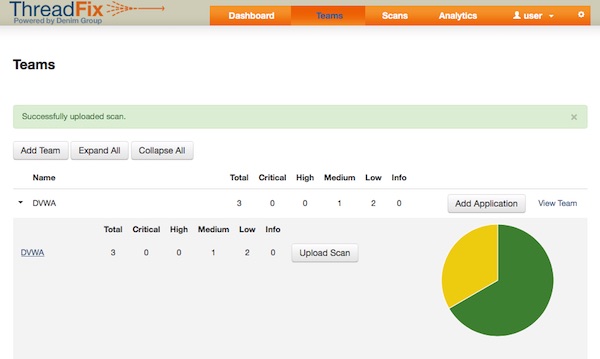
Create new team with application.
Configure Firefox
# get local ip
$ ipconfig getifaddr en0
...
192.168.192.39
...
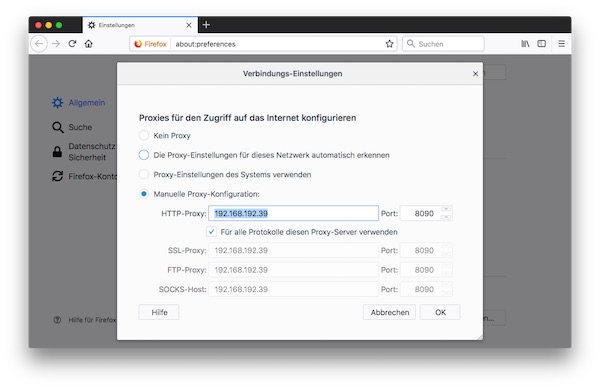
# open Firefox preferences
$ /Applications/Firefox.app/Contents/MacOS/firefox --preferences
Configure manual proxy with your local IP and 2nd ZAP port (8090). Afterwards you enable checkbox “Use this proxy server for all protocols” and press OK button.
When all the configurations have been made, you can temporarily quit Firefox.
Use environment
# list all containers (optional)
$ docker ps -a

# open DVWA via Proxy
$ open -a firefox http://192.168.192.39:8081
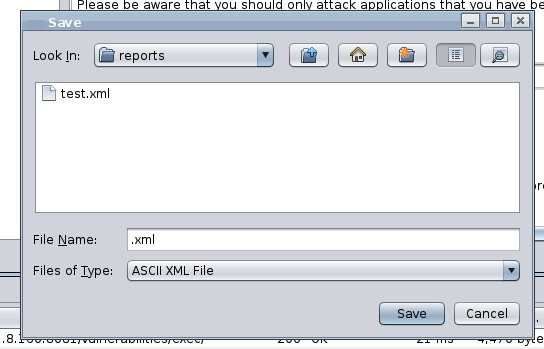
Start recording and save your XML report “Report -> Generate XML Report”.
# open reports directory in finder
$ open /tmp/reports
Next steps
Now it’s time to study! If you need help, you can found a lot of training materials on Youtube.
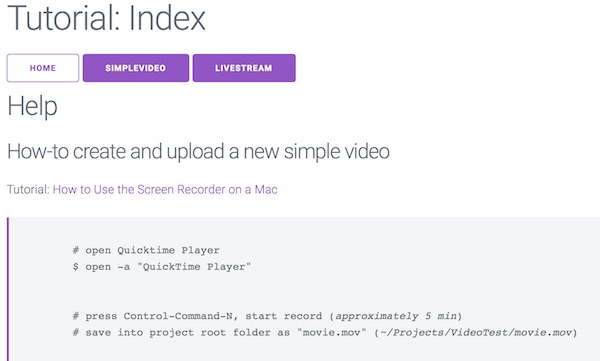
In the first part we created the video test environment and you learned how to extend it. At the end of this tutorial you will know how to embed video content in the video test environment. Therefore, a few basics are shown around ffmpeg (how to create, edit and use videos).
Record and prepare some videos
The recording should contain video and sound and should be 5 minutes long. The content of the video does not matter!
# open Quicktime Player
$ open -a "QuickTime Player"

# press Control-Command-N, start record (approximately 5 min)
# save record into project folder as movie.mov (~/Projects/VideoTest/movie.mov)
As soon as a video is ready we have to create more.
# copy binary (optional)
$ sudo cp ~/Projects/VideoTest/ffmpeg /usr/local/bin/ffmpeg && sudo chmod a+rx /usr/local/bin/ffmpeg

# convert mov into mp4 (copy)
$ ffmpeg -i movie.mov -vcodec copy -acodec copy demo.mp4

# resize mp4 to 320x240 (filter_graph)
$ ffmpeg -i demo.mp4 -vf scale=320:240 ./src/demo_scaled.mp4

# create poster from mp4 (position and frame)
$ ffmpeg -i ./src/demo_scaled.mp4 -ss 00:00:30 -vframes 1 ./src/demo_poster.png

# create m3u8/ts files from mp4 (HLS - Apple HTTP Live Stream)
$ ffmpeg -i demo.mp4 -b:v 1M -g 60 -hls_time 2 -hls_list_size 0 -hls_segment_size 500000 ./src/output.m3u8

# run specific SHELL provisioner
$ vagrant provision --provision-with video
Note: After this step you will have many video files which you will use
./movie.mov (original)
./demo.mp4 (converted)
./src/demo_scaled.mp4 (converted and resized)
./src/output.m3u8
./src/\*.ts
Get in contact with ffmpeg
I assume that ffmpeg is properly installed and the test environment is running.
# create target folder
$ mkdir ~/Projects/VideoTest/test

# extract some images from video
$ ffmpeg -i movie.mov -ss 00:00:30 -t 0.1 -f image2 -qscale 2 -vcodec mjpeg ./test/img-%03d.jpg

# create local m3u8/ts files from mp4
$ ffmpeg -i demo.mp4 -b:v 1M -g 60 -hls_time 2 -hls_list_size 0 -hls_segment_size 500000 ./test/output.m3u8

# extract mp4 from local m3u8/ts files
$ ffmpeg -i test/output.m3u8 -bsf:a aac_adtstoasc -vcodec copy -c copy -crf 50 ./test/output_local.mp4

# extract mp4 from url to m3u8 file (will not work with LiveStream)
$ ffmpeg -i http://localhost:8080/output.m3u8 -c copy -bsf:a aac_adtstoasc stream.mp4
Stream videos
# open browser
$ open -a Safari http://localhost:8080/livestream.html

# stream video (Real-Time Messaging Protocol)
$ ffmpeg -re -i demo.mp4 -vcodec libx264 -vprofile baseline -g 30 -acodec aac -strict -2 -f flv rtmp://localhost/show/stream
Stream from FaceTime HD Camera (macOS)
# open browser
$ open -a Safari http://localhost:8080/livestream.html

# list devices
$ ffmpeg -f avfoundation -list_devices true -i ""

# stream sound and video (Real-Time Messaging Protocol)
$ ffmpeg -f avfoundation -framerate 30 -i "0:0" -pix_fmt yuv420p -vcodec libx264 -vprofile baseline -g 30 -acodec libmp3lame -f flv rtmp://localhost/show/stream
In this series I would like to clarify the following questions. How can you test local videos and videos provided by a server? What tools are there? How could the test environment look like? … So these tutorials should provide an entry into the subject of video testing. In this part, we will provide the test environment.
The test environment will created by Vagrant. The Vagrant Base box needs to be provided with Debian 9. Therefore you have now 2 options. You can use a Debian 9 Base box from Vagrant cloud or you create your own. To create your own Debian 9 Base box you can use my Packer Git repository.
Please ensure, that the Vagrantfile is properly configured (config.vm.box_url, config.vm.box) before start-up environment.
# modify Vagrantfile (box name)
$ vim Vagrantfile

# start new environment
$ vagrant up --provision-with install,prepare,start

# open in browser
$ open -a Safari http://localhost:8080/
After successful start you will find some informations on start page about How-to create, modify, upload and stream videos. In second tutorial we will have a detailed look on it.
To understand the background somewhat better, take a look!
# tail nginx log files (optional)
$ vagrant ssh -c 'sudo tail -f /usr/local/nginx/logs/*.log'

# show content of directory (optional)
$ vagrant ssh -c 'sudo ls -la /tmp/hls/'
Develop some more
There are even more ways to publish video files (Media Streaming Server). You can easily expand the environment. Just customize/create the configurations and files in the “src” folder as well as the Vagrantfile. For Dynamic Adaptive Streaming over HTTP (DASH) support take a look here. This link opens the commercial software solution.
Note: You simply link the IDE with the “src” folder. To change the images and videos, just run vagant provisioner.
# run specific SHELL provisioner (video)
$ vagrant provision --provision-with video

# restart after configuration
$ vagrant up --provision-with stop,prepare,start
Download and install ffmpeg binaries on macOS
Currently official ffmpeg packages are available for Windows, Linux (Debian, Ubuntu, Fedora, RedHat) and macOS. You can download latest versions here.
Here now a solution for macOS users, if you don’t like to install many additional software on your system (static FFmpeg binaries).
Now some basic ffmpeg commands, which should work now. If you like,you can move the binary into directory “/usr/local/”.
# show version
$ ~/Projects/VideoTest/ffmpeg -version

# show help
$ ~/Projects/VideoTest/ffmpeg -help

# list codecs
$ ~/Projects/VideoTest/ffmpeg -codecs

# list formats
$ ~/Projects/VideoTest/ffmpeg -formats
Wuzz is a very easy command line tool for HTTP(S) inspection with very much potential. In this tutorial I will show the installation on Debian 8.7 (jessie).
Preparation
# install git and curl packages
$ sudo apt install -y curl git

# download go (do not install from Debian)
$ curl -O https://storage.googleapis.com/golang/go1.8.linux-amd64.tar.gz

# unzip archive
$ tar xvf go1.8.linux-amd64.tar.gz

# set owner and group (recursive)
$ sudo chown -R root:root go

# move all into target directory
$ sudo mv go /usr/local/
Configure go (for user)
# create hidden go directory
$ mkdir ~/.go

# configure needed paths (inside .bashrc)
$ echo "GOPATH=$HOME/.go" >> ~/.bashrc
$ echo "export GOPATH" >> ~/.bashrc
$ echo "PATH=\$PATH:/usr/local/go/bin:\$GOPATH/bin" >> ~/.bashrc

# reload
$ source ~/.bashrc

# check go version
$ go version
go version go1.8 linux/amd64
Install wuzz
# install packages from github
$ go get github.com/asciimoo/wuzz
# check wuzz version
$ wuzz --version wuzz 0.2.0
# show wuzz help
$ wuzz --help
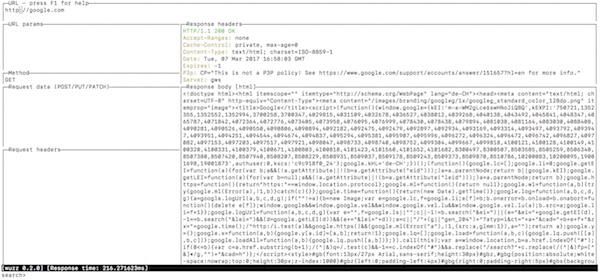
# simple run
$ wuzz
If everything is going well, the terminal should look like this and you can start.
In my search for a command-line fake data generator I’ve found phony. What can I say, the tool does exactly what it should! After installation, you no longer need to leave the terminal.
Installation
# install go and git (Debian 8)
$ apt-get install -y golang git

# set GOPATH environment variable for workspace
$ mkdir ~/.go
$ echo "GOPATH=$HOME/.go" >> ~/.bashrc
$ echo "export GOPATH" >> ~/.bashrc
$ echo "PATH=\$PATH:\$GOPATH/bin" >> ~/.bashrc
$ source ~/.bashrc

# install phony
$ go get github.com/yields/phony

# verfiy installation
$ phony --version
With Bats (Bash Automated Testing System) it is easy to automate Bash and command line testing. It is an awesome open source framework written in Bash by Sam Stephenson. In combination with Jenkins you are able to use it via build.
# create new project
$ mkdir ~/Project/Bats && cd ~/Projects/Bats

# create Bats file
$ vim test.bats

# execute test
$ bats test.bats
...
✓ Simple check for date command
✓ Check for current user
- Test for something that does not exist (skipped: This test is skipped)
✓ Test for something that should not exist
✓ Check for individual line of output

5 tests, 0 failures, 1 skipped

# execute test with TAP output
$ bats --tap test.bats
...
1..5
ok 1 Simple check for date command
ok 2 Check for current user
ok 3 # skip (This test is skipped) Test for something that does not exist
ok 4 Test for something that should not exist
ok 5 Check for individual line of output
Example Bats file
#!/usr/bin/env bats

@test "Simple check for date command" {
  date
}

@test "Check for current user" {
  result="$(whoami)"
  [ "$result" == "lupin" ]
}

@test "Test for something that does not exist" {
  skip "This test is skipped"
  ls /test/no/test
}

@test "Test for something that should not exist" {
  run ls /test/no
  [ "$status" -eq 1 ]
}

@test "Check for individual line of output" {
  run ping -c 1 google.com
  [ "$status" -eq 0 ]
  [ "${lines[3]}" = "1 packets transmitted, 1 packets received, 0.0% packet loss" ]
}
Note: There is much more! Read documentation and have a look on projects which are using it!