PyCharm CE remote execution

Since I’m back to develop more in Python and need to execute my Python scripts also on remote machines – I asked my self: “How can I do with PyCharm CE and without any Plugin?” The solution was very easy and this tutorial is about.

Requirements

  • VirtualBox VM (e.g. Linux Debian incl. user and ssh server configured)
  • PyCharm CE installed

Note: Of course you could also use any other option then a Debian vm. Just adapt the tutorial steps for your specific needs.

Objective

Use terminal and external tools of PyCharm CE to execute Python scripts on remote machines.

Introduction

For this tutorial I’m using a VirtualBox VM (Debian Linux) which do have only a NAT interface configured. So I need to enable Port-forwarding for SSH. If this is not the case for you – you can jump over to the section where I explain the important steps in PyCharm.

Analysis of stopped VM’s

As a first step I check my VM settings (just to verify).

# list all vm's (optional)
$ VBoxManage list vms

# list all vm's and grep for name & nic rules
$ VBoxManage list -l vms | grep -i "Name:\|NIC 1 Rule"

Analysis of running VM’s

I don’t know the IP – so I do start the VM and check their all settings.

# start specific vm
$ VBoxManage startvm "Debian" --type headless

# list all running vm's (optional)
$ VBoxManage list runningvms

# list all running vm's and grep for name & nic rules (optional)
$ VBoxManage list runningvms -l | grep -i "Name:\|NIC Rule"

# list specific vm Nic informations (optional)
$ VBoxManage showvminfo "Debian" | grep -i "NIC"

# get IPv4 information of specific vm
$ VBoxManage guestproperty get "Debian" "/VirtualBox/GuestInfo/Net/0/V4/IP"

Add Port-forwarding

Now I know the IP (which in my case will not change) and can enable the Port-forwarding for SSH easily.

# shutdown specific vm
$ VBoxManage controlvm "Debian" poweroff

# add port-forwarding rule to specific vm
$ VBoxManage modifyvm "Debian" --natpf1 "SSH-PW,tcp,127.0.0.1,2222,10.0.2.15,22"

# list specific vm Nic informations (optional)
$ VBoxManage showvminfo "Debian" | grep -i "NIC 1 Rule"

# start specific vm
$ VBoxManage startvm "Debian" --type headless

# test ssh connection (optional)
$ ssh -p 2222 lupin@127.0.0.1 -v -C 'whoami && exit'

Note: On my VM (Debian) the user is named “lupin” this will be different for you! Also Openssh-server is enabled and I added my public ssh key on VM (authorized_keys).

PyCharm remote execution

As I also like and use the feature “scratches” of PyCharm, I will show first the remote execution of these files.

Prepare a scratch

I prepare a simple Python script scratch, which just prints out environment variables (same code I use later inside project example).

import os

print('hello world', os.environ)

To find the absolute path for my scratch.py – I run it. On terminal the path will be visible.

PyCharm run scratches

After I know the path I run some simple commands in PyCharm Terminal.

# execute local script via SSH on remote system
$ ssh -p 2222 user@127.0.0.1 -C "/usr/bin/python" < "path/to/scratches/scratch.py"

# same as above but with unbuffered binary stdout and stderr
$ ssh -p 2222 user@localhost -C "/usr/bin/python" -u - < "./test_remote.py"

It works perfectly fine.

Note: Please replace the value “user” in all ssh examples!

PyCharm CE remote scratch execution

Project files

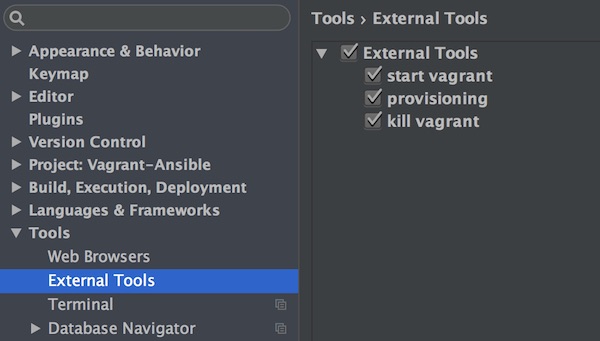
For all other scripts in the PyCharm project I don’t want to type the terminal commands always! So I’m using the feature “External Tools”. To do so, I add a new item and use the built-in variables (Macros) of PyCharm.

PyCharm CE add external tool

You simply give a Name Run on Remote, optional a short description, for Program your shell /bin/zsh and on Arguments --login -c "ssh user@localhost -p 2222 -C /usr/bin/python -u - < "$FilePah$. If you press button “OK” the input will be saved. The value for Working Directory $ProjectFileDir$ will be set (normally) automatically.

Now you can use the context menu to execute your script over SSH on remote machine.

PyCharm CE external tool remote execution

Simple Doctests with PyCharm CE

Python Doctests with PyCharm are very easy to configure! This tutorial will show you – how easy you can configure and run your Doctests inside PyCharm CE. You can use the following pyton script.

#!/usr/bin/env python
# -*- coding: utf-8 -*-
"""
This is an example for python doctest inside module docstring

>>> add('i', 'i')
Traceback (most recent call last):
    ...
TypeError: can't multiply sequence by non-int of type 'str'

"""


def add(a, b):
    """
    This is an example for python doctest inside function docstring

    >>> add(2, 3)
    6
    >>> add('a', 3)
    'aaa'
    """
    return a * b


class SomeTest(object):
    """
    This is an example for python doctest inside class docstring

    >>> t = SomeTest(); t.add(2, 'b'); t.sum
    'bb'
    """

    def __init__(self):
        """
        This is an example for python doctest inside constructor docstring

        >>> t = SomeTest(); type(t.sum)
        <type 'int'>
        """
        self.sum = int()

    def add(self, a, b):
        """
        This is an example for python doctest inside method docstring

        >>> t = SomeTest(); t.add(5, 5); t.sum
        25
        >>> t = SomeTest(); t.add('a', 5); t.sum
        'aaaaa'
        """
        self.sum = a * b

Now create following Doctests for Script, Class, Method and Function.

Script

pycharm doctest for script

Class

pycharm doctest for class

Method

pycharm doctest for method

Function

pycharm doctest for function

Now you can run your different doctests and look on results.

pycharm doctest results example

PyCharm – TERM environment variable not set

It can happen that you get this message in the PyCharm console. “TERM environment variable not set.” Here now the simple way to solve that issue.

The example Python script

#!/usr/bin/env python
# -*- coding: utf8 -*-

import os

os.system('clear')

The annoying error will displayed in PyCharm.

Solution

Open “Run/Debug configuration” and add an environment variable “TERM=xterm-color”

PyCharm environment variable
PyCharm run debug configuration

That’s it already … The message should no longer appear.

PyCharm, Vagrant and Ansible

This tutorial is about the interaction of PyCharm (Community Edition), Vagrant and Ansible. I want to show how you can simplify your daily work.

Preconditions

The disclosures in the brackets are my current versions. Mac OS X user need to have Command Line Tools installed!

Folder and file structure

.
├── Makefile
├── Vagrantfile
├── inventory
├── playbook.yml
└── roles
    └── common
        └── tasks
            └── main.yml

File contents

help:
	@echo "Run make <target> with:"
	@echo " > start         : to create vm via vagrant"
	@echo " > provisioning  : to start ansible on vm"
	@echo " > kill          : to stop and destroy vm"

start:
	vagrant up

provisioning:
	ansible-playbook -i inventory playbook.yml

kill:
	vagrant destroy -f
VAGRANTFILE_API_VERSION = "2"

Vagrant.configure(VAGRANTFILE_API_VERSION) do |config|
  config.vm.box = "demo/centos7"
  config.vm.provider "virtualbox" do |vb|
     vb.name = "Vagrant-Ansible"
  end
  config.vm.provision "ansible" do |ansible|
      # ansible.verbose = "v"
      ansible.playbook = "playbook.yml"
  end
end
[vagrant-example]
127.0.0.1 ansible_ssh_user=vagrant ansible_ssh_port=2222 ansible_ssh_private_key_file=.vagrant/machines/default/virtualbox/private_key
---
- hosts: all
  become: yes
  gather_facts: yes
  roles:
    - common
---
- name: upgrade all packages via yum
  yum: name=* state=latest
  when: (ansible_distribution == 'CentOS') or
        (ansible_distribution == 'Red Hat Enterprise Linux')
  tags:
    - common

- name: upgrade all packages via apt
  apt: upgrade=dist
  when: (ansible_distribution == 'Debian') or
        (ansible_distribution == 'Ubuntu')
  tags:
    - common

Little hint

If you do not know the path for ansible_ssh_private_key_file, just type $ vagrant ssh-config!

PyCharm – External Tools

In the last step we configure the PyCharm (External Tools). We do this for every command from Makefile exept help.

PyCharm-ExternalTool Configuration

PyCharm Make Commands

Python profiling with PyCharm Community Edition

Before we start, if you don`t know what is profiling read this Wikipedia article! In my opinion profiling should be a part of every development/build process! Whether the responsibility lies with QA or development. Python profiler are supported only in PyCharm Professional Edition. This article show you the possibilities for the community edition.

Preparation

  • PyCharm installed
  • Virtualenv or similar installed (optional)
  • PyCharm BashSupport Plugin installed

The easiest Profiler

With Unix/Linux time command you have allready a simple profiler! Time writes a message to standard output. Here you will find some information on Stackoverflow.

#!/usr/bin/env python
# -*- coding: utf-8 -*-


def hello_world():

    for i in range(1, 5):
        print '%d Hello world from python...' % i


if __name__ == '__main__':
    hello_world()

With BashSupport Plugin we can setup the “Run/Debug Configuration” like:

unix time profiler

Better informations

But now we need better information. For this we use cProfile, cprofilev and snakeviz.

# cProfile is part of standard python library

# install snakeviz
$ pip install snakeviz

# install cprofildev
$ pip install cprofilev

“Run/Debug Configuration” example

cProfile simple

Now will store the results into a file

cProfile store output

With snakeviz you can open the profile in browser:

$ snakeviz output.prof

The other option is to use cprofilev:

cprofilev

Even more information

If that was not enough,… we install some more libraries.

# install line_profiler
$ pip install line_profiler

# install memory_profiler and psutil
$ pip install memory_profiler
$ pip install psutil

Now we need to change the example code. We add the decorator…

#!/usr/bin/env python
# -*- coding: utf-8 -*-


@profile
def hello_world():

    for i in range(1, 5):
        print '%d Hello world from python...' % i


if __name__ == '__main__':
    hello_world()

the line_profiler configuration

kernprofiler

the memory_profiler

memory profiler

All configurations could now startet via the “Run” button. There are even more Profiler that you can use with similar PyCharm.

Ansible and PyCharm

Of course you can run Ansible within PyCharm via command-line, but it also works with the “Run” button.

Preparation

  • PyCharm project created (maybe with virtualenv)
  • YAML/Ansible support Plugin installed (optional)
  • BashSupport Plugin installed

Configuration

Open “Run/Debug Configurations” and add new Bash configuration. Give a name and Script value. The value should be the main Ansible playbook. As Interpreter path value select the ansible-playbook binary. For Interpreter option insert the Ansible inventory file. The last value is your current working directory. If you don’t set this value, the values for playbook and inventory need configured with absolute path!

PyCharm and Ansible

Now you can create different configurations and run Ansible via “Run” button.

Recommendation for JetBrains PyCharm PlugIns

This time a few recommendations for PyCharm PlugIns.

  • CodeGlance – a code mini-map similar to Sublime
  • BashSupport – Bash language support with many features
  • .ignore – PlugIn for Git, Mercurial, Docker, Chef, CVS, TeamFoundation and etc.
  • Dummy Text Generator – random text generator
  • Ini4Idea – *.ini file support
  • Markdown (Markdown support, MultiMarkdown) – *.md file support
  • IntelliBot – RobotFramework support
  • Gerrit – Gerrit Code Review integration
  • Jenkins Control Plugin – watch and trigger Jenkins builds

Create information gathering test application

It is time again for an extensive tutorial. This time, a tiny test application for passive and active information gathering. After the instruction you are welcome to improve the application with more features! Okay let’s start…

What should it do?

The security tester selects a information gathering method first. As second step the testers insert the URL or IP in a testfield and press a button. The result should printed out in a text area. The GUI should look like this:

Sensei Mockup

How it is implemented?

The prefered language is Python 2.7. So it is portable to different OS and for the most of methods are already packages available. The GUI is done with Tkinter. Tkinter provides all objects which are needed as widgets and ranges for this scope out completely. The file and folder structure look like:

├── essential
│   ├── __init__.py
│   └── timestop.py
├── gathering
│   ├── __init__.py
│   ├── geolocation.py
│   ├── icmpping.py
│   ├── information.py
│   ├── wappalyzer.py
│   └── whoisgathering.py
├── requirements.txt
└── sensei.py

File content

Files in root directory:

requests
python-Wappalyzer
python-whois
#!/usr/bin/env python
#  -*- coding: utf-8 -*-
from urlparse import urlparse
from gathering import IcmpPing, WhoisGathering, GeoLocation, WappAlyzer
from Tkinter import (Tk, Frame, StringVar, OptionMenu, Entry, Button, Text,
                     W, E, END, FALSE)


class Sensei(object):

    def __init__(self):
        self.root = Tk()
        self.root.title('Sensei')
        self.root.resizable(width=FALSE, height=FALSE)
        self.select = [
            'ICMP Ping', 'Whois', 'GeoLocation', 'Wappalyzer'
        ]
        self.option = StringVar(self.root)
        self.option.set(self.select[0])
        self.method = None
        self.url = None
        self.result = None

    def create_gui(self):
        self._top_frame()
        self._output_frame()
        self.root.mainloop()

    def quite_app(self):
        self.root.quit()

    def _start_request(self):
        self.result.delete(1.0, END)
        action = None
        target = self.url.get()
        method = self.option.get()
        if method == 'ICMP Ping':
            action = IcmpPing()
        elif method == 'Whois':
            action = WhoisGathering()
        elif method == 'GeoLocation':
            action = GeoLocation()
        elif method == 'Wappalyzer':
            action = WappAlyzer()
        if target:
            action.set_target(target)
            action.do_request()
            value = action.get_result()
        else:
            value = 'Internal Error'
        self.result.insert(END, value)

    def check_protocol(self, value):
        target = self.url.get()
        if value == 'Wappalyzer':
            if 'http' not in target:
                self.url.insert(0, 'http://')
        else:
            if 'http' in target:
                new_target = urlparse(target)
                self.url.delete(0, END)
                self.url.insert(0, new_target[1])

    def _top_frame(self):
        top_frame = Frame(self.root)
        top_frame.grid(column=0, row=0, sticky=W+E)
        self.method = OptionMenu(
            top_frame, self.option, *self.select, command=self.check_protocol
        )
        self.method.config(width=15)
        self.method.grid(column=0, row=0)
        self.url = Entry(top_frame, width=50)
        self.url.grid(column=1, row=0)
        Button(top_frame, text='Request', command=self._start_request).grid(
            column=2, row=0)
        Button(top_frame, text='Close', command=self.quite_app).grid(
            column=3, row=0)

    def _output_frame(self):
        output_frame = Frame(self.root)
        output_frame.grid(column=0, row=2, sticky=W+E)
        self.result = Text(output_frame, height=15)
        self.result.grid(column=0, row=0)


if __name__ == '__main__':
    RUN = Sensei()
    RUN.create_gui()

Files in essential:

#!/usr/bin/env python
#  -*- coding: utf-8 -*-
from essential.timestop import TimeStop
#!/usr/bin/env python
#  -*- coding: utf-8 -*-
from datetime import datetime


class TimeStop(object):
    """missing docstring"""

    __start = None

    @classmethod
    def start_measure(cls):
        cls.__start = datetime.now()

    @classmethod
    def stop_measure(cls):
        stop = datetime.now()
        total = stop - cls.__start
        return ">>>> request complete in " + str(total)

Files in gathering:

#!/usr/bin/env python
#  -*- coding: utf-8 -*-

from gathering.information import InformationGathering
from gathering.icmpping import IcmpPing
from gathering.whoisgathering import WhoisGathering
from gathering.geolocation import GeoLocation
from gathering.wappalyzer import WappAlyzer
#!/usr/bin/env python
#  -*- coding: utf-8 -*-


class InformationGathering(object):

    def __init__(self):
        self.errors = 0
        self.target = ''
        self.result = ''

    def set_target(self, target):
        victim = target.strip(' \t\n\r')
        if not victim:
            self.errors += 1
            self.result = 'No target given!'
        else:
            self.target = target

    def get_result(self):
        return self.result
#!/usr/bin/env python
#  -*- coding: utf-8 -*-
from gathering.information import InformationGathering
from essential.timestop import TimeStop
import os
import platform


class IcmpPing(InformationGathering):

    COMMAND = ''

    def __create_command(self):
        operation_system = platform.system()
        if operation_system == "Windows":
            self.COMMAND = "ping -n 1 "
        elif operation_system == "Linux":
            self.COMMAND = "ping -c 1 "
        else:
            self.COMMAND = "ping -c 1 "

    def do_request(self):
        if self.errors == 0:
            self.__create_command()
            command = self.COMMAND + self.target
            TimeStop.start_measure()
            response = os.popen(command)
            for line in response.readlines():
                self.result += line
            self.result += TimeStop.stop_measure()
#!/usr/bin/env python
#  -*- coding: utf-8 -*-
from gathering.information import InformationGathering
from essential.timestop import TimeStop
import whois


class WhoisGathering(InformationGathering):

    def do_request(self):
        if self.errors == 0:
            TimeStop.start_measure()
            result = whois.whois(self.target)
            self.result += result.text
            self.result += TimeStop.stop_measure()
#!/usr/bin/env python
#  -*- coding: utf-8 -*-
from gathering.information import InformationGathering
from essential.timestop import TimeStop
import requests


class GeoLocation(InformationGathering):

    API = 'http://ip-api.com/json/'

    def do_request(self):
        if self.errors == 0:
            target = self.API + self.target
            TimeStop.start_measure()
            response = requests.get(target)
            output = response.json()
            for key, val in output.items():
                if val:
                    self.result += str(key) + " => " + str(val) + "\n"
            self.result += TimeStop.stop_measure()
#!/usr/bin/env python
#  -*- coding: utf-8 -*-
from gathering.information import InformationGathering
from essential.timestop import TimeStop
from Wappalyzer import Wappalyzer, WebPage


class WappAlyzer(InformationGathering):

    def do_request(self):
        if self.errors == 0:
            TimeStop.start_measure()
            wappalyzer = Wappalyzer.latest()
            website = WebPage.new_from_url(self.target)
            output = wappalyzer.analyze(website)
            for val in output:
                self.result += " => " + str(val) + "\n"
            self.result += TimeStop.stop_measure()

That was it. The result looks like this:

Sensei

Improve it with your ideas!