Create QA dashboards with Grafana (Part 1)

Since I have my new role (Head of QA), many employees constantly want metrics from me. That means a lot of work for me. But since I do not always want to deal with such things, I have searched for a simpler way. So the question was – how can I deliver this data at any time and possibly from different sources (eq. JIRA, pipelines, test results, Salesforce, etc.)? Hmmm … Grafana is awesome – not only for DevOps! So in this tutorial series, I’d like to show you how to create nice and meaningful dashboards for your QA metrics in Grafana.

What you need?

  • Docker installed (latest version)
  • Bash (min. 3.2.x)

Prepare the project

In order to create dashboards in Grafana, you need a small environment (Grafana/InfluxDB) as well as some data. The next steps will help you to create them. The environment/services are simulated by docker containers. For the fictitious data, just use the bash script which I created for this tutorial.

# create project
$ mkdir -p ~/Projects/GrafanaDemo && cd ~/Projects/GrafanaDemo

# create file docker-compose.yml
$ touch docker-compose.yml

# create file CreateData.sh
$ touch CreateData.sh

# change file permissions
$ chmod u+x CreateData.sh

Now copy/paste the content of the two files with your favorite editor. The content of docker-compose.yml.

version: '3'

networks:
  grafana-demo:
    driver: bridge
    ipam:
      driver: default
      config:
        - subnet: 10.1.0.0/24

services:

  influxdb:
    container_name: influxdb
    networks:
      grafana-demo:
        ipv4_address: 10.1.0.10
    ports:
      - '8086:8086'
    image: influxdb

  grafana:
    container_name: grafana
    networks:
      grafana-demo:
        ipv4_address: 10.1.0.20
    ports:
      - '3000:3000'
    image: grafana/grafana
    environment:
      - 'GF_INSTALL_PLUGINS=grafana-piechart-panel'
    depends_on:
      - influxdb

And here the content of CreateData.sh.

#!/usr/bin/env  bash

# shell options
#set -x
#set -v
set -e
set -u
set -f

# magic variables
declare -r OPTS="htsp"
declare -a TIMESTAMPS
declare -a OPTIONS=(false false false)
declare -r -a DATABASES=(test_db support_db pipeline_db)
declare -r -a TESTER=(Tina Robert)
declare -r -a SUPPORTER=(Jennifer Mary Tom)
declare -r -a STAGES=(S1 S2 S3)
declare -r -a BUILD=(SUCCESS FAILURE ABORTED)
declare -r -i SUCCESS=0
declare -r -i BAD_ARGS=85
declare -r -i NO_ARGS=86

# functions
function usage() {
  local count
  local file_name=$(basename "$0")

  printf "Usage: %s [options...]\n" "$file_name"
  for (( count=1; count<${#OPTS}; count++ )); do
    printf "%s\tcreate %s and content\n" "-${OPTS:$count:1}" "${DATABASES[$count - 1]}"
  done
  exit "$SUCCESS"
}

function bad_args() {
  printf "Error: Wrong arguments supplied\n"
  usage
  exit "$BAD_ARGS"
}

function no_args() {
  printf "Error: No options were passed\n"
  usage
  exit "$NO_ARGS"
}

function create_timestamp_array() {
  local counter=1
  local timestamp

  while [ "$counter" -le 30 ]; do
    timestamp=$(date -v -"$counter"d +"%s")
    TIMESTAMPS+=("$timestamp")
    ((counter++))
  done
}

function curl_post() {
  local url=$(printf 'http://localhost:8086/write?db=%s&precision=s' "$2")

  curl -i -X POST "$url" --data-binary "$1"
}

function create_test_results() {
  local passed
  local failed
  local skipped
  local count
  local str

  for count in "${TESTER[@]}"; do
    passed=$((RANDOM % 30 + 20))
    failed=$((RANDOM % passed))
    skipped=$((passed - failed))
    str=$(printf 'suite,app=demo,qa=%s passed=%i,failed=%i,skipped=%i %i' "$count" "$passed" "$failed" "$skipped" "$1")
    echo "$2: $str"
    curl_post "$str" "$2"
  done
}

function create_support_results() {
  local items=(1 2 none)
  local in
  local out
  local str
  local count

  for count in "${SUPPORTER[@]}"; do
    in=$((RANDOM % 25))
    out=$((RANDOM % 25))
    str=$(printf 'tickets,support=%s in=%i,out=%i %i' "$count" "$in" "$out" "$1")
    echo "$2: $str"
    curl_post "$str" "$2"
  done
}

function create_pipeline_results() {
  local status
  local duration
  local str
  local count

  for count in "${STAGES[@]}"; do
    status=${BUILD[$RANDOM % ${#BUILD[@]} ]}
    duration=$(( 3+RANDOM%(3-17) )).$(( RANDOM%999 ))
    str=$(printf 'pipeline,stage=%s status="%s",duration=%s %i' "$count" "$status" "$duration" "$1")
    echo "$2: $str"
    curl_post "$str" "$2"
  done
}

function main() {
  local repeat=$(printf '=%.0s' {1..80})

  create_timestamp_array

  for ((i = 0; i < ${#OPTIONS[@]}; ++i)); do
    if [[ "${OPTIONS[$i]}" == "true" ]]; then
      printf "Create database: %s\n" "${DATABASES[$i]}"
      printf "%s\n" "$repeat"
      curl -i -X POST http://localhost:8086/query --data-urlencode "q=CREATE DATABASE ${DATABASES[$i]}"
      printf "Generate content of database: %s\n" "${DATABASES[$i]}"
      printf "%s\n" "$repeat"
      for item in "${TIMESTAMPS[@]}"; do
        if [[ "${DATABASES[$i]}" == "${DATABASES[0]}" ]]; then
          create_test_results "$item" "${DATABASES[$i]}"
        fi
        if [[ "${DATABASES[$i]}" == "${DATABASES[1]}" ]]; then
          create_support_results "$item" "${DATABASES[$i]}"
        fi
        if [[ "${DATABASES[$i]}" == "${DATABASES[2]}" ]]; then
          create_pipeline_results "$item" "${DATABASES[$i]}"
        fi
      done
    fi
  done
}

# script arguments
while getopts "$OPTS" OPTION; do
  case "$OPTION" in
    h)
        usage;;
    t)
        OPTIONS[0]="true";;
    s)
        OPTIONS[1]="true";;
    p)
        OPTIONS[2]="true";;
    *)
        bad_args;;
  esac
done

if [ $OPTIND -eq 1 ]; then
  no_args
fi

# main function
main

# exit
exit "$SUCCESS"

Start environment and create data

Once the project and the files have been created, you can build and start the environment. For this you use Docker Compose.

# validate docker-compose file (optional)
$ docker-compose config

# run environment
$ docker-compose up -d

# get IP from grafana container (optional)
$ docker inspect -f '{{range .NetworkSettings.Networks}}{{.IPAddress}}{{end}}' grafana
10.1.0.20

# get IP from influxdb container (optional)
$ docker inspect -f '{{range .NetworkSettings.Networks}}{{.IPAddress}}{{end}}' influxdb
10.1.0.10

# show created docker network (optional)
$ docker network ls | grep -i 'grafana*'

# show docker containers (optional)
$ docker ps -a | grep -i 'grafana\|influxdb'

In next step you create the InfluxDB databases (incl. fictitious measurements, series and data) via Bash script.

# ping influxdb (optional)
$ curl -I http://localhost:8086/ping

# show help (optional)
$ ./CreateData.sh -h

# create databases and contents (execute only 1x)
$ ./CreateData.sh -t -s -p

# show current databases (optional)
$ curl -G http://localhost:8086/query?pretty=true --data-urlencode "q=SHOW DATABASES"

# show test_db series (optional)
$ curl -G http://localhost:8086/query?pretty=true --data-urlencode "db=test_db" --data-urlencode "q=SHOW SERIES"

# show test_db measurements (optional)
$ curl -G http://localhost:8086/query?pretty=true --data-urlencode "db=test_db" --data-urlencode "q=SHOW MEASUREMENTS"

Note: You could use influx command to administrate InfluxDB directly.

# exec docker container
$ docker exec -ti influxdb influx

# list all databases
> show databases

# use specific database test_db
> use test_db

# show series of test_db
> show series

# show measurements of test_db
> show measurements

# drop measurements of test_db (in case something went wrong)
> drop measurement suite

Okay the environment preparation is done. Now start Grafana in browser.

# open Grafana in browser
$ open http://localhost:3000

New Grafana Login

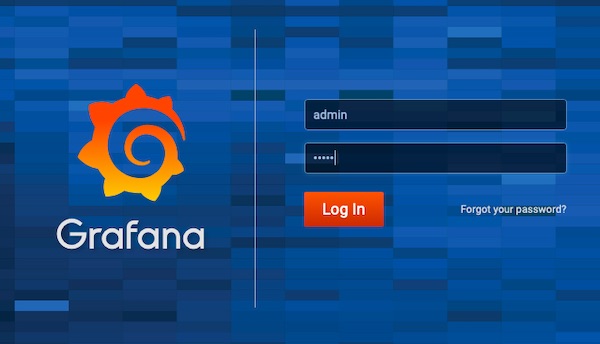
The default username and password is “admin:admin“. Note, if you use docker-compose down you have to repeat most of steps like data creation. Better use docker-compose stop! … See you in 2nd part – where we add data sources and create dashboards.

File encryption/decryption using GPG

There are just too many people and organizations who are interested in our data. Thus, the secure transmission of data is important. Through encryption/decryption, data can be protected from access by third parties. There are already very long easy ways for the encryption/decryption but I have to find again and again that these are quite unknown. Herewith a little tutorial where I want to show possibilities by means of GPG.

Requirements

  • Docker (latest)

Environment preparation

By means of two Docker containers, we now want to simulate 2 persons who exchange the encrypted data.

# prepare project
$ mkdir -p ~/Projects/GPG-Example && cd ~/Projects/GPG-Example

# pull latest centos image (optional)
$ docker pull centos

# start container (user_a)
$ docker run -d -ti --name user_a --mount type=bind,source="$(pwd)",target=/share centos /bin/bash

# start container (user_b)
$ docker run -d -ti --name user_b --mount type=bind,source="$(pwd)",target=/share centos /bin/bash

# check running containers (optional)
$ docker ps -a

# enter container (user_a eq. terminal 000)
$ docker exec -ti user_a /bin/bash

# enter container (user_b eq. terminal 001)
$ docker exec -ti user_b /bin/bash

Container (user_a)

# show version (optional)
$ gpg --version

# create a simple text file
$ echo -e "Lorem ipsum dolor sit amet,\nconsetetur sadipscing elitr, sed diam nonumy eirmod tempor invidunt ut labore et dolore magna aliquyam erat,\nsed diam voluptua." > /share/example.txt

# print file in STDOUT (optional)
$ cat /share/example.txt

# symmetric encryption
$ gpg -c /share/example.txt && rm -f /share/example.txt

# check directory (optional)
$ ls -la /share/

Container (user_b)

# symmetric decryption
$ gpg -d -o /share/example.txt /share/example.txt.gpg && rm -f /share/example.txt.gpg

# print file in STDOUT (optional)
$ cat /share/example.txt

No passphrase prompt

If you want to use the encryption/decryption without prompt, for example in a bash script, you can use the following options. Depending on the version, it can come to a distinction. Option 1 is by default not available in the Docker containers.

# symmetric encryption (option 1)
$ gpg -c --pinentry-mode=loopback --passphrase "PASSWORD" /share/example.txt && rm -f /share/example.txt

# symmetric encryption (option 2)
$ echo "PASSWORD" | gpg -c --batch --passphrase-fd 0 /share/example.txt && rm -f /share/example.txt

# symmetric encryption (option 3)
$ gpg -c --batch --passphrase "PASSWORD" /share/example.txt && rm -f /share/example.txt

# symmetric decryption (option 1)
$ gpg -d --pinentry-mode=loopback --passphrase "PASSWORD" -o /share/example.txt /share/example.txt.gpg && rm -f /share/example.txt.gpg

# symmetric decryption (option 2)
$ echo "PASSWORD" | gpg -d --batch --passphrase-fd 0 -o /share/example.txt /share/example.txt.gpg && rm -f /share/example.txt.gpg

# symmetric decryption (option 3)
$ gpg -d --batch --passphrase "PASSWORD" -o /share/example.txt /share/example.txt.gpg && rm -f /share/example.txt.gpg

Multiple files

You can also use a simple loop to encrypt/decrypt multiple files. Please note the available GPG version/options. Here now a simple example without prompt.

# create 3 text files from single file
$ split -l 1 -d /share/example.txt -a 1 --additional-suffix=".txt" /share/demo_

# check directory (optional)
$ ls -la /share/

# start symmetric encryption with multiple file
$ for file in /share/demo_{0..2}.txt; do gpg -c --batch --passphrase "PASSWORD" "$file" && rm -f "$file"; done

# check directory (optional)
$ ls -la /share/

# start symmetric decryption with multiple file
$ for file in /share/demo_{0..2}.txt.gpg; do gpg -d --batch --passphrase "PASSWORD" -o "${file::-4}" "$file" && rm -f "$file"; done

# check directory (optional)
$ ls -la /share/

Encryption and Decryption via keys

Container (user_a)

# generate keys
$ gpg --gen-key
...
kind of key: 1
keysize: 2048
valid: 0
Real name: user_a
Email address: user_a@demo.tld
...

# list keys (optional)
$ gpg --list-keys

# export public key
$ gpg --armor --export user_a@demo.tld > /share/user_a.asc

Container (user_b)

# generate keys
$ gpg --gen-key
...
kind of key: 1
keysize: 2048
valid: 0
Real name: user_b
Email address: user_b@demo.tld
...

# list keys (optional)
$ gpg --list-keys

# export public key
$ gpg --armor --export user_b@demo.tld > /share/user_b.asc

Both public keys are available.

# show folder content (optional)
ls -la /share/
...
-rw-r--r-- 1 root root  156 Oct 19 12:19 example.txt
-rw-r--r-- 1 root root 1707 Oct 19 13:22 user_a.asc
-rw-r--r-- 1 root root 1707 Oct 19 13:27 user_b.asc
...

Both clients need to import the public key from other.

# user_a
$ gpg --import /share/user_b.asc

# user_b
$ gpg --import /share/user_a.asc

# list keys (optional)
$ gpg --list-keys

Our user_a now encrypt data.

# encryption for recipient
$ gpg -e -r user_b /share/example.txt && rm -f /share/example.txt

# show folder content (optional)
$ ls -la /share/

User_b now decrypt data.

# decryption
$ gpg -d -o /share/example.txt /share/example.txt.gpg && rm -f /share/example.txt.gpg

# print file in STDOUT (optional)
$ cat /share/example.txt

I hope that you have found an entry point into the topic and I have woken up your interest.

Unseal Vault with PGP

In this tutorial I will show an example for unsealing Vault using GPG. We generate for two users the keys and each user will use them to unseal. For the storage we use Consul.

Conditions

Host Preparation

First we need to setup, configure and start Consul and Vault.

Note: Because of the security settings of my provider, spaces are after “etc”. Please delete it after copy/paste.

# create new project
$ mkdir -p ~/Projects/VaultConsulPGP/consul-data && cd ~/Projects/VaultConsulPGP

# create private/public keys
$ openssl req -newkey rsa:4096 -nodes -keyout private_key.pem -x509 -days 365 -out public_key.pem
...
Country Name (2 letter code) []:CH
State or Province Name (full name) []:Zuerich
Locality Name (eg, city) []:Winterthur
Organization Name (eg, company) []:Softwaretester
Organizational Unit Name (eg, section) []:QA
Common Name (eg, fully qualified host name) []:demo.env
Email Address []:demo@demo.env
...

# create HCL configuration
$ touch ~/Projects/VaultConsulPGP/vault.hcl

# add hosts entry
$ echo -e "127.0.0.1 demo.env\n" >> /etc /hosts

# start consul service
$ consul agent -server -bootstrap-expect 1 -data-dir $HOME/Projects/VaultConsulPGP/consul-data -ui

# start vault service
$ vault server -config $HOME/Projects/VaultConsulPGP/vault.hcl

Do not stop and/or close any terminal sessions!

ui = true

storage "consul" {
  address = "127.0.0.1:8500"
  path    = "vault"
}

listener "tcp" {
  address       = "demo.env:8200"
  tls_cert_file = "public_key.pem"
  tls_key_file  = "private_key.pem"
}

Your project folder now should look like this:

# show simple folder tree
$ find . -print | sed -e 's;[^/]*/;|____;g;s;____|; |;g'
.
|____private_key.pem
|____vault_tutorial.md
|____vault.hcl
|____consul-data
|____public_key.pem

Client Preparation

As I wrote – we need to simulate two users. Now to the Docker client’s…

# run client A
$ docker run -ti --name client_a --mount type=bind,source=$HOME/Projects/VaultConsulPGP,target=/tmp/target bitnami/minideb /bin/bash

# run client B
docker run -ti --name client_b --mount type=bind,source=$HOME/Projects/VaultConsulPGP,target=/tmp/target bitnami/minideb /bin/bash

Both client’s need similar configuration, so please execute the following steps on both containers.

# install needed packages
$ apt-get update && apt-get install -y curl unzip gnupg iputils-ping

# get host IP
$ HOST_IP=$(ping -c 1 host.docker.internal | grep "64 bytes from"|awk '{print $4}')

# add hosts entry
$ echo -e "${HOST_IP} demo.env\n" >> /etc /hosts

# download vault
$ curl -C - -k https://releases.hashicorp.com/vault/0.10.4/vault_0.10.4_linux_amd64.zip -o /tmp/vault.zip

# extract archive and move binary and clean up
$ unzip -d /tmp /tmp/vault.zip && mv /tmp/vault /usr/local/bin/ && rm /tmp/vault.zip

# generate GPG key (1x for each client)
$ gpg --gen-key
...
Real name: usera
...
Real name: userb
...
# don't set a passphrase!!!!

# export generated key (client 1)
$ gpg --export [UID] | base64 > /tmp/target/usera.asc

# export generated key (client 2)
$ gpg --export [UID] | base64 > /tmp/target/userb.asc

Your project folder now should look like this:

# show simple folder tree
$ find . -print | sed -e 's;[^/]*/;|____;g;s;____|; |;g'
.
|____private_key.pem
|____vault_tutorial.md
|____vault.hcl
|____consul-data
     |____ ...
     |____ ...
|____public_key.pem
|____usera.asc
|____userb.asc

Initialize and Unseal Vault

On the host we initialize the Vault and share unseal key’s back to the client’s.

# set environment variables
$ export VAULT_ADDR=https://demo.env:8200
$ export VAULT_CACERT=public_key.pem

# ensure proper location (host)
cd ~/Projects/VaultConsulPGP

# initialize vault
$ vault operator init -key-shares=2 -key-threshold=2 -pgp-keys="usera.asc,userb.asc"

Note: Save now all keys and share the correspondending <unseal keys> to the client’s!

Now our client’s can start the unseal of Vault. Even here, please execute the following steps on both containers.

# set environment variables
$ export VAULT_ADDR=https://demo.env:8200
$ export VAULT_CACERT=/tmp/target/public_key.pem

# decode unseal key
$ echo "<unseal key>" | base64 -d | gpg -dq

# unseal vault
$ vault operator unseal <...>

Just for information

We configured both services (Consul and Vault) with WebUI.

# open Consul in Firefox
$ open -a Firefox http://127.0.0.1:8500

# open Vault in Firefox
$ open -a Firefox https://demo.env:8200/ui

Use the “Initial Root Token” to login into Vault’s WebUI.

Hashicorp Vault SSH OTP

With Vault’s SSH secret engine you can provide an secure authentication and authorization for SSH. With the One-Time SSH Password (OTP) you don’t need to manage keys anymore. The client requests the credentials from the Vault service and (if authorized) can connect to target service(s). Vault will take care that the OTP can be used only once and the access is logged. This tutorial will provide needed steps on a simple Docker infrastructure. Attention, in that tutorial Vault and Vault-SSH-Helper are running in Development Mode – don’t do that in production!

Conditions

Vault server

Let’s start and prepare the vault service.

# run vault-service container (local)
$ docker run -ti --name vault-service bitnami/minideb /bin/bash

# install packages
$ apt-get update && apt-get install -y ntp curl unzip ssh sshpass

# download vault
$ curl -C - -k https://releases.hashicorp.com/vault/0.10.4/vault_0.10.4_linux_amd64.zip -o /tmp/vault.zip

# unzip and delete archive
$ unzip -d /tmp/ /tmp/vault.zip && rm /tmp/vault.zip

# move binary
$ mv /tmp/vault /usr/local/bin/

# start vault (development mode)
$ vault server -dev -dev-listen-address='0.0.0.0:8200'

Don’t stop or close terminal session! Open new terminal. Note: The IP’s I use in this tutorial may be different to yours.

# get IP of container (local)
$ docker inspect -f '{{ .NetworkSettings.IPAddress }}' vault-service
...
172.17.0.2
...

# run commands on container (local)
$ docker exec -ti vault-service /bin/bash

# set environment variable
$ export VAULT_ADDR='http://0.0.0.0:8200'

# enable ssh secret engine
$ vault secrets enable ssh

# create new vault role
$ vault write ssh/roles/otp_key_role key_type=otp default_user=root cidr_list=0.0.0.0/0

Target server

Now we create and configure the target service.

Note: Because of the security settings of my provider, spaces are after “etc”. Please delete it after copy/paste.

# run target-service container (local)
$ docker run -ti --name target-service bitnami/minideb /bin/bash

# install packages
$ apt-get update && apt-get install -y ntp curl unzip ssh vim

# download vault-ssh-helper
$ curl -C - -k https://releases.hashicorp.com/vault-ssh-helper/0.1.4/vault-ssh-helper_0.1.4_linux_amd64.zip -o /tmp/vault-ssh-helper.zip

# unzip and delete archive
$ unzip -d /tmp/ /tmp/vault-ssh-helper.zip && rm /tmp/vault-ssh-helper.zip

# move binary
$ mv /tmp/vault-ssh-helper /usr/local/bin/

# create directory
$ mkdir /etc /vault-ssh-helper.d

# add content to file
$ cat > /etc /vault-ssh-helper.d/config.hcl << EOL
vault_addr = "http://172.17.0.2:8200"
ssh_mount_point = "ssh"
ca_cert = "/etc /vault-ssh-helper.d/vault.crt"
tls_skip_verify = false
allowed_roles = "*"
EOL

# verify config (optional)
$ vault-ssh-helper -dev -verify-only -config=/etc /vault-ssh-helper.d/config.hcl

Pam SSHD configuration (on target server)

# modify pam sshd configuration
$ vim /etc /pam.d/sshd
...
#@include common-auth
auth requisite pam_exec.so quiet expose_authtok log=/tmp/vaultssh.log /usr/local/bin/vault-ssh-helper -dev -config=/etc /vault-ssh-helper.d/config.hcl
auth optional pam_unix.so not_set_pass use_first_pass nodelay
...

SSHD configuration (on target server)

# modify sshd_config
$ vim /etc /ssh/sshd_config
...
ChallengeResponseAuthentication yes
UsePAM yes
PasswordAuthentication no
PermitRootLogin yes
...
# start SSHD
$ /etc /init.d/ssh start

# echo some content into file (optional)
$ echo 'Hello from target-service' > /tmp/target-service

Client server

Last container is for simulating a client.

# run some-client container (local)
$ docker run -ti --name some-client bitnami/minideb /bin/bash

# install packages
$ apt-get update && apt-get install -y ntp curl unzip ssh sshpass

# download vault
$ curl -C - -k https://releases.hashicorp.com/vault/0.10.4/vault_0.10.4_linux_amd64.zip -o /tmp/vault.zip

# unzip and delete archive
$ unzip -d /tmp/ /tmp/vault.zip && rm /tmp/vault.zip

# move binary
$ mv /tmp/vault /usr/local/bin/

# set environment variable
$ export VAULT_ADDR='http://172.17.0.2:8200'

# authenticate as root (root token)
$ vault auth <root token>

Usage

Most work is already done. Now we use the demo environment.

# get container IP of target-service (local)
$ docker inspect -f '{{ .NetworkSettings.IPAddress }}' target-service
...
172.17.0.3
...

# get container IP of some-client (local)
$ docker inspect -f '{{ .NetworkSettings.IPAddress }}' some-client
...
172.17.0.4
...
# create an OTP credential (vault-service)
$ vault write ssh/creds/otp_key_role ip=172.17.0.3
$ vault write ssh/creds/otp_key_role ip=172.17.0.4

Note: Because of the security settings of my provider, spaces are after “root”. Please delete it after copy/paste.

# connect via vault SSH (vault-service)
$ vault ssh -role otp_key_role -mode otp -strict-host-key-checking=no root @172.17.0.3

# connect via vault SSH (some-client)
$ vault ssh -role otp_key_role -mode otp -strict-host-key-checking=no root @172.17.0.3

# read content of file (via SSH connections)
$ cat /tmp/target-service

# tail logfile (target-service)
$ tail -f /tmp/vaultssh.log

Running Jenkins on Kubernetes (Docker for Mac)

Now we will deploy Jenkins-Docker on local Kubernetes. If you haven’t Kubernetes running yet, feel free to have a look on my previous tutorial. I will try to describe with very basic steps the tutorial. That’s may confusing for advanced peoples or experts but it should help beginner to get in that topic. For example, this tutorial uses 2 YAML files.

Preparation

# create new project
$ mkdir -p ~/Projects/KubernetesJenkins && cd ~/Projects/KubernetesJenkins

# create needed files
$ touch namespace.yml pod.yml

# modify namespace.yml
$ vim namespace.yml

# modify pod.yml
$ vim pod.yml
apiVersion: v1
kind: Namespace
metadata:
  name: qa-namespace
  labels:
    name: qa-namespace
apiVersion: v1
kind: Pod
metadata:
  name: jenkins.example.com
  labels:
    app: qa-jenkins-app
  namespace: qa-namespace
spec:
  containers:
    - name: jenkins
      image: jenkins/jenkins:lts-alpine
      ports:
        - containerPort: 8080

Let’s go – start Jenkins container on Kubernetes

# show nodes (optional)
$ kubectl get nodes

# create namespace
$ kubectl create -f ~/Projects/KubernetesJenkins/namespace.yml

# show namespaces (optional)
$ kubectl get namespaces --show-labels

# create pod
$ kubectl create -f pod.yml

# show pods of namespace
$ kubectl get pods --namespace qa-namespace

# show pod informations (optional)
$ kubectl describe pod jenkins.example.com --namespace qa-namespace

Open Jenkins in Browser

Jenkins is already running but you cannot access Jenkins without one important step! You need to configure the network routing. Probably the easiest option to do that is a simple port-forward.

# show ports in use (optional)
$ lsof -i -P | grep -i "listen"

# create port-forward to specific namespace
$ kubectl port-forward jenkins.example.com 8080:8080 --namespace=qa-namespace

# open browser (new terminal)
$ open http://localhost:8080

The 2nd way is to expose a service. This possibility is recommended only for local environments! For example on AWS you use load-balancer and there the way is a little bit different.

# expose pod as service
$ kubectl expose pod jenkins.example.com --namespace=qa-namespace --type=NodePort --name jenkins-service

# show services in namespace (optional)
$ kubectl get services --namespace qa-namespace

# show service informations (optional)
$ kubectl get service jenkins-service --namespace qa-namespace

# get node port
$ kubectl describe service jenkins-service --namespace qa-namespace | grep NodePort

# open browser (same terminal)
$ open http://localhost:32654

Whatever way you prefer, you need the initial admin password for Jenkins and/or you may need to see logs.

# show key for Jenkins activation
$ kubectl exec jenkins.example.com --namespace qa-namespace -- cat /var/jenkins_home/secrets/initialAdminPassword

# show logs of pod
$ kubectl logs -f jenkins.example.com --namespace qa-namespace

That’s it… Now you can use Jenkins.

CleanUp

If you want to clean up, proceed as follows.

# delete service
$ kubectl delete service jenkins-service --namespace qa-namespace

# list services (optional)
$ kubectl get services --namespace qa-namespace

# delete pod
$ kubectl delete pod jenkins.example.com --force --namespace qa-namespace

# list pods (optional)
$ kubectl get pods --namespace qa-namespace

# delete namespace
$ kubectl delete namespaces qa-namespace

# list namespaces (optional)
$ kubectl get namespaces

Kubernetes with Docker for Mac

The newer versions of Docker for Mac actually bring everything for the use of Kubernetes. Since the current documentation is not so optimal, I try it in my own way. Since I plan to further testing tutorials on this topic, this guide will serve as a basis.

Preparation

Kubernetes is currently only supported via Docker Edge. Caution, if you switch from stable to edge all Docker images and containers will be deleted! If you are already using the Edge version, skip the following steps 1 till 3.

Docker for Mac Version Stable

  1. Download Docker for Mac Edge Version… You can exit Docker for Mac while downloading.
  2. After successful download of DMG start the installation (Replace the old version).
  3. Start Docker and follow the instructions.
  4. Activate Kubernetes now via “Enable Kubernetes” checkbox and install the Kubernetes cluster. This can take a while, do not lose your patience!
  5. When the installation is finished you can check it.

Enable Kubernetes

Docker Version Edge with Kubernetes

Note, if you have already used minikube, you should now switch the cluster. You can switch between clusters at any time via GUI or command-line.

# show kubectl version
$ kubectl version
Client Version: version.Info{Major:"1", Minor:"9", GitVersion:"v1.9.6", GitCommit:"9f8ebd171479bec0ada837d7ee641dec2f8c6dd1", GitTreeState:"clean", BuildDate:"2018-03-21T15:21:50Z", GoVersion:"go1.9.3", Compiler:"gc", Platform:"darwin/amd64"}
Unable to connect to the server: dial tcp 192.168.99.100:8443: i/o timeout

# show current context
$ kubectl config current-context
minikube

# switch context
$ kubectl config use-context docker-for-desktop
Switched to context "docker-for-desktop".

# show kubectl version
$ kubectl version
Client Version: version.Info{Major:"1", Minor:"9", GitVersion:"v1.9.6", GitCommit:"9f8ebd171479bec0ada837d7ee641dec2f8c6dd1", GitTreeState:"clean", BuildDate:"2018-03-21T15:21:50Z", GoVersion:"go1.9.3", Compiler:"gc", Platform:"darwin/amd64"}
Server Version: version.Info{Major:"1", Minor:"9", GitVersion:"v1.9.6", GitCommit:"9f8ebd171479bec0ada837d7ee641dec2f8c6dd1", GitTreeState:"clean", BuildDate:"2018-03-21T15:13:31Z", GoVersion:"go1.9.3", Compiler:"gc", Platform:"linux/amd64"}

Now it’s a good time to know some more about current cluster, nodes, pods and namespaces. This will help to understand everything better!

# show cluster informations
$ kubectl cluster-info
Kubernetes master is running at https://localhost:6443
KubeDNS is running at https://localhost:6443/api/v1/namespaces/kube-system/services/kube-dns:dns/proxy

To further debug and diagnose cluster problems, use 'kubectl cluster-info dump'.

# show nodes informations
$ kubectl get nodes
NAME                 STATUS    ROLES     AGE       VERSION
docker-for-desktop   Ready     master    14m       v1.9.6

# show pod informations
$ kubectl get pods
No resources found.

# show namespaces informations
$ kubectl get namespaces
NAME          STATUS    AGE
default       Active    23m
docker        Active    21m
kube-public   Active    23m
kube-system   Active    23m

As you can see, everything is working fine. The system is now ready for usage. By the way, have a look on your Docker images!

# list current Docker images (optional)
$ docker images
...

Deploying the Kubernetes Web UI Dashboard

Finally we deploy the Kubernetes Web UI Dashboard on our new Kubernetes Master as a Pod in namespace kube-system. The Dashboard is not installed/deployed by default. Although everything is possible via command-line, it can help to better understand and analyze the system.

# create a resource from a file
$ kubectl create -f https://raw.githubusercontent.com/kubernetes/dashboard/master/src/deploy/recommended/kubernetes-dashboard.yaml
secret "kubernetes-dashboard-certs" created
serviceaccount "kubernetes-dashboard" created
role "kubernetes-dashboard-minimal" created
rolebinding "kubernetes-dashboard-minimal" created
deployment "kubernetes-dashboard" created
service "kubernetes-dashboard" created

# list pods in specific namespace
$ kubectl get pods --namespace=kube-system
NAME                                         READY     STATUS    RESTARTS   AGE
etcd-docker-for-desktop                      1/1       Running   0          46m
kube-apiserver-docker-for-desktop            1/1       Running   0          46m
kube-controller-manager-docker-for-desktop   1/1       Running   0          46m
kube-dns-6f4fd4bdf-f7pjw                     3/3       Running   0          47m
kube-proxy-c676q                             1/1       Running   0          47m
kube-scheduler-docker-for-desktop            1/1       Running   0          46m
kubernetes-dashboard-5bd6f767c7-f9w4j        1/1       Running   0          1m

# forward port to specific pod (Attention! Your pod may have a different name!)
$ kubectl port-forward kubernetes-dashboard-5bd6f767c7-f9w4j 8443:8443 --namespace=kube-system
Forwarding from 127.0.0.1:8443 -> 8443

# open Web UI Dashboard
$ open https://localhost:8443

Skip Authentication

You can skip authentication and jump directly to the dashboard. This step should may give you a hint. Never ever do the same in production!

Kubernetes Dashboard

That’s it already! Have a look on created dashboard and get familiar with your new Kubernetes environment.

PHP QA Tools and Docker Jenkins

This Tutorial is about some simple PHP QA Tools and Docker Jenkins. I will show near how to install PHP and PHP Composer in an Jenkins Alpine Linux Docker inclusive some needed Jenkins PlugIns.

Note

If you have an running Docker Container already which you cannot stop, you can install needed packages directly via:

# list containers (optional)
$ docker ps -a

# access running container as root
$ docker exec -u 0 -it <Container Name> sh

# install packages and exit container
...

Now you can use the same commented commands as provided via Dockerfile. Otherwise follow next steps.

Let’s go

# create new project
$ mkdir -p ~/Projects/DockerJenkins && cd ~/Projects/DockerJenkins/

# create Dockerfile and plugins.txt
$ touch Dockerfile plugins.xt

# modify Dockerfile
$ vim Dockerfile

# modify plugins.txt
$ vim plugins.txt
FROM jenkins/jenkins:lts-alpine

USER root

RUN apk update && apk upgrade

# install needed libary packages
RUN apk --no-cache add libssh2 libpng freetype libjpeg-turbo libgcc \
libxml2 libstdc++ icu-libs libltdl libmcrypt

# install needed PHP packages
RUN apk --no-cache add php7 php7-fpm php7-opcache php7-gd php7-pdo_mysql \
php7-mysqli php7-mysqlnd php7-mysqli php7-zlib php7-curl php7-phar \
php7-iconv php7-pear php7-xml php7-pdo php7-ctype php7-mbstring \
php7-soap php7-intl php7-bcmath php7-dom php7-xmlreader php7-openssl \
php7-tokenizer php7-simplexml php7-json

# Download and install composer installer
RUN php -r "copy('https://getcomposer.org/installer', 'composer-setup.php');"
RUN php -r "if (hash_file('SHA384', 'composer-setup.php') === '544e09ee996cdf60ece3804abc52599c22b1f40f4323403c44d44fdfdd586475ca9813a858088ffbc1f233e9b180f061') { echo 'Installer verified'; } else { echo 'Installer corrupt'; unlink('composer-setup.php'); } echo PHP_EOL;"
RUN php composer-setup.php
RUN mv composer.phar /usr/local/bin/composer
RUN chmod +x /usr/local/bin/composer
RUN rm -f composer-setup.php

USER jenkins

# install plugins from plugins.txt
COPY plugins.txt /usr/share/jenkins/ref/plugins.txt
RUN /usr/local/bin/install-plugins.sh < /usr/share/jenkins/ref/plugins.txt
checkstyle:3.50
analysis-core:1.95
dry:2.50
pmd:3.50
violations:0.7.11

That was it! Now build the image, start and work with jenkins.

# build image from Dockerfile
$ docker build -t lupin/jenkins:lts-alpine .

# list images (optional)
$ docker images

# start container
$ docker run --name JenkinsPHP -p 8080:8080 lupin/jenkins:lts-alpine

Test

After starting, configuring and logging, you can see the already installed plugins in the Jenkins PlugIns!

Jenkins PlugIns

To test, you can create a simple freestyle job. Here you configure the repository, build steps and post-build actions. After a few runs, the results should be visible on the project side.

Jenkins Build Results

Docker registry and Let’s Encrypt

In a previous tutorial, I showed you how to setup a insecure Docker registry. Now we will use HTTPS via certificates from Let’s Encrypt and without some insecure registry settings.

Order dedicated host

If you have a host already, skip this section. If you looking for an good and cheap dedicated host, have a look on Dedibox.

Dedibox

After successful order you can start to install CentOS (Server distributions).

install os on Dedibox

When the OS installation is done, please take care for security! On tecmint.com you can find some cool guides “The Mega Guide To Harden and Secure CentOS 7“. On official Docker docs you will found all needed steps for your Docker CE installation.

Register and configure free domain

Let’s Encrypt need a domain! Register on Freenom and order new domain for free (.tk, .ml, .ga, .cf, .gq). If you have a domain already, skip this section.

free domain

Ensure your dns is configured correctly!

Freenom dns management

Create new Let’s Encrypt certificates

Login into your host via SSH and follow next steps. Attention, replace “demotesthost.tk” by your own domain!

# install epel-release
$ yum install -y epel-release

# install certbot
$ yum install -y certbot

# show default configuration
$ firewall-cmd --list-all

# open firewall ports 80, 443
$ firewall-cmd --permanent --add-port=80/tcp
$ firewall-cmd --permanent --add-port=443/tcp

# reload firewall
$ firewall-cmd --reload

# create needed certificates
$ certbot certonly --standalone --email admin@demotesthost.tk -d demotesthost.tk

# close firewall port 80
$ firewall-cmd --permanent --remove-port=80/tcp

# reload firewall
$ firewall-cmd --reload

# list certificates (optional)
$ ls -lahG /etc /letsencrypt/archive/demotesthost.tk/

# create new directory
$ mkdir -p /opt/certs

# copy needed certificates
$ cp /etc /letsencrypt/archive/demotesthost.tk/cert1.pem /opt/certs/
$ cp /etc /letsencrypt/archive/demotesthost.tk/privkey1.pem /opt/certs/

# list certificates (optional)
$ ls -la /opt/certs/
...
-rwxrwxrwx  1 root root 1797 Feb 27 17:17 cert1.pem
-rwxrwxrwx  1 root root 1704 Feb 27 17:17 privkey1.pem

Note: The space after /etc is just because of security settings by my provider!

Run your Docker registry

# search for image (optional)
$ docker search registry
NAME              DESCRIPTION                                     STARS     OFFICIAL   AUTOMATED
registry          The Docker Registry 2.0 implementation for s…   1853      [OK]                
...

# download and run container
$ docker run -d \
  --restart=always \
  --name registry \
  -v /opt/certs:/certs \
  -e REGISTRY_HTTP_SECRET=test1234 \
  -e REGISTRY_HTTP_ADDR=0.0.0.0:5000 \
  -e REGISTRY_HTTP_TLS_CERTIFICATE=/certs/cert1.pem \
  -e REGISTRY_HTTP_TLS_KEY=/certs/privkey1.pem \
  -p 443:5000 \
  registry:2

# check logs (optional)
$ docker logs -f registry

# check container (optional)
$ docker ps -a

# connection test from local to host (optional)
$ curl -v https://demotesthost.tk/v2/_catalog

Now it’s time for push and pull a images

# pull small alpine image
$ docker pull alpine

# tag alpine image
$ docker tag alpine demotesthost.tk/myalpine

# push image to registry (try)
$ docker push demotesthost.tk/myalpine
The push refers to repository [demotesthost.tk/myalpine]
Get https://demotesthost.tk/v2/: x509: certificate signed by unknown authority

# download needed certs
$ curl -O https://letsencrypt.org/certs/isrgrootx1.pem
$ curl -O https://letsencrypt.org/certs/lets-encrypt-x3-cross-signed.pem

# open directory in Finder
$ open .

After download and open Finder, you should see similar files.

letsencrypt  CA certificates

Simply install both CA certificates via double-click.

letsencrypt certificate install

Optional you can check via “Keychain Access.app”.

Keychain Access.app

Now restart local docker and try again.

# push image
$ docker push demotesthost.tk/alpine

# check repositories via curl (optional)
$ curl https://demotesthost.tk/v2/_catalog
{"repositories":["alpine"]}

# check image tags via curl (optional)
$ curl https://demotesthost.tk/v2/alpine/tags/list
{"name":"alpine","tags":["latest"]}

# delete local images
$ docker rmi alpine
$ docker rmi demotesthost.tk/alpine

# pull image from your registry
$ docker pull demotesthost.tk/alpine

… next steps

So what about authentication? Currently everybody can upload/download images! What that means for security, should be clear. Please read the Docker docs about.