In a previous tutorial, I showed you how to set up a security learning environment quickly. Since there are some changes now (ex: Webswing), I’ll do the tutorial again. By the way i use macOS, some commands could be different but similar for Linux or Windows.
# run DVWA container
$ docker run -d -p 8081:80 --name dvwa citizenstig/dvwa
# check DVWA logs for startup (optional)
$ docker logs -f dvwa
# get local ip
$ ipconfig getifaddr en0
...
192.168.192.39
...
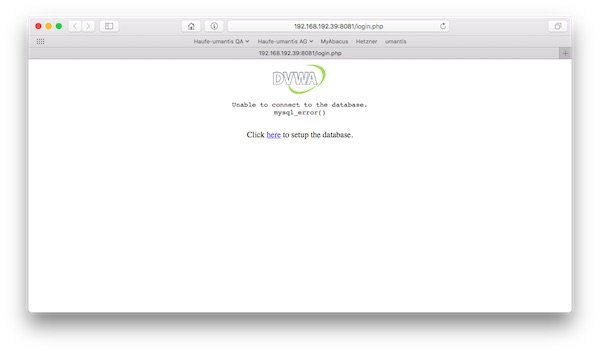
# start DVWA in browser
$ open -a Safari http://192.168.192.39:8081/
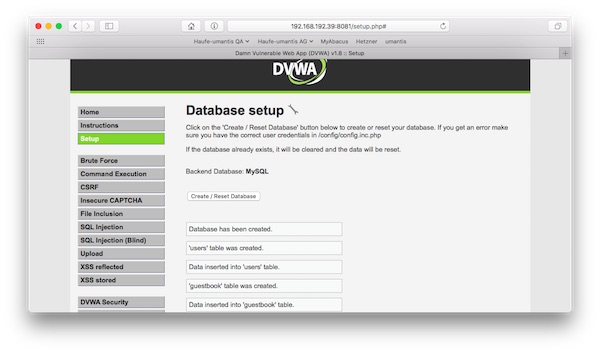
…Setup/create new database…
Run ZAP container
# create folder
$ mkdir -p /tmp/reports
# run ZAP container
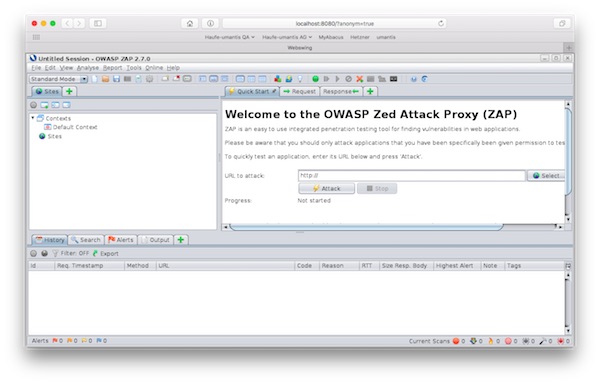
$ docker run -u zap -i -p 8080:8080 -p 8090:8090 -v /tmp/reports:/home/zap/reports --name zap owasp/zap2docker-stable zap-webswing.sh
# start ZAP in Browser
$ open -a Safari http://localhost:8080/?anonym=true&app=ZAP
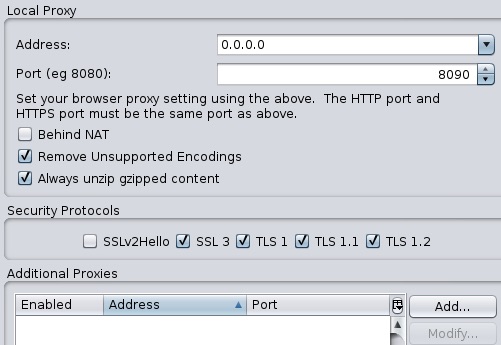
Please check via “Tools” -> “Options” -> “Local Proxies” the right configuration!
You need do use the non-routable meta address (0.0.0.0)!
Run ThreadFix container
# run ThreadFix container
$ docker run -d -p 8443:8443 --name threadfix jmbmxer/threadfix start

# check ThreadFix logs for startup (optional)
$ docker logs -f threadfix
...
Jan 30, 2018 8:56:40 AM org.apache.catalina.startup.Catalina start
INFO: Server startup in 49986 ms
...

# start ThreadFix in Browser
$ open -a Safari https://localhost:8443/threadfix/
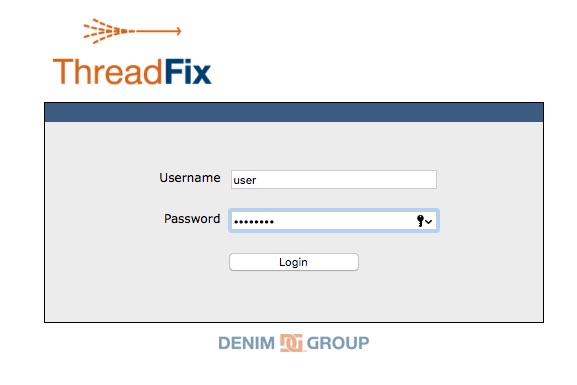
Login into ThreadFix with “user/password”
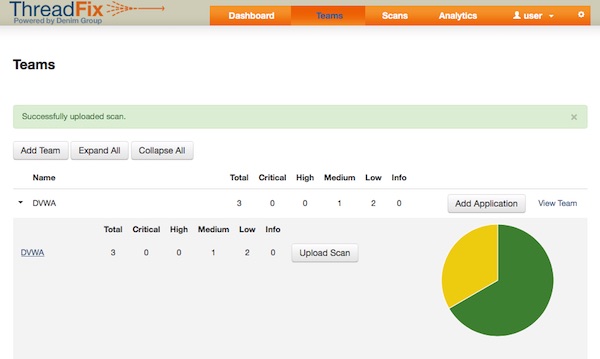
Create new team with application.
Configure Firefox
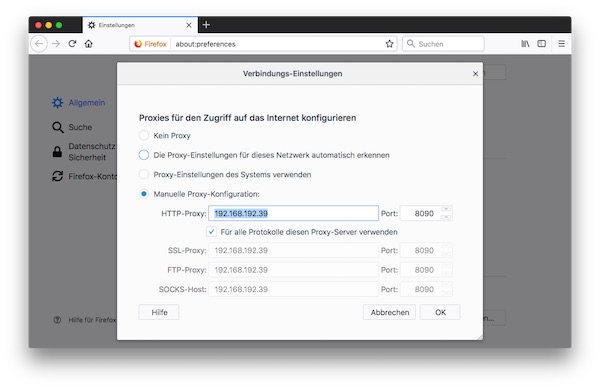
# get local ip
$ ipconfig getifaddr en0
...
192.168.192.39
...

# open Firefox preferences
$ /Applications/Firefox.app/Contents/MacOS/firefox --preferences
Configure manual proxy with your local IP and 2nd ZAP port (8090). Afterwards you enable checkbox “Use this proxy server for all protocols” and press OK button.
When all the configurations have been made, you can temporarily quit Firefox.
Use environment
# list all containers (optional)
$ docker ps -a

# open DVWA via Proxy
$ open -a firefox http://192.168.192.39:8081
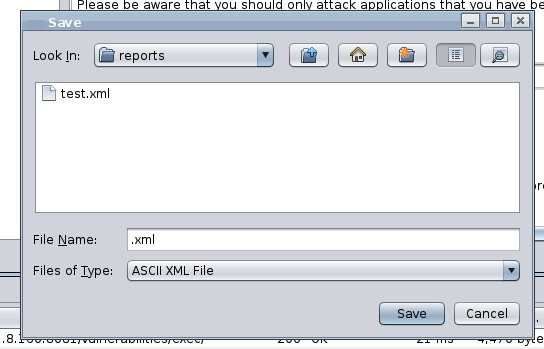
Start recording and save your XML report “Report -> Generate XML Report”.
# open reports directory in finder
$ open /tmp/reports
Next steps
Now it’s time to study! If you need help, you can found a lot of training materials on Youtube.
Penetration testing make fun but writing penetration testing reports is boring. When you start you will look for templates or software which supports you. Here comes Serpico into the game. Serpico is a collaboration and report generation tool. The best… it is open-source.
Usage via Docker
# search for Serpico (optional)
$ docker search serpico

# download official image
$ docker pull serpicoproject/serpico

# create and run container
$ docker run --name serpico -p 8888:443 -it serpicoproject/serpico /bin/bash -l

# run setup script (only 1st time)
$ ruby scripts/first_time.rb

# create new user
$ ruby scripts/create_user.rb admin test123 1

# start serpico
$ ruby serpico.rb
Now you can use Serpico in your favorite browser…
# macOS use Safari
$ open -a Safari https://localhost:8888
Login with created credentials (admin/test123) and create your reports. On Youtube is a good introduction. If you don’t have Microsoft Words installed, you can view your reports online.
LUNAR is a open source UNIX security auditing tool written in Shell script. It offers the audit for various operating systems like Linux (RHEL, CentOS, Debian, Ubuntu), Solaris and Mac OS with less requirements. Services like Docker and AWS are also supported.
The use is very easy… but the outcome brings much values.
# show help
$ sh lunar.sh -h

# list functions
$ sh lunar.sh -S

# run ssh audit
$ sh lunar.sh -s audit_ssh_config

# run selinux audit in verbose mode
$ sh lunar.sh -s audit_selinux -v

# run all audits
$ sh lunar.sh -a
Infrastructures can be very big. Luckily, there are provisioner like Chef, Salt, Ansible and etc. These provisioners can be very complex and possibly the developer has done something wrong. Therefore the infrastructure has to be tested! Tools like goss, Serverspec and Testinfra helps testers to validate. This tutorial show the first steps with Testinfra.
Testinfra is written in Python very small and easy to understand. Here is the GitHub repository.
Precondition
Vagrant (min. 1.9.3) installed
Python (min. 2.7) installed
pip (min. 9.0.1) and virtualenv (min. 15.1.0) installed
make (min. 3.81) installed
Project structure
To get used to it – i prepared some files for you. You only need to change the box name/url in Vagrantfile.
# create virtualenv and install dependencies
$ make env

# create vagrant environment
$ make up

# run tests
$ make test

# delete all generated files and directories
$ make clean_all
Testinfra offers several connections backends for remote command execution and can be used with python standard unit test framework: unittest. So the integration with build servers is easily possible.
I wrote an bash script which makes the SSH server configuration audit a little bit easier. Here now an description for usage. The repository can found here.
Usage
# upload script to target host (tmp directory)
$ scp ssh_audit.sh <user>@<host>:/tmp

# login into target host
$ ssh <user>@<host>

# switch to root
$ su -

# change file permissions (optional)
$ chmod u+x /tmp/ssh_audit.sh

# run ssh audit
$ /tmp/ssh_audit.sh
The output is self-explanatory. If you need more details, just run following command.
# output the effective configuration to stdout (Extended test mode)
$ sshd -T