Install v3n0m on Debian (Jessie)

V3n0m is a free penetration scanner. This tutorial shows how to install v3n0m on Debian 8.6.

Preparation

# update and upgrade system
$ apt-get update && apt-get upgrade

# install needed packages
$ apt-get install -y build-essential sudo git libssl-dev openssl

# download python 3.5 source
$ wget https://www.python.org/ftp/python/3.5.0/Python-3.5.0.tgz

# unzip archive
$ tar xzvf Python-3.5.0.tgz

# change directory
$ cd Python-3.5.0

# configure for compile
$ ./configure

# compile python 3.5
$ make

# install python 3.5
$ make install

# check pip version
$ pip3 --version
...
pip 7.1.2 from /usr/local/lib/python3.5/site-packages (python 3.5)

# change directory (home dir)
$ cd

# install python libraries
$ pip3 install dnspython3 aiohttp httplib2 socksipy-branch requests url

Install and run v3n0m

# clone git repository
$ git clone https://github.com/v3n0m-Scanner/V3n0M-Scanner.git

# change directory
$ cd V3n0M-Scanner/src/

# run V3n0M
$ python3.5 v3n0m.py

Output…

|----------------------------------------------------------------|
| Release Date 07/10/2016                                        |
|                                                                |
|        Proxy Enabled  [ False ]                                |
|                                                                |
|                    _____       _____                           |
|                   |____ |     |  _  |                          |
|             __   __   / /_ __ | |/' |_ __ ___                  |
|             \ \ / /   \ \ '_ \|  /| | '_ ` _ \                 |
|              \ V /.___/ / | | \ |_/ / | | | | |                |
|    Official   \_/ \____/|_| |_|\___/|_| |_| |_| Release 410.1  |
|                     NovaCygni  Architect                       |
|----------------------------------------------------------------|

[1] Dork and vuln scan
[2] Admin page finder
[3] FTP crawler and vuln scan
[4] DNS brute
[5] Enable Tor/Proxy Support
[6] Misc Options
[7] Check for and apply update
[0] Exit

:

Have fun but be careful!
Install YAWAST on Debian (Jessie)

This time i show YAWAST (Antecedent Web Application Security Toolkit) on Debian 8.6. YAWAST performs basic checks for penetration testers and security auditors.

System preparation

# update and upgrade system
$ apt-get update && apt-get upgrade

# install needed packages
$ apt-get install -y build-essential libssl-dev

# download ruby archive
$ wget https://cache.ruby-lang.org/pub/ruby/2.3/ruby-2.3.1.tar.gz

# unzip archive
$ tar -zxvf ruby-2.3.1.tar.gz

# change directory
$ cd ruby-2.3.1/

# run configuration
$ ./configure

# run compilation
$ make

# run intsallation
$ make install

# check version
$ ruby --version

Install YAWAST

# install YAWAST via gem
$ gem install yawast

# show help
$ yawast --help

Usage

# simple scan
$ yawast scan [URL]

# detect CMS
$ yawast cms [URL]

# show ssl information
$ yawast ssl [URL]

There is more! Read the documentation on GitHub adamcaudill/yawast.

Build a Docker Penetration Test environment

Today we build a penetration test environment via Docker. That means no Plug-Ins (for example: Java) are needed! If you are Mac OS X users, a VNC client is already included (since Yosemite).

Preparation:

# download all needed Docker images
$ docker pull owasp/zap2docker-stable
$ docker pull citizenstig/dvwa
$ docker pull jmbmxer/threadfix

# list local Docker images
$ docker images
...
REPOSITORY                TAG                 IMAGE ID            CREATED             SIZE
owasp/zap2docker-stable   latest              a774bdc65502        3 months ago        1.557 GB
jmbmxer/threadfix         latest              b6f1907a61cd        5 months ago        941 MB
citizenstig/dvwa          latest              c8312743bc09        23 months ago       478.5 MB

ZAP Attack Proxy

# run Docker container with ZAP Attack Proxy (insert and remember password)
$ docker run -u zap -p 5900:5900 -p 8080:8080 -v /tmp/reports:/home/zap/reports --name zap -i owasp/zap2docker-stable x11vnc --forever --usepw --create

# start VNC (Mac OS X)
$ open /System/Library/CoreServices/Applications/Screen\ Sharing.app/

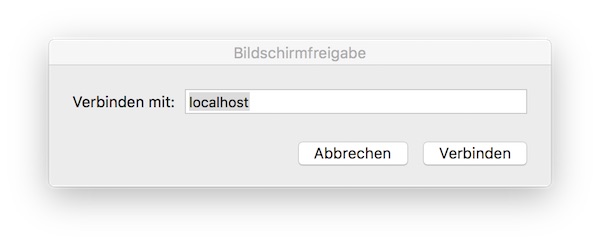
…or use the short way via: [cmd] + [space] and type screen sharing

vnc connection to zap

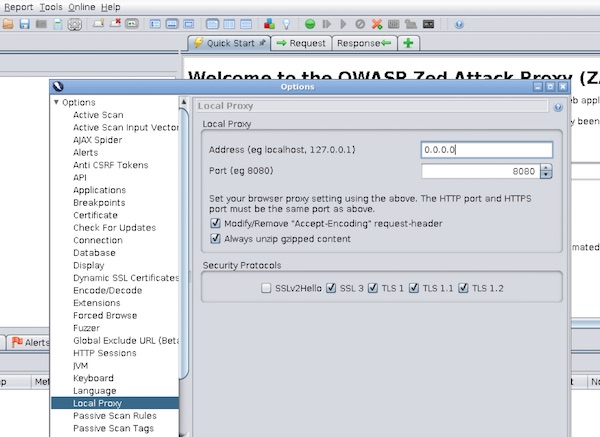
Insert “localhost” and your given password… and follow introduction for ZAP startup. Now you configure the ZAP Proxy Settings.

zap proxy configuration

Note: Select IP “0.0.0.0” for later use. You can also use “$ docker inspect zap” to find out the internal IP, but this could change on next start.

DVWA

# run Docker container with DVWA (2nd terminal)
$ docker run -d -p 8081:80 --name dvwa citizenstig/dvwa

# wait for startup
$ docker logs -f dvwa

# get host ip (from where you run browser)
$ ifconfig

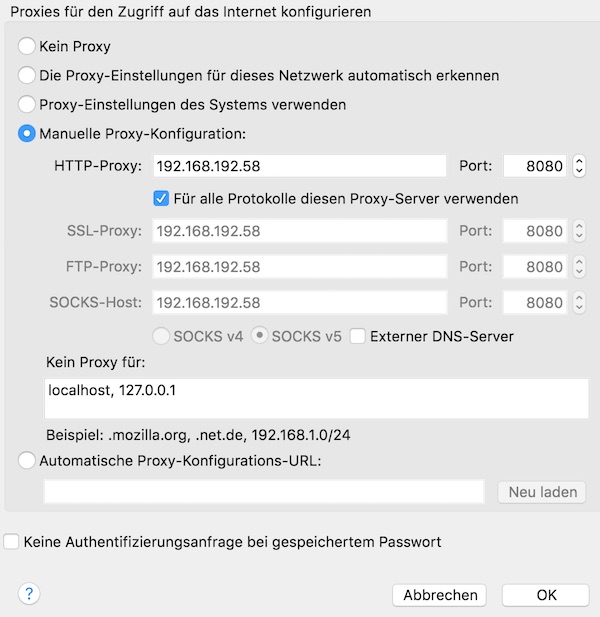
Now start your Firefox browser and change proxy settings. Insert your IP!

firefox proxy settings

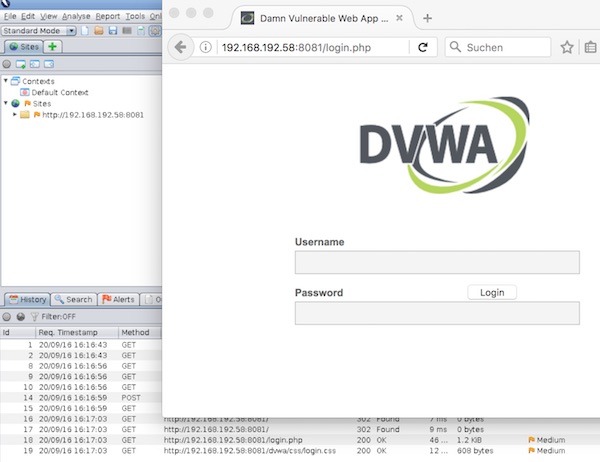
Call URL for DVWA in Firefox and run your penetration tests.

pentest firefox zap

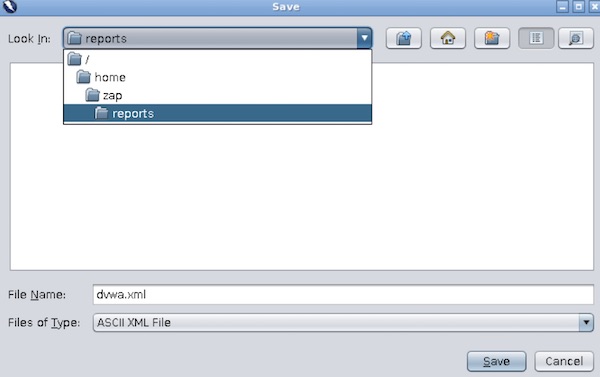
When you are done, export XML report

zap xml report
From now on, you can stop all running docker container.

ThreadFix

# run Docker container with ThreadFix
$ docker run -d -p 8443:8443 --name threadfix jmbmxer/threadfix start

# wait for startup
$ docker logs -f threadfix

Open Safari and call URL: https://localhost:8443/threadfix. Login with User: “user” and Password: “password”. Create a new team and add a application to team.

# open directory in finder
$ open /tmp/reports/

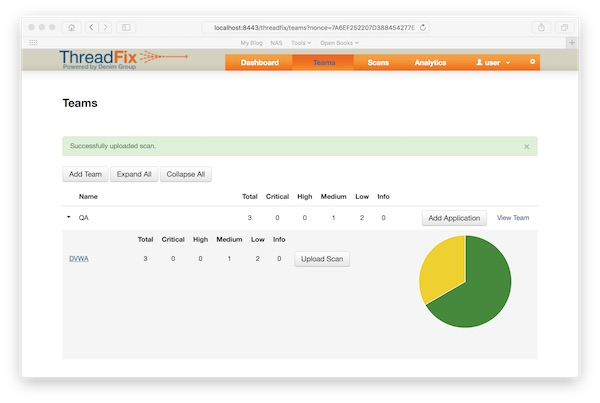
Import the ZAP XML report.

threadfix zap report

That is it… enjoy and expand your pentest laboratory!

Create own Docker port scanner

Today’s tutorial shows how quickly and easily a Docker port scanner can be created. With the knowledge you can then create additional Docker applications.

Preparation

# prepare knocker project (local)
$ mkdir ~/Projects/Knocker && cd ~/Projects/Knocker

# create Dockerfile (local)
$ vim Dockerfile

# create KnockerVM (local)
$ docker-machine create -d virtualbox KnockerVM

# pointing shell to KnockerVM (local)
$ eval $(docker-machine env KnockerVM)

# copy Dockerfile into KnockerVM (local)
$ docker-machine scp ~/Projects/Knocker/Dockerfile KnockerVM:Dockerfile

# SSH into KnockerVM (local)
$ docker-machine ssh KnockerVM

Dockerfile

FROM alpine

# install needed packages
RUN apk --update add wget build-base gcc abuild binutils binutils-doc gcc-doc

# download and unzip
RUN wget http://prdownloads.sourceforge.net/knocker/knocker-0.7.1.tar.gz
RUN tar -zxvf knocker-0.7.1.tar.gz && rm -f knocker-0.7.1.tar.gz

# configure, install and clean up
WORKDIR /knocker-0.7.1
RUN ./configure \
    && make install \
    && make clean

# create mountable directory
RUN mkdir /results
VOLUME /results
WORKDIR /results

# remove packages
RUN apk del wget build-base gcc abuild binutils binutils-doc gcc-doc \
    && rm -fr /knocker-0.7.1

ENTRYPOINT ["knocker"]

Usage

# build Docker image (KnockerVM)
$ docker build -t alpine/knocker .

# run Knocker help (KnockerVM)
$ docker run -ti --rm alpine/knocker --help

# run simple port scan (KnockerVM)
$ docker run -ti --rm alpine/knocker -H 192.168.192.1 -SP 1 -EP 10

# run port scan with (KnockerVM)
$ docker run -ti --rm -v /home/docker:/results alpine/knocker -H 192.168.192.1 -SP 80 -EP 90 -lf /results/report

# read report (KnockerVM)
$ cat report

Feel free to edit and/or expand! Knocker self can be found here.

Docker Audit

This tutorial shows software testers some simple examples for Docker audit. Here now we will make some audits on Docker environment and Dockerfiles.

Docker environment audit

# check Docker environment with docker-bench-security
$ docker run -it --net host --pid host --cap-add audit_control \
    -v /var/lib:/var/lib \
    -v /var/run/docker.sock:/var/run/docker.sock \
    -v /usr/lib/systemd:/usr/lib/systemd \
    -v /etc :/etc --label docker_bench_security \
    docker/docker-bench-security

Note: 1st the space after /etc is only because of security settings from my provider! 2nd create os specific docker-bench-security (example CentOS)

Dockerfile audit

# install on RedHat, CentOS, Fedora ...
$ yum install epel-release && yum install lynis

# install on Debian, Ubuntu ...
$ apt-get install lynis

# Suse
$ zypper install lynis

# install via Homebrew
$ brew install lynis

# audit Dockerfile
$ lynis audit dockerfile Dockerfile

# check log file
$ cat /var/log/lynis.log
$ cat /var/log/lynis-report.dat

Lint Dockerfile with Haskell Dockerfile Linter

# simply run Container again Dockerfile
$ docker run --rm -i lukasmartinelli/hadolint < Dockerfile

dnstwist with docker

What happens when users make a typo in URL input? It can display a fake websites. This similar-looking domains can be used to attack you (Domain Name Permutation). With dnstwist you can find such “evil neighbors”. This tutorial shows how to use in a few seconds dnstwist.

Precondition

  • docker installed and running
  • docker-machine installed (optional)

Instructions

# create VM (optional)
$ docker-machine create -d virtualbox dnstwist

# pointing shell (optional)
$ eval $(docker-machine env dnstwist)

# download docker image (optional)
$ docker pull jrottenberg/dnstwist

# start dnstwist
$ docker run --rm jrottenberg/dnstwist bitbucket.org

Reaver, Wash and CentOS 7

In part 3, I show how to install Reaver/Wash on CentOS 7.

Preparation

Installation

# download reaver and wash
$ wget https://reaver-wps.googlecode.com/files/reaver-1.4.tar.gz

# unzip
$ tar -zxvf reaver-1.4.tar.gz

# install reaver and wash
$ cd /reaver-1.4/src
$ ./configure
$ make install

# optional read docs
$ cat /reaver-1.4/docs/README.REAVER
$ cat /reaver-1.4/docs/README.WASH

Usage

# kill interfering processes
$ airmon-ng check kill

# set interface into monitor mode (my interface is wlp0s11u1)
$ airmon-ng start wlp0s11u1

# find WPS routers via wash
$ wash -I wlp0s11u1mon

# start reaver running
$ reaver -i wlp0s11u1mon -b <ESSID> -t 2 -vv

MDK3 and CentOS 7

Last time i showed you, how to install Aircrack-ng. This time we will install MDK3 on CentOS 7.

Preparation

Installation

# install needed software
$ yum install -y wget bzip2

# download mdk3
$ wget http://aspj.aircrack-ng.org/mdk3-v6.tar.bz2

# unzip mdk3
$ bzip2 -cd mdk3-v6.tar.bz2 | tar xvd -

# compiling
$ cd d mdk3-v6/
$ make
$ mv mdk3 /usr/local/bin/
$ make clean

Usage

# create text-file with fake AP`s
$ echo -e "the force is with you\ncheck me\nhave fun" > fakeAP

# kill interfering processes
$ airmon-ng check kill

# set interface into monitor mode (my interface is wlp0s11u1)
$ airmon-ng start wlp0s11u1

# start mdk3 to create fake AP`s
$ mdk3 wlp0s11u1mon b -f fakeAP