Simple Vault introduction

Today a tiny introduction to Vault from HashiCorp. I will just show the simplest usage. But this will help to get a first idea of Vault and the features.

Requirements

Preparation

# download vault (0.8.0)
$ curl -C - -k https://releases.hashicorp.com/vault/0.8.0/vault_0.8.0_darwin_amd64.zip -o ~/Downloads/vault.zip

# unzip and delete archive
$ unzip ~/Downloads/vault.zip && rm ~/Downloads/vault.zip

# move binary to target
$ sudo mv ~/Downloads/vault /usr/local/

Start Vault Server

# start in DEV mode
$ vault server -dev
...
Root Token: 6fdbf7b1-56a2-e665-aa31-0e3b5add5b77
...

Copy Root Token value to clipboard!!!

Insomnia

Create new environment “vault” under “Manage Environments” and store here your URL as “base_url” and Root Token as “api_key”.

insomnia vault environment

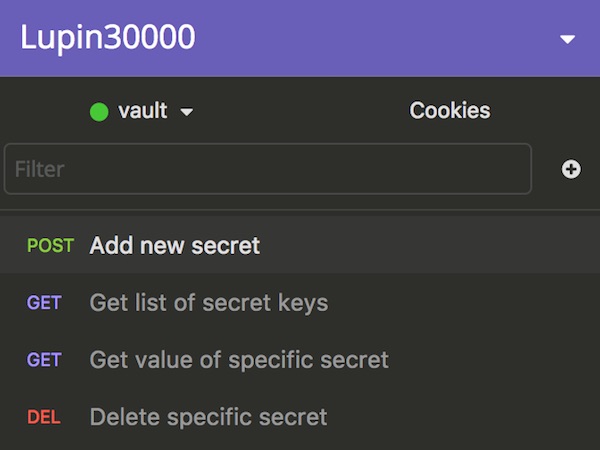
Now we create 4 simple requests

insomnia requests

for all requests we add Header
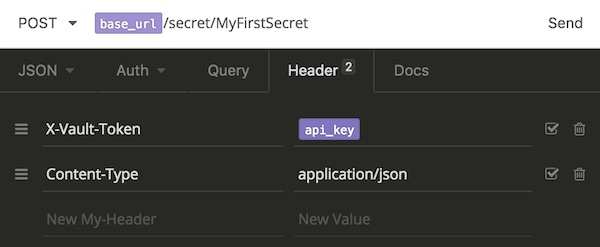
insomnia header

For first URL (POST: Add new secret) we use “{{ base_url }}/secret/MyFirstSecret” and we add following body as JSON.

{
  "value":"myNewSecret"
}

After send the key:value is stored inside Vault. You can modify the request (e.q. “{{ base_url }}/secret/MySecondSecret”) and send some more.

Our next request is to show all keys (GET: Get list of secret keys) “{{ base_url }}/secret?list=true”. The Preview will show similar output.
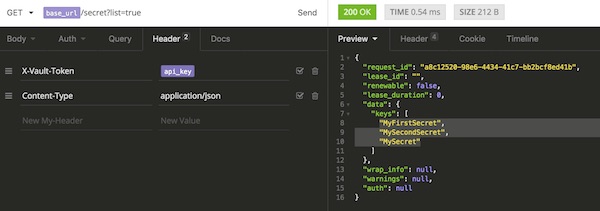
insomnia get vault keys

3rd request is to get the value from a specific key (GET: Get value of specific secret) “{{ base_url }}/secret/MySecret”.
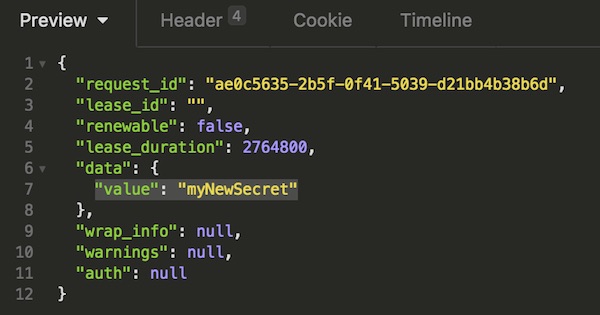
insomnia get vault value

Last request is for delete (DEL: Delete specific secret) “{{ base_url }}/secret/MySecret”.

Tipp: if you lost the root token (Vault server is running) you can find the value!

# show file content
$ cat ~/.vault-token
HTTP inspection with Wuzz

Wuzz is a very easy command line tool for HTTP(S) inspection with very much potential. In this tutorial I will show the installation on Debian 8.7 (jessie).

Preparation

# install git and curl packages
$ sudo apt install -y curl git

# download go (do not install from Debian)
$ curl -O https://storage.googleapis.com/golang/go1.8.linux-amd64.tar.gz

# unzip archive
$ tar xvf go1.8.linux-amd64.tar.gz

# set owner and group (recursive)
$ sudo chown -R root:root go

# move all into target directory
$ sudo mv go /usr/local/

Configure go (for user)

# create hidden go directory
$ mkdir ~/.go

# configure needed paths (inside .bashrc)
$ echo "GOPATH=$HOME/.go" >> ~/.bashrc
$ echo "export GOPATH" >> ~/.bashrc
$ echo "PATH=\$PATH:/usr/local/go/bin:\$GOPATH/bin" >> ~/.bashrc

# reload
$ source ~/.bashrc

# check go version
$ go version
go version go1.8 linux/amd64

Install wuzz

# install packages from github
$ go get github.com/asciimoo/wuzz

# check wuzz version
$ wuzz --version wuzz 0.2.0

# show wuzz help
$ wuzz --help

# simple run
$ wuzz

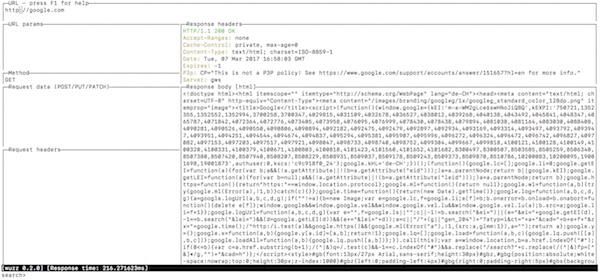
If everything is going well, the terminal should look like this and you can start.

example wuzz cli

Create REST API mock server with Docker

This time again a tutorial with various instructions. It is a REST API services for development and testing purposes and some simple Docker instructions.

Preconditions

Note: For Mac OS X and Windows use Docker Toolbox!

Create and connect into Boot2Docker VM

# create new boot2docker vm
$ docker-machine create -d virtualbox apivm

# list created vm(s)
$ docker-machine ls

# list informations (optional)
$ docker-machine inspect apimock

# ssh into boot2docker vm
$ docker-machine ssh apivm

Create Dockerfile (inside VM)

# create new Dockerfile
$ vi Dockerfile
FROM ubuntu

# install python packages
RUN apt-get update && apt-get -y install python python-dev python-pip

# install python libraries
RUN pip install mock-server tornado==4.2

# create directory
RUN mkdir -p api

EXPOSE 8888

CMD ["mock-server","--address=0.0.0.0","--dir=api"]

Create Docker image and container (inside VM)

# create Docker image
$ docker build -t api_image .

# list Docker image(s)
$ docker images

# create and start new container from Docker image
$ docker run --name api_container -d -p 8888:8888 api_image

# list Docker container(s)
$ docker ps -a

Run application in browser

Now open a browser and call URL like: http://<192.168.99.100>:8888/__manage. You can now begin to create and use REST API resources.

REST testing with jMeter

Testing RESTful application is very simple with jMeter. In the first part of the tutorial in this series, the basics are shown. As requests can be created and evaluated. The request going to http://httpbin.org.

Preconditions

  • JAVA is installed
  • jMeter is installed

Steps

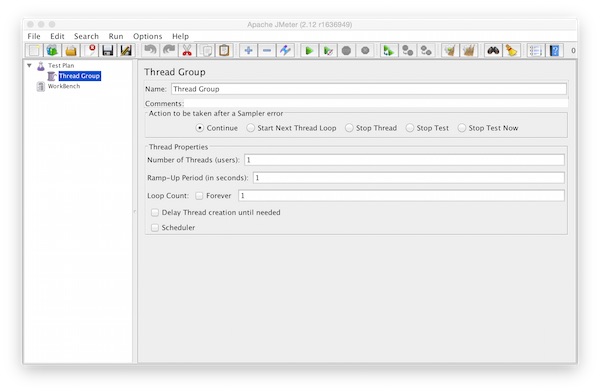
Create new “Thread-Group” on “Test Plan” (Add – Threads (User) – Thread Group)

jmeter thread group

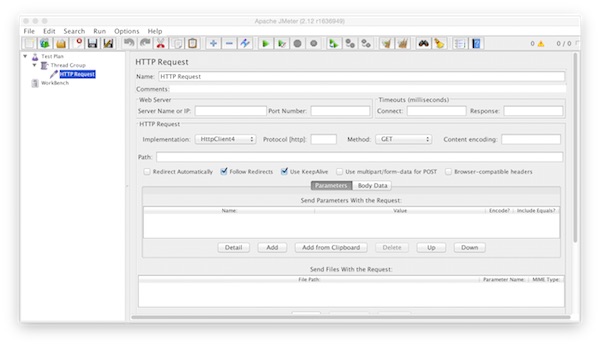
Now add one “HTTP Request” inside the “Thread Group” (Add – Sampler – HTTP Request)

jmeter http request

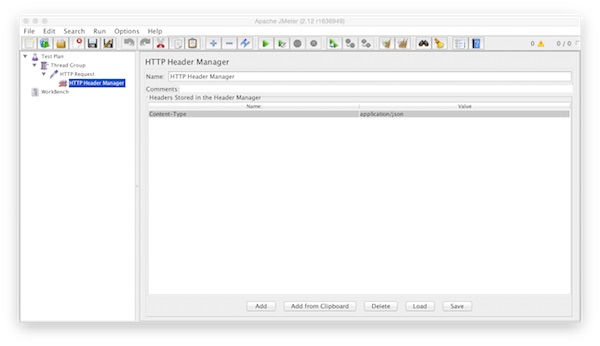
Inside the “HTTP Request” we add now a “HTTP Header Manager” (Add – Config Element – HTTP Header Manager). For configuring we add the Name/Value – “Content-Type”/”application/json”.

jmeter http header manager

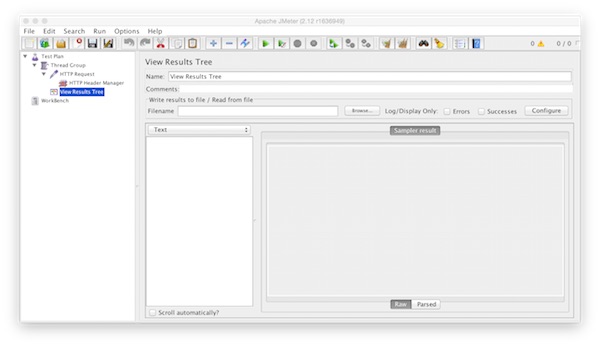
At the end we add the “View Results Tree” on “Thread Group” (Add – Listener – View Results Tree)

jmeter view results tree

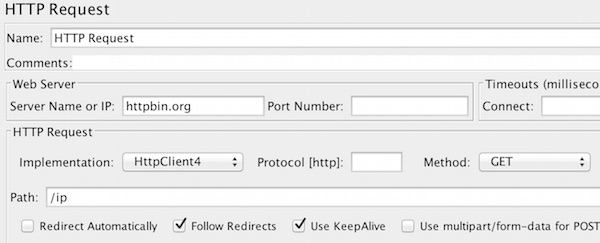
Our first request example will be a “GET”. On HTTP Request we add following values.

  • Server Name or IP: httpbin.org
  • Method: GET
  • Path: /ip
  • Implementation: HttpClient4
  • Follow Redirects: yes
  • Use KeepAlive: yes
jmeter get request

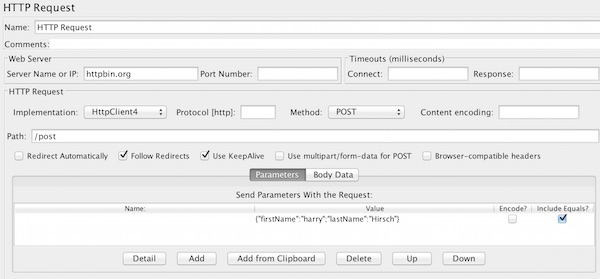
After save we can start the first run. How to see result will show later. Now second request with POST example. For this we modify the HTTP Request with following values.

  • Method: POST
  • Path: /post
  • Send Parameters With the Request: {“firstName”:”harry”;”lastName”:”Hirsch”}
  • Include Equals?: yes
jmeter post request

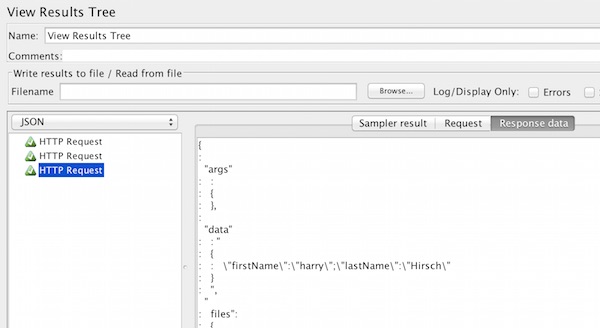
Now save and run again. On View Results Tree we can check the results for every http request (Sampler results, Request, Response data).

jmeter rest results

For the JSON response, switching from Text to JSON view. The same way can used for PUT, DELETE or other requests.