Create test files on the fly

In many cases test files are needed for software tester. Partially with specified file size. With a small set of commands, it is very easy to create these files. In order to check the generated file(s), you can use the following:

# Check file size
$ ls -lh test-file

# Determine file type
$ file test-file

# Display output one screen
$ less test-file

# or
$ hexdump test-file

Perl

# Example for 1.0K
$ perl -e 'print "a" x 1024' > test-file

# Example for 1.0M
$ perl -e 'print "a" x 1048576' > test-file

mkfile

# Example for 1.0K
$ mkfile 1k test-file

# Example for 1.0M
$ mkfile 1m test-file

dd

# Example for 1.0K
$ dd if=/dev/zero of=test-file bs=1k count=1

# Example for 1.0M
$ dd if=/dev/zero of=test-file bs=1m count=1

base64

# Example for 1.0K
$ base64 /dev/urandom | head -c 1024 > test-file

# Example for 1.0M
$ base64 /dev/urandom | head -c 1048576 > test-file
Wireshark and OS X Yosemite

Since X11 is no more included, you need XQuartz to run Wireshark on Yosemite. Wireshark is expecting XQuartz (X11) to be inside the folder “/usr” but it is now under “/opt”. With a symbolic link you can solve it easily.

# create symbolic link
$ sudo ln -s /opt/X11 /usr/X11

After install and create symbolic link you download can install Wireshark. Now you can start Wireshark.

# start wireshark
$ sudo wireshark

Note: The start may take some time.

Start – Stop Apache HTTP server by click

Usually, you start and stop the apache server by the terminal on Mac OS X.

Example

# start Apache
$ sudo apachectl start

# Restart Apache
$ sudo apachectl restart

# Stop Apache
$ sudo apachectl stop

But with the help of Automator, you can do it by simple click.

Steps

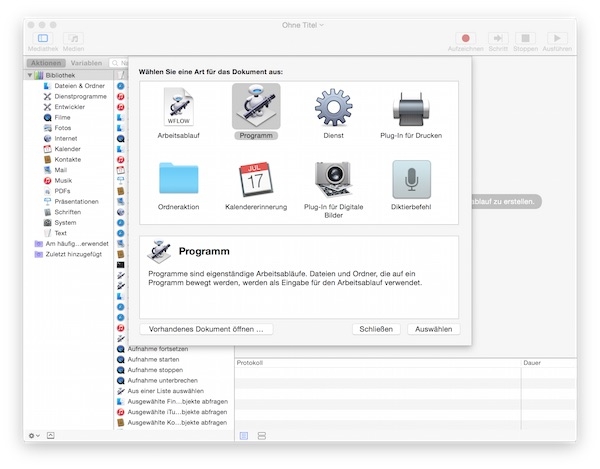
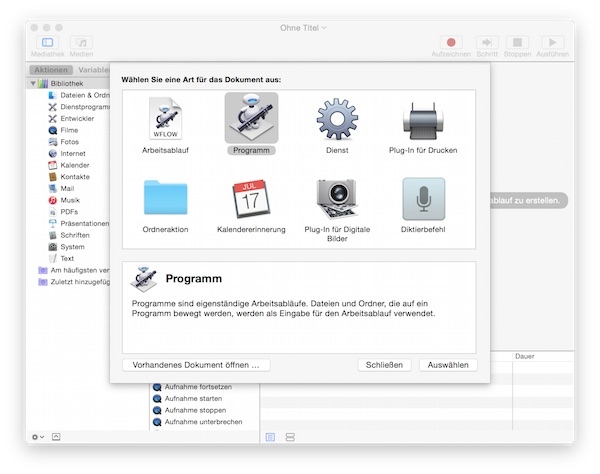
Start the Automator and select “Application”.

automator apache

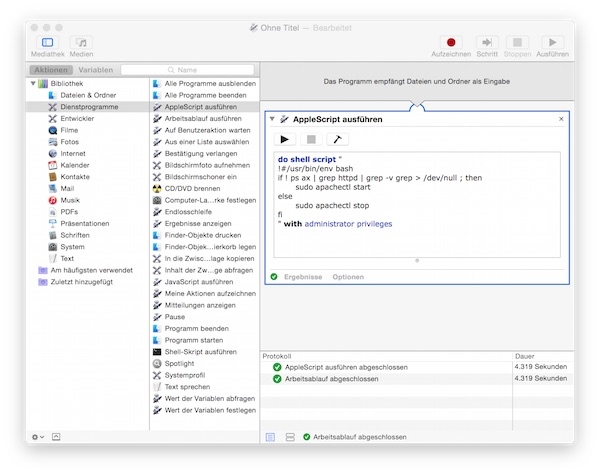
Now insert the action “Run AppleScript” from library into workflow window.

automator apple script

Insert the following script and save your application.

do shell script "
!#/usr/bin/env bash
if ! ps ax | grep httpd | grep -v grep > /dev/null ; then
  sudo apachectl start
else
  sudo apachectl stop
fi
" with administrator privileges

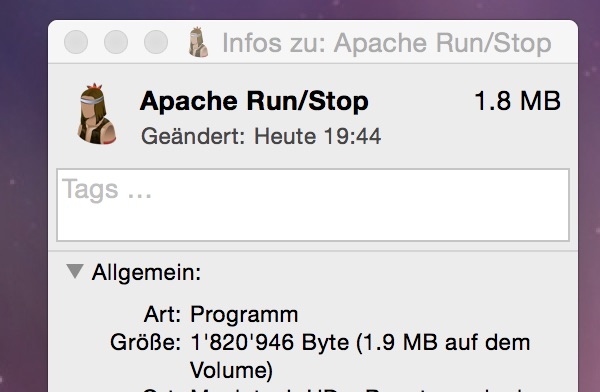
As a small highlight you can change the icon. Select your app and press “CMD” + “i”. Now drag an other icon file on place of Automator icon.

automator icon

Improve your daily workflow

As a test manager I have to check every day, many test results in my browser. With the Automator i can save time.

Steps

Start Automator and select “Application”

os x automator

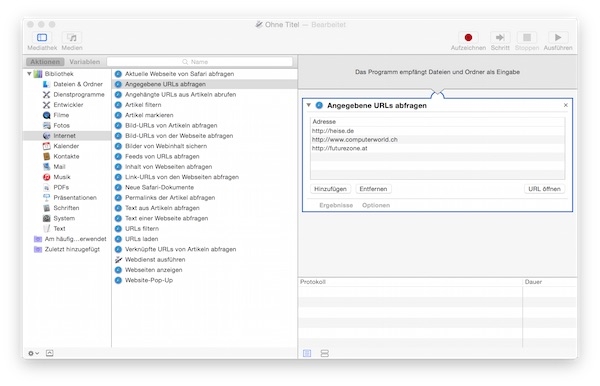
Select “Internet” on “Library” and double click “Get Specified URLs” to get the action into the workflow window. Now insert all URLs.

automator get specific url

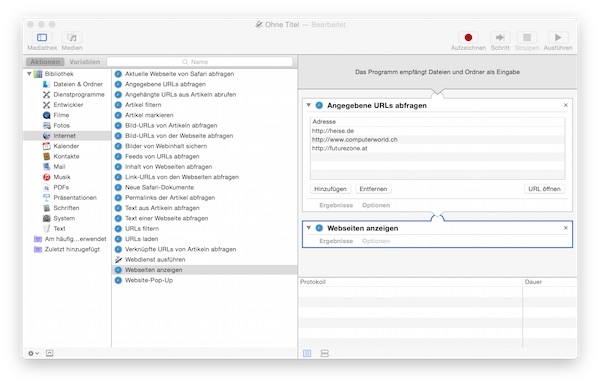
Add in the “Display Webpages” action and save it.

automator display webpages

Attention: default path is “/Users//Library/Services/”, but you can save it on other locations, too.

automator application

Small helper for iOS automated test 2

The second part of this small series, it shows how to obtaining device property informations.

Helper

var Device = {
  isIPhone: function() {
    return this.target().model().match("iPhone");
  },
  isIPad: function() {
    return this.target().model().match("iPad");
  },
  isName: function() {
    return this.target().name();
  },
  isSystemName: function() {
    return this.target().systemName();
  },
  isSystemVersion: function() {
    return this.target().systemVersion();
  },
  target: function() {
    return UIATarget.localTarget();
  }
};

Example

var message = Device.isName();
UIALogger.logMessage("Name: " + message);

var message = Device.isSystemName();
UIALogger.logMessage("SystemName: " + message);

var message = Device.isSystemVersion(); UIALogger.logMessage("SystemVersion: " + message);

if (!Device.isIPad()) {
  throw new Error("Test suite only works on iPad");
}

Integrate pylint in PyCharm

This tutorial shows, how to add pylint into PyCharm.

Preparation

# install pylint via pip
$ sudo pip install pylint

That was the easy way to install pylint…

Steps

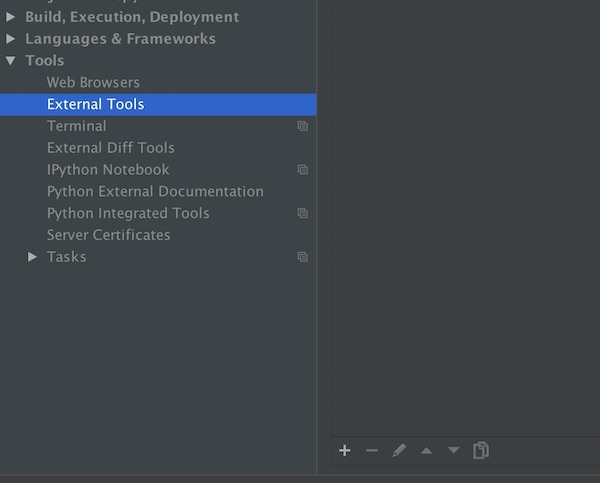
Open “Settings > Tools > External Tools” and press the “+” button.

pycharm external tools

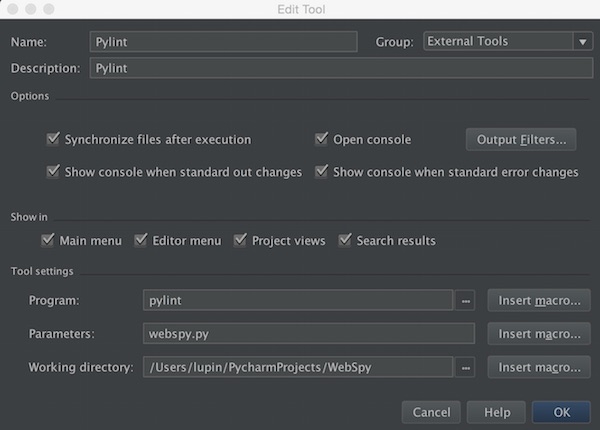
Insert values

Inserts good values on name, description and select your favorite group. Enable more or less all checkboxes. Down the “Tool settings” insert program “pylint”, your specific parameters and working directory.

pycharm pylint

After press “OK” pylint integration is ready.

Extended

To be a little more flexible, you can use PyCharm macros. As an example use the value “$FilePath$” for Working directory and “$Promt$” for Parameters. This allows the use in other projects, too.

pycharm macros

Running PyCharm on Yosemite

Your current Java version is greater than 6 and you get after starting PyCharm an error dialog, the following solution helps.

Check your Java Version

# show Java version
$ java -version
java version "1.8.0_25" Java(TM) SE Runtime Environment (build 1.8.0_25-b17)
Java HotSpot(TM) 64-Bit Server VM (build 25.25-b02, mixed mode)

Open PyCharm settings

# edit file with Vim
$ vim /Applications/PyCharm\ CE.app/Contents/Info.plist

Change following lines on XML

<key>JVMVersion</key>
<string>1.6*</string>

# change into
<key>JVMVersion</key>
<string>1.8*</string>

Now you can start PyCharm

Query kernel variables

Show all

$ sysctl -a

Check for 64bit compatibility

$ sysctl hw |grep 64bit

# yes is like
hw.cpu64bit_capable: 1

# no is like
hw.cpu64bit_capable: 0

Check brand and speed

$ sysctl machdep.cpu.brand_string

Check for VT-x

# check on output if VMX is visible
$ sysctl -a | grep machdep.cpu.features