This tutorial will explain how easy you implement ZAP Attack Proxy into Jenkins. Therefor we create a Freestyle job and will use the “Official OWASP ZAP Jenkins Plugin“. That you can follow and reproduce the tutorial, you need a running Jenkins instance with SSH access to it and proper system rights (OS, Jenkins).
Install ZAP Attack Proxy
Following steps needs to be done when SSH connection, to Jenkins, is established.
Note: If you don’t restart Jenkins after creating “ZAPROXY_HOME”, you will run into trouble like “java.lang.IllegalArgumentException: ZAP INSTALLATION DIRECTORY IS MISSING, PROVIDED [ null ]”
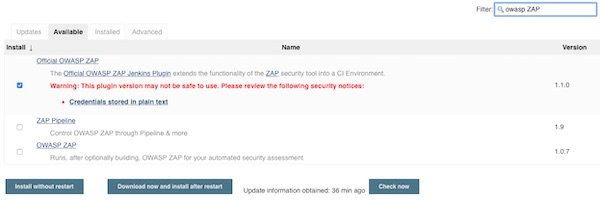
Install needed Jenkins PlugIn’s
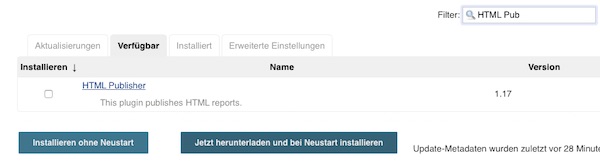
Search for “OWAS ZAP” and for “HTML Publisher” plugins.
Official OWASP ZAP HTML Publisher
Configure Jenkins Freestyle job
All what we need is there, we can start to setup a Jenkins “Freestyle project” with the name “ZAPAttackProxy”.
Jenkins Freestyle Project
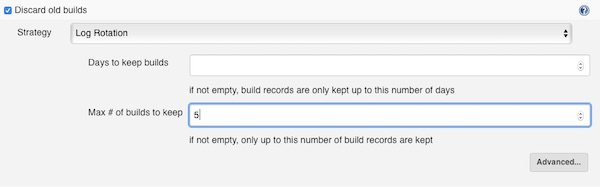
The next setting is optional… I recommend to find your own value (I go with 5 for that example).
Max # of builds to keep
On every build (Jenkins job run) the workspace should be clean. Please enable the checkbox.
Delete workspace before build starts
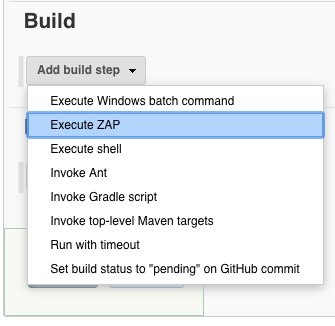
We add now the build step. This build step is available because of the PlugIn “Official OWASP ZAP“.
Build step: Execute ZAP
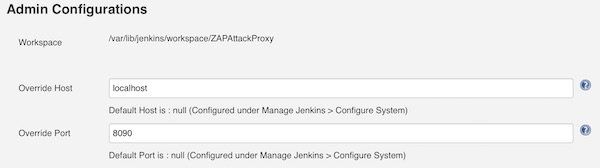
Now we have many fields to configure. We start to set the values for section “Admin Configurations”.
Admin Configuration
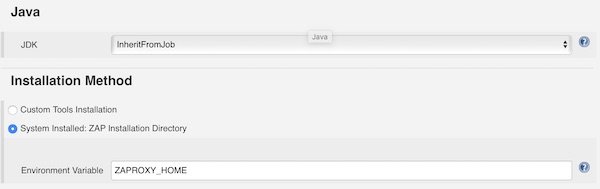
As we already installed ZAP and created the entry into /etc/environment, we can now use that variable.
Installation Method
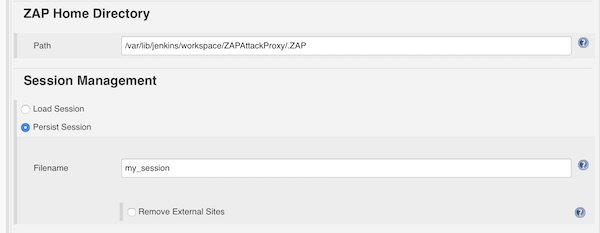
For ZAP Home Directory we add the path to the workspace and let the build create the directory “.ZAP”. For Session Management we choose “Persist Session” and give filename “my_session”.
Home Directory & Session Management
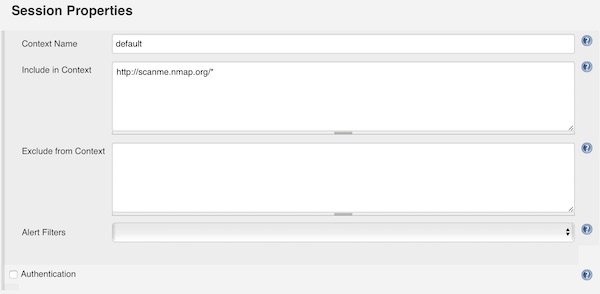
Under section “Session Properties” you add the Context Name “default” and for “Include in Context” you can add IP’s and/or Domains. For that example I choose “http://scanme.nmap.org/*”.
Session Properties
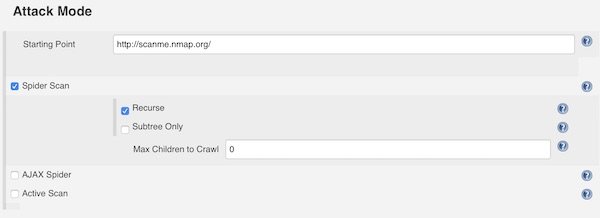
In section “Attack Method” you can choose different attack methods like Spider Scan and so on. Please set always a “Starting Point”. The settings here are self explainable.
Attack Method
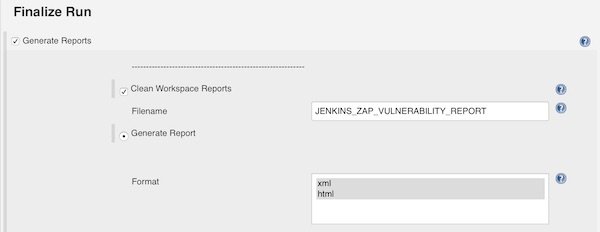
Enable checkbox “Generate Reports” in section “Finalize Run”. Now enter a filename and select “XML” and “HTML” format.
Finalize Run
Note: You can ignore the HTTP 404 error.
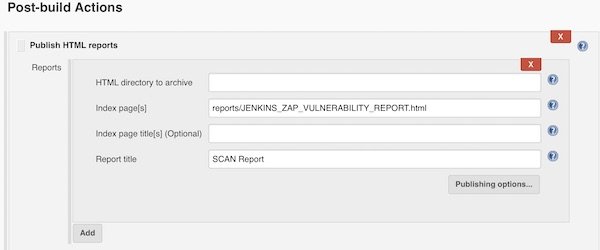
We are done! To provide on our job dashboard a link for HTML report, you can use now the HTML Publisher.
In previous tutorial I showed you how to create the environment and how to implement the build steps for Jenkins pipeline. Now I will show you to setup the deploy step.
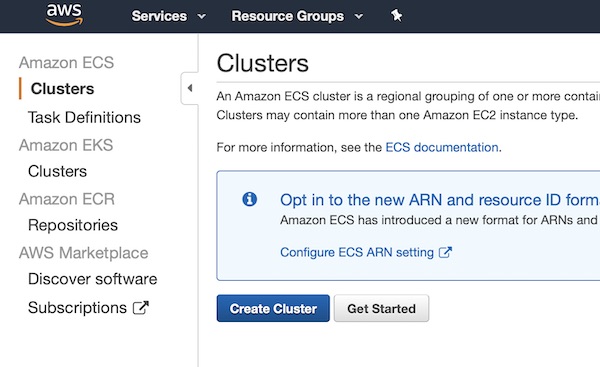
Create a very small AWS ECS cluster in region “Frankfurt” (eu-central-1). Therefore enter Amazon ECS Clusters and press button “Create Cluster”.
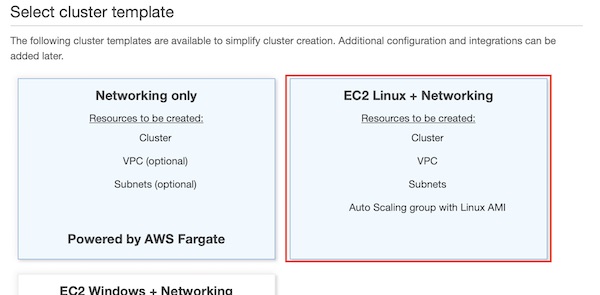
Select template “EC2 Linux + Networking” and continue to next step.
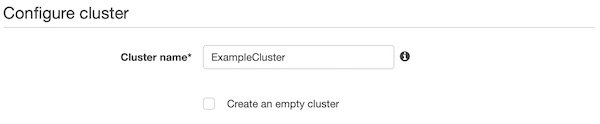
On section “Configure cluster” you give a name like “ExampleCluster”.
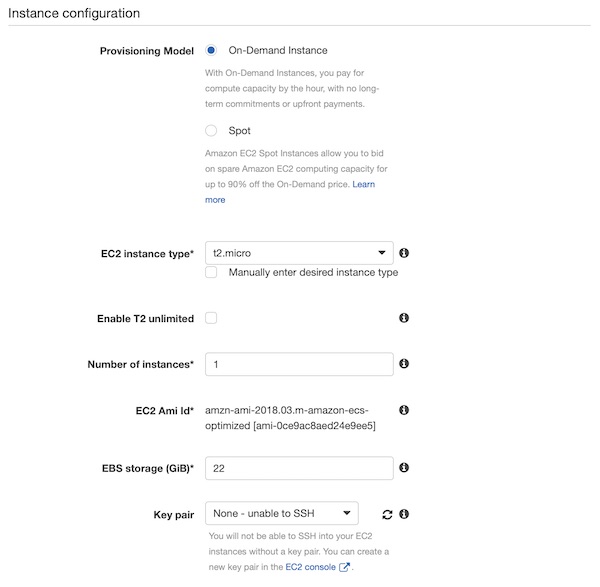
On section “Instance configuration” select “On-Demand Instance”, “t2.micro”, “1”, “22” and “None – unable to SSH”.
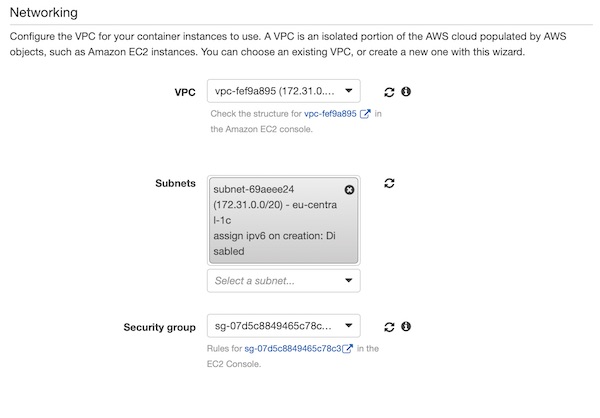
In the section “Networking” you have to be careful now. Your values will be different from mine! Under VPC, select the same value as for the EC2 Jenkins instance (I selected default VPC). Now you can choose one of the subnets. We created the security group together with the EC2 Jenkins instance, so select “ExampleSecurityGroup” here.
Okay, press button “Create” and wait till the cluster is created. The cluster creation can take a while, so please be patient.
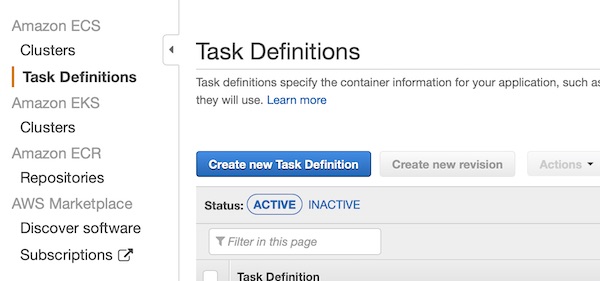
AWS ECS Task Definition
The cluster is running and the “Task Definition” can be created. So press button “Create new Task Definition”.
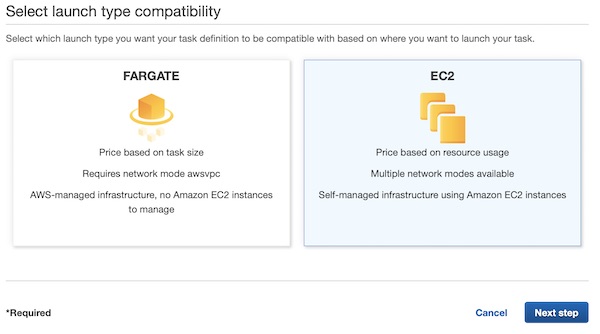
Select “EC2” on page launch type compatibility and press button “Next step”.
On section “Configure task and container definitions” set value “ExampleTask” for input field “Task Definition Name” and for “Network Mode” select “<default>”.
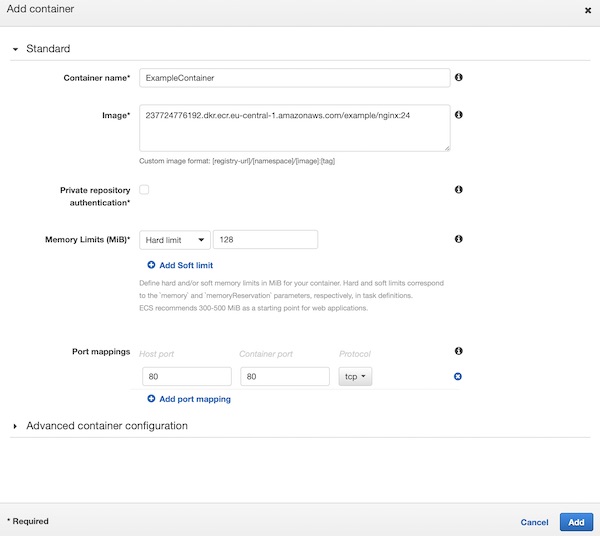
On section “Container Definition” press button “Add Container”. A new window will slide in. Here give the “Container name” value “ExampleContainer”, add under image your latest version from ECR (my latest is 24). Set values “128” for “Memory Limits (MiB)”, “80:80” for “Port mappings” and press button “Add”.
You are done with your task definition configuration, scroll down and press button “Create”.
AWS IAM
Before we can go through the next steps, we need to adjust the group policy for “PipelineExampleGroup”. You must add the “AmazonECS_FullAccess” policy. _For our example this is okay, but never use this policy in production!_
Run task on ECS cluster (via Jenkins)
Now you only need to modify two files in your repository. Replace the content of “deploy.sh” and “Jenkinsfile” with following contents.
#!/usr/bin/env bash

## shell options
set -e
set -u
set -f

## magic variables
declare ECR
declare CLUSTER
declare TASK
declare BUILD_NUMBER
declare -r -i SUCCESS=0
declare -r -i NO_ARGS=85
declare -r -i BAD_ARGS=86
declare -r -i MISSING_ARGS=87

## script functions
function usage() {
  local FILE_NAME

  FILE_NAME=$(basename "$0")

  printf "Usage: %s [options...]\n" "$FILE_NAME"
  printf " -h\tprint help\n"
  printf " -e\tset ecr repository uri\n"
  printf " -c\tset esc cluster name uri\n"
  printf " -t\tset esc task name\n"
  printf " -b\tset build number\n "
}

function no_args() {
  printf "Error: No arguments were passed\n"
  usage
  exit "$NO_ARGS"
}

function bad_args() {
  printf "Error: Wrong arguments supplied\n"
  usage
  exit "$BAD_ARGS"
}

function missing_args() {
  printf "Error: Missing argument for: %s\n" "$1"
  usage
  exit "$MISSING_ARGS"
}

## check script arguments
while getopts "he:c:t:b:" OPTION; do
  case "$OPTION" in
    h) usage
       exit "$SUCCESS";;
    e) ECR="$OPTARG";;
    c) CLUSTER="$OPTARG";;
    t) TASK="$OPTARG";;
    b) BUILD_NUMBER="$OPTARG";;
    *) bad_args;;
  esac
done

if [ "$OPTIND" -eq 1 ]; then
  no_args
fi

if [ -z "$ECR" ]; then
  missing_args '-e'
fi

if [ -z "$CLUSTER" ]; then
  missing_args '-c'
fi

if [ -z "$TASK" ]; then
  missing_args '-t'
fi

if [ -z "$BUILD_NUMBER" ]; then
  missing_args '-b'
fi

## run main function
function main() {
  local TASK_ARN
  local TASK_ID
  local ACTIVE_TASK_DEF
  local TASK_DEFINITION
  local TASK_DEF_ARN

  # list running task
  TASK_ARN="$(aws ecs list-tasks --cluster "$CLUSTER" --desired-status RUNNING --family "$TASK" | jq -r .taskArns[0])"
  TASK_ID="${TASK_ARN#*:task/}"

  # stop running task
  if [ -n "$TASK_ID" ] && [ "$TASK_ID" != "null" ]; then
    printf "INFO: Stop Task %s\n" "$TASK_ID"
    aws ecs stop-task --cluster "$CLUSTER" --task "$TASK_ID"
  fi

  # list active task definition
  ACTIVE_TASK_DEF="$(aws ecs list-task-definitions --family-prefix "$TASK" --status ACTIVE | jq -r .taskDefinitionArns[0])"

  # derigister task definition
  if [ -n "$ACTIVE_TASK_DEF" ]; then
    printf "INFO: Deregister Task Definition %s\n" "$ACTIVE_TASK_DEF"
    aws ecs deregister-task-definition --task-definition "$ACTIVE_TASK_DEF"
  fi

  # read task definition template
  TASK_DEFINITION=$(cat ./cicd/task_definition.json)

  # create new task definition file
  TASK_DEFINITION="${TASK_DEFINITION/URI/$ECR}"
  echo "${TASK_DEFINITION/NUMBER/$BUILD_NUMBER}" > ecs_task_definition.json

  # register new task definition
  TASK_DEF_ARN="$(aws ecs register-task-definition --cli-input-json file://ecs_task_definition.json | jq -r .taskDefinition.taskDefinitionArn)"

  # run task by task definition
  aws ecs run-task --task-definition "$TASK_DEF_ARN" --cluster "$CLUSTER"
}

main

# exit
exit "$SUCCESS"
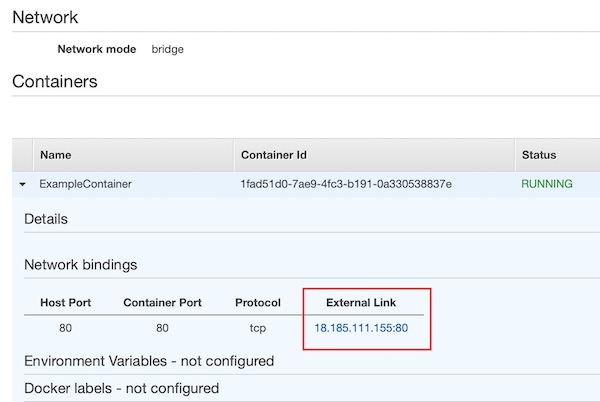
Commit your changes and wait for build trigger (or trigger manually). After successful deployment, your ECS cluster will have a running task now. On section “Container” you can see the link.
Every time when you modify files and commit them into your Git repository, the pipeline will be triggered and latest version will be visible in browser.
That’s it with this part of the series. Cu soon in next part.
This tutorial serie should enable you to create own pipelines via Jenkins on AWS. Therefore we try to catch all needed basics with AWS IAM, EC2, ECR and ECS. Some of our configurations are recommended only for learning purpose, don’t use them on production! Why? Because these lessons are for people who starts on these topics and I will try to make all steps/configuration as easy as possible without focus on security. In this part we will create the environment and setup the “build step”.
Preconditions
AWS account (eq. free tier)
Git account (eq. GitLab, Bitbucket, GitHub, etc.)
AWS IAM
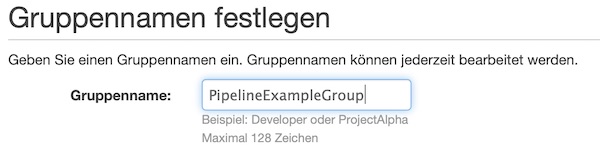
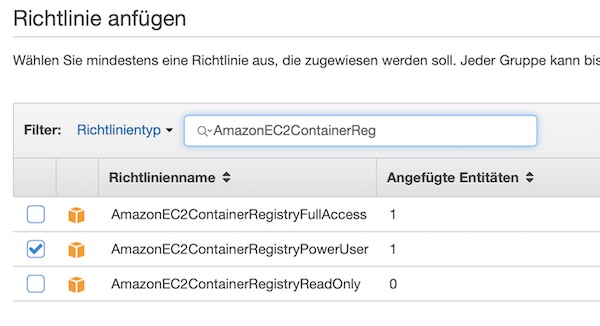
The first preparation you do on AWS IAM Management Console. Here you create and configure a new group. The benefit of this group is that you can reconfigure the policies for assigned users easily at anytime. Please name the group “PipelineExampleGroup”.
Now search for EC2 Container Registry policies and enable checkbox for “AmazonEC2ContainerRegistryPowerUser”. For our example this policy is enough, but for production please don’t do that!
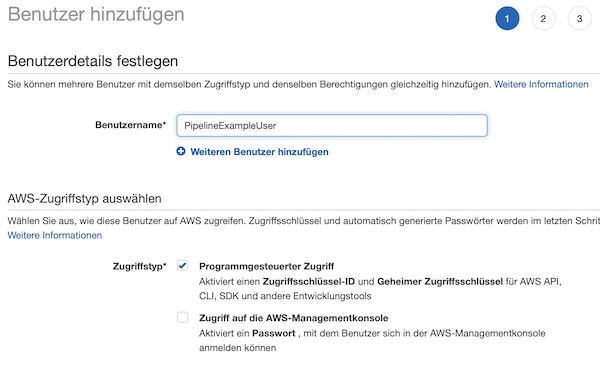
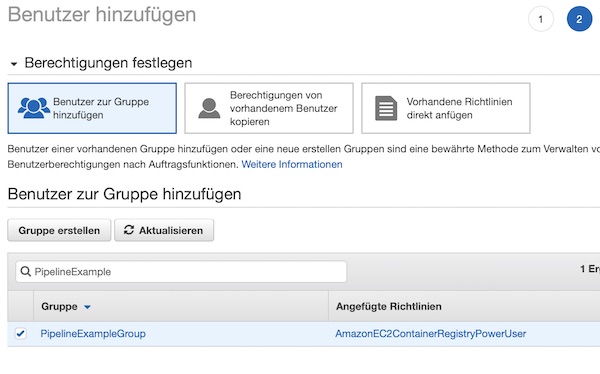
After the group is created, a user needs to be assigned to this group. Name the user “PipelineExampleUser”. Please enable checkbox “Programmatic access” for this user.
Assign the user to group.
Before you finish the process, please choose Download .csv and then save the file to a safe location.
AWS Jenkins EC2 Instance
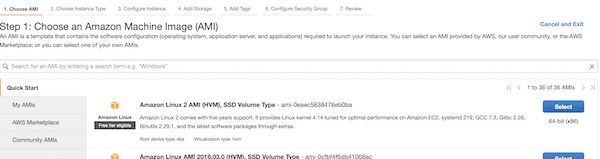
Now you can launch our EC2 instance. Do this on region “Frankfurt” (eu-central-1). Of course you can choose any other region, but please remember your choice later. At very first step select the template “Amazon Linux 2 AMI (HVM), SSD Volume Type”.
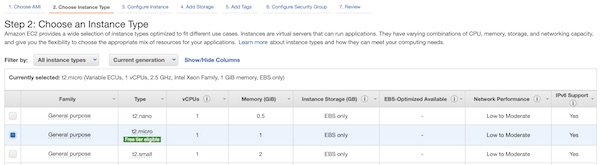
The instance type “t2.micro” is enough for our example. For production you will need something else – depending to your needs.
Now you need to be a little bit careful. On Instance Details step please select “Enable” for “Auto-assign Public IP” and “Stop” for “Shutdown Behavior”. For all other values the defaults should be fine. I select my default VPC and “No preference…” for Subnet.
15 Gb disk space are fine. For production you need to estimate differently.
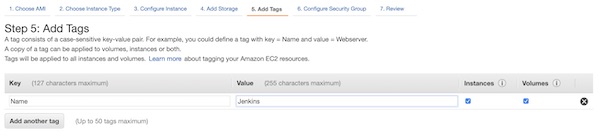
With the tag you will have it easier to identify the instance later on console view. Enter values “Name” for “Key” and “Jenkins” for “Value”.
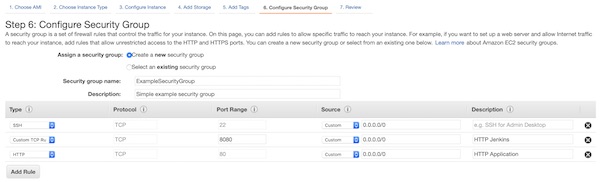
Create a new security group with name “ExampleSecurityGroup” and allow ports 22, 80 and 8080 (IPv4 only). You can change the configuration at any time later. On a production environment you should use other ports like 443 and IP restrictions.
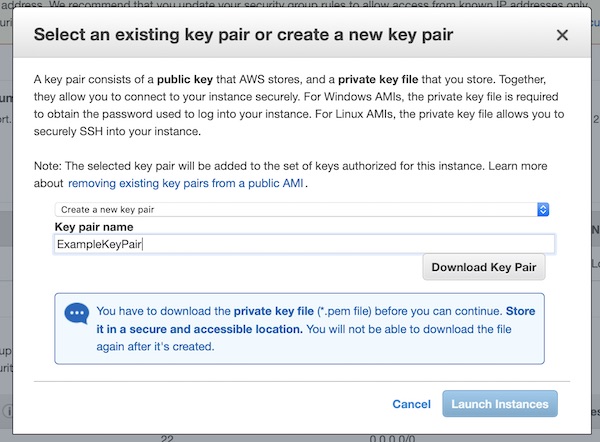
Create a new key pair with name “ExampleKeyPair”. Don’t forget to save the key (“Download Key Pair”) and press “Launch Instances”!
Install and run Jenkins
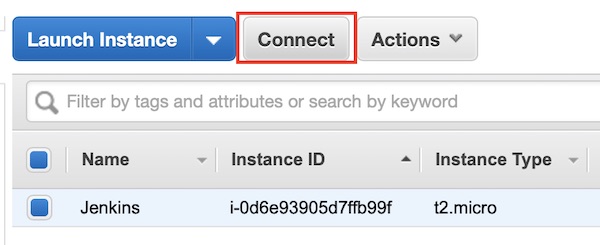
The EC2 instance is running and you can connect via SSH to start all needed installations and configurations. Attention: Your Public IP/DNS will be different (also after every stop/start), via button “Connect” you can easily figure out your configuration. I will just use the term “<EC2 IP|DNS>” in my description.
# move SSH keys (my are downloaded under Downloads)
$ mv ~/Downloads/ExampleKeyPair.pem.txt ~/.ssh/ExampleKeyPair.pem

# change permissions
$ chmod 0400 ~/.ssh/ExampleKeyPair.pem

# start ssh connection
$ ssh -i ~/.ssh/ExampleKeyPair.pem ec2-user@<EC2 IP|DNS>

# change to root user
$ sudo su -

# update system
$ yum update -y

# add latest Jenkins repository
$ wget -O /etc /yum.repos.d/jenkins.repo http://pkg.jenkins.io/redhat/jenkins.repo

# add key from Jenkins
$ rpm --import https://pkg.jenkins.io/redhat/jenkins.io.key

# install docker-ce
$ amazon-linux-extras install -y docker

# install java, git, jenkins and jq
$ yum install -y java git jenkins jq

# add jenkins to docker group
$ usermod -a -G docker jenkins

# enable and start docker
$ systemctl enable docker && systemctl start docker

# enable and start jenkins
$ systemctl enable jenkins && systemctl start jenkins

# get initial password
$ cat /var/lib/jenkins/secrets/initialAdminPassword
Note: I have a space after etc, because of security settings of my provider.
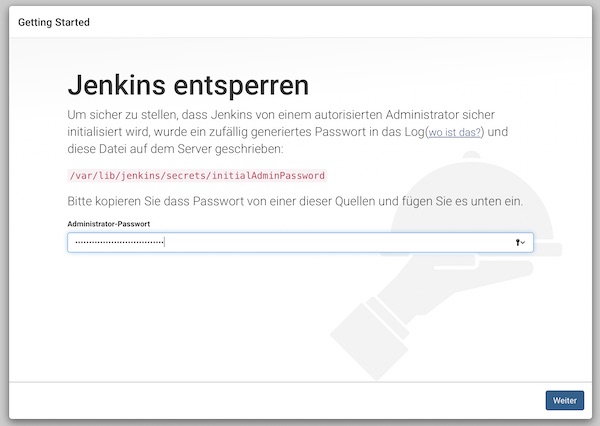
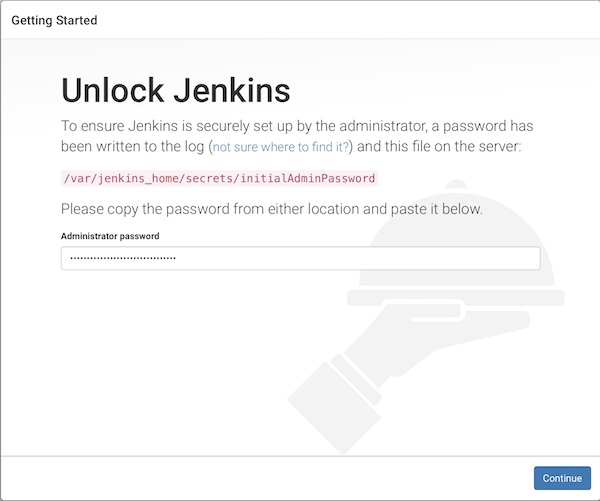
Do not close the SSH connection yet. Start your browser and following there the Jenkins installation steps. The URL is similar to your SSH connection – http://<EC2 IP|DNS>:8080. You should see the following screen and paste the initial password there.
On next screen press button “Install suggested plugins” and wait for the screen to create administrator account. Fill in your credentials and finish the installation steps. The remaining configurations (on browser) will be made later.
AWS ECR
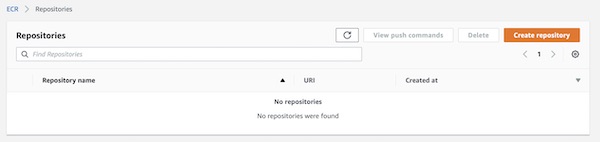
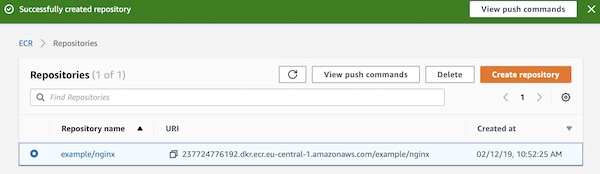
Before you can push images to ECR, you need to create a new repository. On the ECR page, choose button “Create repository”. Your AWS ECR console screen could look a little bit different.
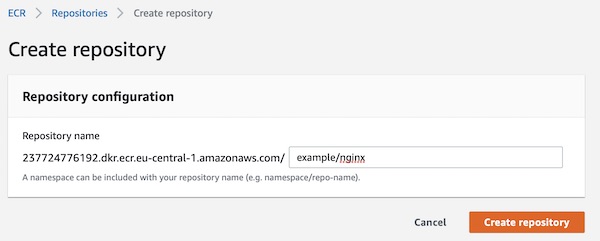
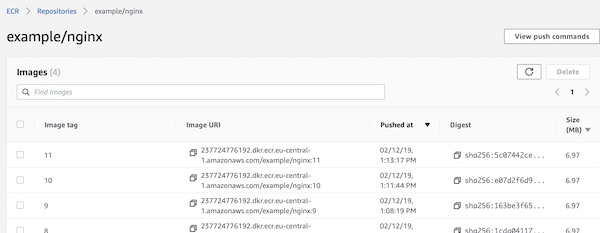
Give a repository name “example/nginx” and press button “Create repository”.
Done, your ECR repository is already created. You can see on overview page all needed informations like Repository name and URI. Your repository URI will be different to my. I will just use the term “<ECR URI>” in my description.
Okay, now enable user jenkins to connect to ECR. Go back to terminal and execute following steps. You need now the credentials from downloaded csv file for “PipelineExampleUser”.
# change to jenkins user
$ su -s /bin/bash jenkins

# show docker info (optional)
$ docker info

# configure AWS-CLI options
$ aws configure
...
AWS Access Key ID [None]: <credentials.csv>
AWS Secret Access Key [None]: <credentials.csv>
Default region name [None]: eu-central-1
Default output format [None]: json
...

# list repositories in registry (optional)
$ aws ecr describe-repositories
Git Repository
I assume that you are familiar with Git. You must now create a Git Repository and create the following folders and files there. I will use my own private GitLab repository.
# show local project tree (optional)
$ tree ~/<path to your project>
|____index.html
|____Dockerfile
|____.gitignore
|____cicd
| |____build.sh
| |____Jenkinsfile
| |____deploy.sh
| |____task_definition.json
| |____test.sh
|____dev_credentials
| |____credentials.csv
|____.git
Note: Please set permission rights for shell scripts like $ chmod +x build.sh deploy.sh test.sh
#!/usr/bin/env bash

## shell options
set -e
set -u
set -f

## magic variables
declare REPONAME
declare ECR
declare REGION
declare BUILD_NUMBER
declare -r -i SUCCESS=0
declare -r -i NO_ARGS=85
declare -r -i BAD_ARGS=86
declare -r -i MISSING_ARGS=87

## script functions
function usage() {
  local FILE_NAME

  FILE_NAME=$(basename "$0")

  printf "Usage: %s [options...]\n" "$FILE_NAME"
  printf " -h\tprint help\n"
  printf " -n\tset ecr repository name\n"
  printf " -e\tset ecr repository uri\n"
  printf " -r\tset aws region\n"
  printf " -b\tset build number\n "
}

function no_args() {
  printf "Error: No arguments were passed\n"
  usage
  exit "$NO_ARGS"
}

function bad_args() {
  printf "Error: Wrong arguments supplied\n"
  usage
  exit "$BAD_ARGS"
}

function missing_args() {
  printf "Error: Missing argument for: %s\n" "$1"
  usage
  exit "$MISSING_ARGS"
}

## check script arguments
while getopts "hn:e:r:b:" OPTION; do
  case "$OPTION" in
    h) usage
       exit "$SUCCESS";;
    n) REPONAME="$OPTARG";;
    e) ECR="$OPTARG";;
    r) REGION="$OPTARG";;
    b) BUILD_NUMBER="$OPTARG";;
    *) bad_args;;
  esac
done

if [ "$OPTIND" -eq 1 ]; then
  no_args
fi

if [ -z "$REPONAME" ]; then
  missing_args '-n'
fi

if [ -z "$ECR" ]; then
  missing_args '-e'
fi

if [ -z "$REGION" ]; then
  missing_args '-r'
fi

if [ -z "$BUILD_NUMBER" ]; then
  missing_args '-b'
fi

## run main function
function main() {
  local LAST_ID

  # delete all previous image(s)
  LAST_ID=$(docker images -q "$REPONAME")
  if [ -n "$LAST_ID" ]; then
    docker rmi -f "$LAST_ID"
  fi

  # build new image
  docker build -t "$REPONAME:$BUILD_NUMBER" --pull=true .

  # tag image for AWS ECR
  docker tag "$REPONAME:$BUILD_NUMBER" "$ECR":"$BUILD_NUMBER"

  # basic auth into ECR
  $(aws ecr get-login --no-include-email --region "$REGION")

  # push image to AWS ECR
  docker push "$ECR":"$BUILD_NUMBER"
}

main

# exit
exit "$SUCCESS"
Inside folder “dev_credentials” I store the credentials.csv from AWS. The content of this folder will be only on my local machine, because via .gitignore I exclude the folder and files from git.
Jenkins job configuration
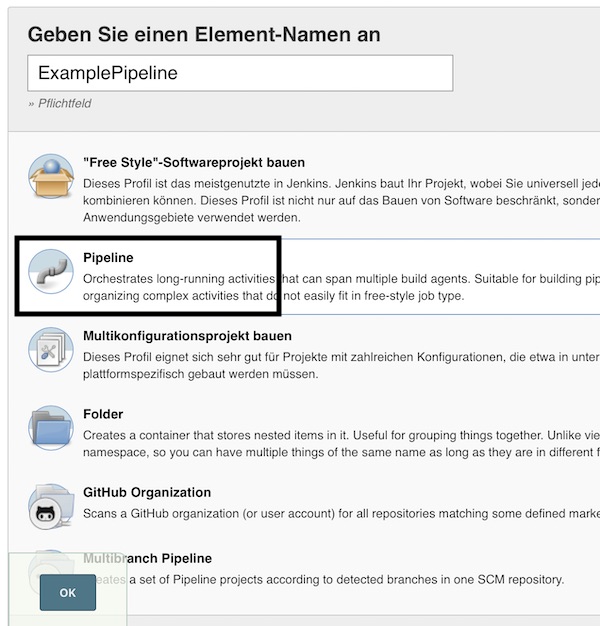
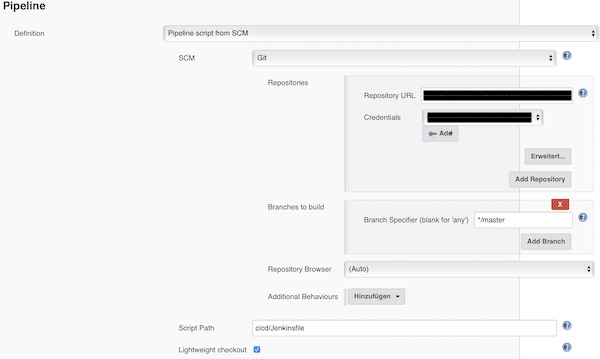
I will not use this tutorial to explain security topics for Jenkins, so we start directly with the configuration of the job (resp. project). On main page press now button “New item” or link “create new jobs”. Insert name “ExamplePipeline”, select “Pipeline” and press button “OK”.
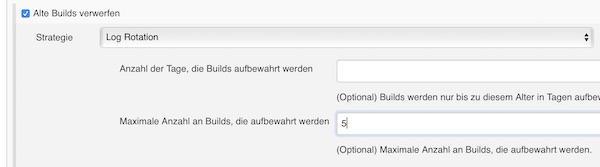
To save some disk space enable checkbox discard old builds (5 builds are enough).
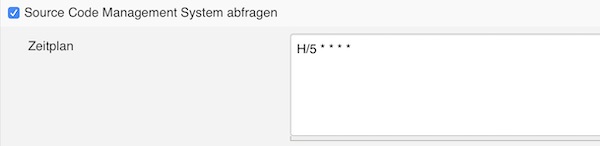
Normally you would create a webhook to trigger the build after commit, but our EC2 instance does change the public IP/DNS on every stop/start. That’s why here we check the revision changes every 5 minutes on git and trigger the job if something has changed.
Add the repository (may credentials are needed), configure the branch and Jenkinsfile path.
Press button “save”, _cross fingers_ and trigger manual the build. If you did nothing wrong, the job will run without issues and the ECR contains your images (depending how often you trigger the build).
The next part of this tutorial series will be about deployment to ECS.
While surfing the internet I stumbled across Sitespeed.io. It’s a amazing collection of Open Source Tools, which make performance measuring for developers and testers super easy. I tried it out and was immediately impressed. Here’s a little tutorial on how to use Jenkins and Sitespeed.
When Jenkins is ready (restarted), install the HTML Publisher PlugIn (no restart after installation of plugin required).
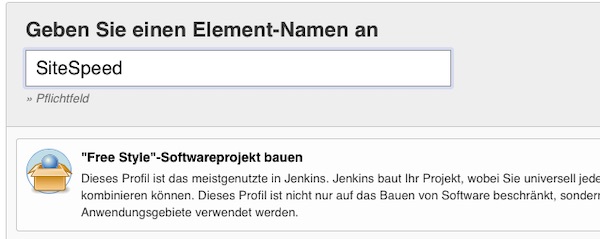
Create a new free-style project named SiteSpeed.
Attention: You need to specify later the absolute path to the local directory /target/workspace/SiteSpeed. If you do not know how, press save and start the build without any job information (empty job configuration) and follow the optional instructions.
# change directory (optional)
$ cd ~/Projects/Sitespeed/target/workspace/SiteSpeed

# get absolute path (optional)
$ pwd
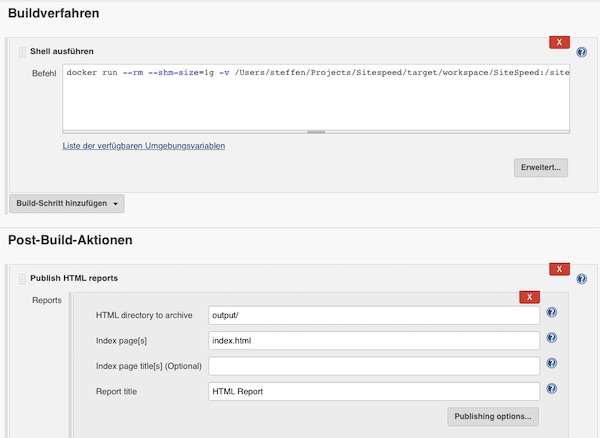
In my case the path is: “/Users/steffen/Projects/Sitespeed/target/workspace/SiteSpeed”. Under job configuration section “Build” enable “Execute shell” and paste following command.
Via Post-Build-Action: Publish HTML reports you can enter the report very simple from the job project page.
Save everything and run the job. After a short time you can look at the HTML report. See “Pages” > “https://www.sitespeed.io/” for screenshots, HAR and video files. On the website of sitespeed.io is a very detailed documentation and many more examples. Have fun!
This Tutorial is about some simple PHP QA Tools and Docker Jenkins. I will show near how to install PHP and PHP Composer in an Jenkins Alpine Linux Docker inclusive some needed Jenkins PlugIns.
Note
If you have an running Docker Container already which you cannot stop, you can install needed packages directly via:
# list containers (optional)
$ docker ps -a

# access running container as root
$ docker exec -u 0 -it <Container Name> sh

# install packages and exit container
...
Now you can use the same commented commands as provided via Dockerfile. Otherwise follow next steps.
Let’s go
# create new project
$ mkdir -p ~/Projects/DockerJenkins && cd ~/Projects/DockerJenkins/

# create Dockerfile and plugins.txt
$ touch Dockerfile plugins.xt

# modify Dockerfile
$ vim Dockerfile

# modify plugins.txt
$ vim plugins.txt
FROM jenkins/jenkins:lts-alpine

USER root

RUN apk update && apk upgrade

# install needed libary packages
RUN apk --no-cache add libssh2 libpng freetype libjpeg-turbo libgcc \
libxml2 libstdc++ icu-libs libltdl libmcrypt

# install needed PHP packages
RUN apk --no-cache add php7 php7-fpm php7-opcache php7-gd php7-pdo_mysql \
php7-mysqli php7-mysqlnd php7-mysqli php7-zlib php7-curl php7-phar \
php7-iconv php7-pear php7-xml php7-pdo php7-ctype php7-mbstring \
php7-soap php7-intl php7-bcmath php7-dom php7-xmlreader php7-openssl \
php7-tokenizer php7-simplexml php7-json

# Download and install composer installer
RUN php -r "copy('https://getcomposer.org/installer', 'composer-setup.php');"
RUN php -r "if (hash_file('SHA384', 'composer-setup.php') === '544e09ee996cdf60ece3804abc52599c22b1f40f4323403c44d44fdfdd586475ca9813a858088ffbc1f233e9b180f061') { echo 'Installer verified'; } else { echo 'Installer corrupt'; unlink('composer-setup.php'); } echo PHP_EOL;"
RUN php composer-setup.php
RUN mv composer.phar /usr/local/bin/composer
RUN chmod +x /usr/local/bin/composer
RUN rm -f composer-setup.php

USER jenkins

# install plugins from plugins.txt
COPY plugins.txt /usr/share/jenkins/ref/plugins.txt
RUN /usr/local/bin/install-plugins.sh < /usr/share/jenkins/ref/plugins.txt
That was it! Now build the image, start and work with jenkins.
# build image from Dockerfile
$ docker build -t lupin/jenkins:lts-alpine .

# list images (optional)
$ docker images

# start container
$ docker run --name JenkinsPHP -p 8080:8080 lupin/jenkins:lts-alpine
Test
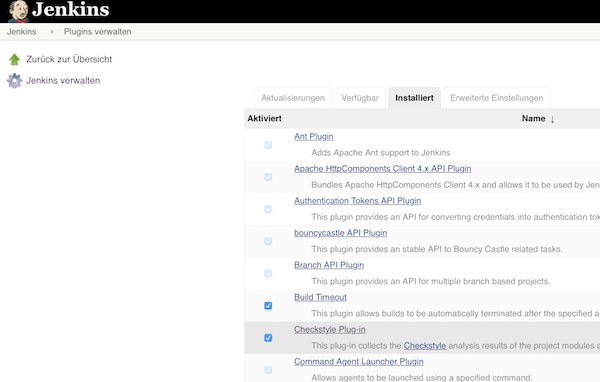
After starting, configuring and logging, you can see the already installed plugins in the Jenkins PlugIns!
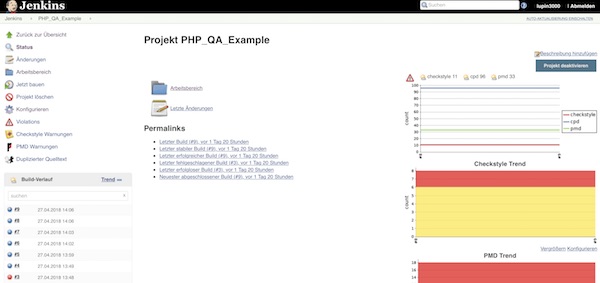
To test, you can create a simple freestyle job. Here you configure the repository, build steps and post-build actions. After a few runs, the results should be visible on the project side.
Today an basic introduction to Jenkins, InfluxDB and Grafana. Docker is used to save some time. Okay,… let’s start.
Preparation
# create project and change directory
$ mkdir ~/Projects/JIG/influxdb && cd ~/Projects/JIG/

# download official jenkins image (latest)
$ docker pull jenkins

# download official influxdb image (latest)
$ docker pull influxdb

# download official grafana image (latest)
$ docker pull grafana/grafana

# list docker images
$ docker images
...
REPOSITORY          TAG                 IMAGE ID            CREATED             SIZE
jenkins             latest              59b08e8f6e37        4 days ago          704 MB
grafana/grafana     latest              2cdb407c0fa4        7 days ago          286 MB
influxdb            latest              fad81160f2de        13 days ago         224 MB
...
Jenkins preparation
# start Jenkins
$ docker run --name jenkins -p 8080:8080 jenkins

# copy password from cli
...
*************************************************************

Jenkins initial setup is required. An admin user has been created and a password generated.
Please use the following password to proceed to installation:

b49ffa5749724d61b43d3a159b181133
...
Now open your favorite browser with URL http://localhost:8080 and unlook Jenkins with following steps.
unlook with password from cli
install suggested plugins
create your admin user
start using jenkins
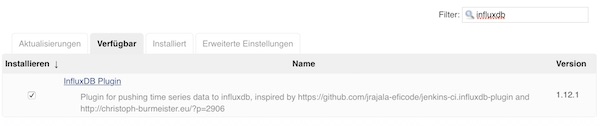
Next, the InfluxDB plug-in must be installed.
InfluxDB preparation
# start InfluxDB
$ docker run --name influxdb -p 8086:8086 -v $PWD/influxdb:/var/lib/influxdb influxdb

# check current configuration (optional)
$ docker exec -i influxdb influxd config

# create new user
$ curl -G http://localhost:8086/query --data-urlencode "q=CREATE USER jenkins WITH PASSWORD 'password123' WITH ALL PRIVILEGES"

# create database for jenkins
$ curl -G http://localhost:8086/query -u jenkins:password123 --data-urlencode "q=CREATE DATABASE jenkins_db"

# show users (optional)
$ curl -G http://localhost:8086/query -u jenkins:password123 --data-urlencode "q=SHOW USERS"
...
{"results":[{"statement_id":0,"series":[{"columns":["user","admin"],"values":[["jenkins",true]]}]}]}
...

# show databases (optional)
$ curl -G http://localhost:8086/query -u jenkins:password123 --data-urlencode "q=SHOW DATABASES"
...
{"results":[{"statement_id":0,"series":[{"name":"databases","columns":["name"],"values":[["_internal"],["jenkins_db"]]}]}]}
...

# show measurements
$ curl -G http://localhost:8086/query -u jenkins:password123 --data-urlencode "db=jenkins_db" --data-urlencode "q=SHOW MEASUREMENTS"
...
{"results":[{"statement_id":0}]}
...
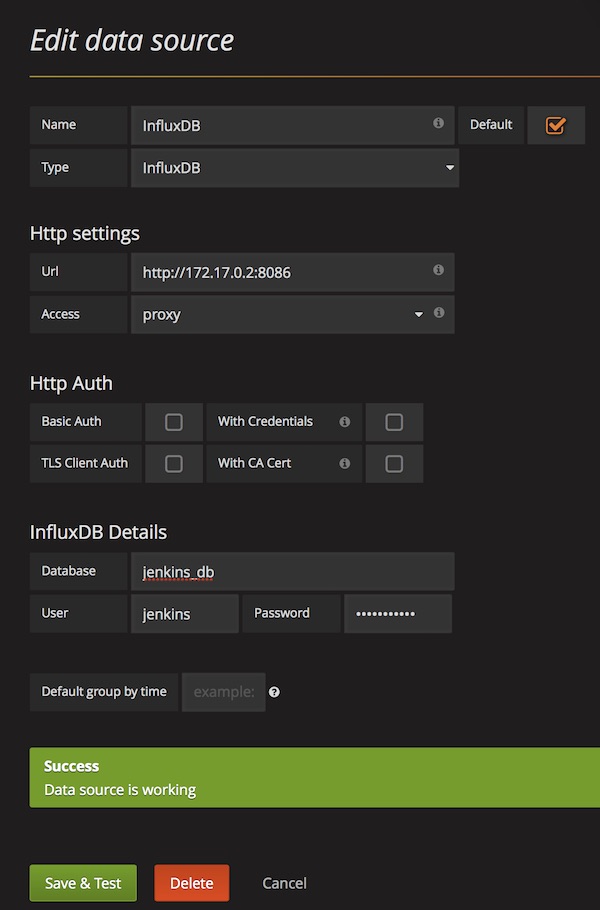
Connect Jenkins with InfluxDB
# start jenkins container (if stopped)
$ docker start jenkins

# show ip of influxdb container
$ docker inspect --format '{{ .NetworkSettings.IPAddress }}' influxdb
...
172.17.0.2
...
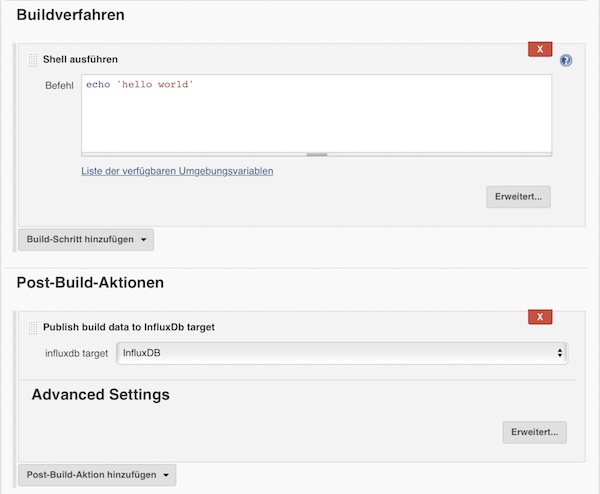
Add new InfluxDB target on Jenkins
Save and create a new freestyle job. For example with following configuration.
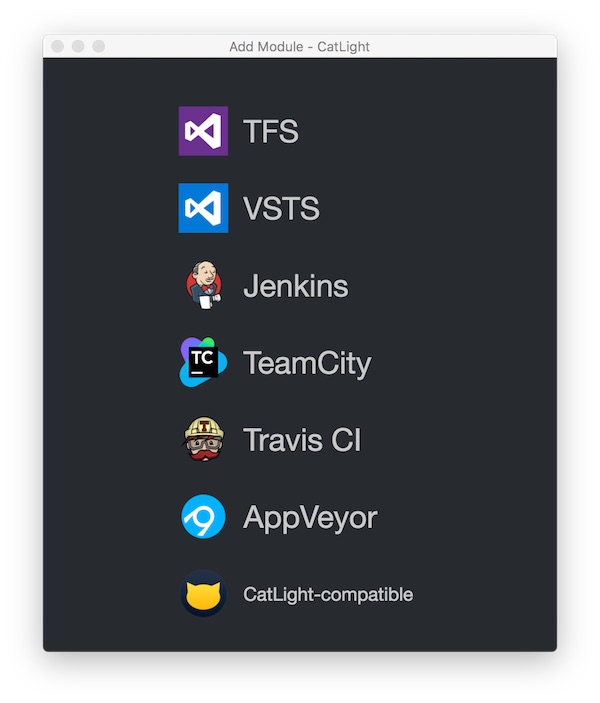
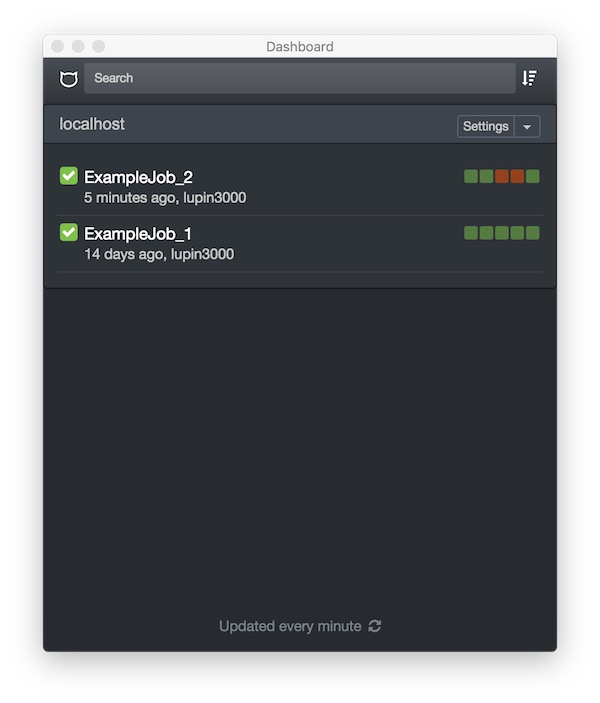
CatLight is the the perfect app if you would like to know the current status of your continuous delivery pipelines, tasks and bugs. Without looking on E-Mails or visit build servers you know when attention is needed. It’s available for Debian, Ubuntu, Windows and MacOS.
With Bats (Bash Automated Testing System) it is easy to automate Bash and command line testing. It is an awesome open source framework written in Bash by Sam Stephenson. In combination with Jenkins you are able to use it via build.
# create new project
$ mkdir ~/Project/Bats && cd ~/Projects/Bats

# create Bats file
$ vim test.bats

# execute test
$ bats test.bats
...
✓ Simple check for date command
✓ Check for current user
- Test for something that does not exist (skipped: This test is skipped)
✓ Test for something that should not exist
✓ Check for individual line of output

5 tests, 0 failures, 1 skipped

# execute test with TAP output
$ bats --tap test.bats
...
1..5
ok 1 Simple check for date command
ok 2 Check for current user
ok 3 # skip (This test is skipped) Test for something that does not exist
ok 4 Test for something that should not exist
ok 5 Check for individual line of output
Example Bats file
#!/usr/bin/env bats

@test "Simple check for date command" {
  date
}

@test "Check for current user" {
  result="$(whoami)"
  [ "$result" == "lupin" ]
}

@test "Test for something that does not exist" {
  skip "This test is skipped"
  ls /test/no/test
}

@test "Test for something that should not exist" {
  run ls /test/no
  [ "$status" -eq 1 ]
}

@test "Check for individual line of output" {
  run ping -c 1 google.com
  [ "$status" -eq 0 ]
  [ "${lines[3]}" = "1 packets transmitted, 1 packets received, 0.0% packet loss" ]
}
Note: There is much more! Read documentation and have a look on projects which are using it!