Automate Bash testing with Bats

With Bats (Bash Automated Testing System) it is easy to automate Bash and command line testing. It is an awesome open source framework written in Bash by Sam Stephenson. In combination with Jenkins you are able to use it via build.

Installation

# clone from github
$ git clone https://github.com/sstephenson/bats.git

# change directory
$ cd bats

# start installation
$ sudo ./install.sh /usr/local

Usage

# create new project
$ mkdir ~/Project/Bats && cd ~/Projects/Bats

# create Bats file
$ vim test.bats

# execute test
$ bats test.bats
...
✓ Simple check for date command
✓ Check for current user
- Test for something that does not exist (skipped: This test is skipped)
✓ Test for something that should not exist
✓ Check for individual line of output

5 tests, 0 failures, 1 skipped

# execute test with TAP output
$ bats --tap test.bats
...
1..5
ok 1 Simple check for date command
ok 2 Check for current user
ok 3 # skip (This test is skipped) Test for something that does not exist
ok 4 Test for something that should not exist
ok 5 Check for individual line of output

Example Bats file

#!/usr/bin/env bats

@test "Simple check for date command" {
  date
}

@test "Check for current user" {
  result="$(whoami)"
  [ "$result" == "lupin" ]
}

@test "Test for something that does not exist" {
  skip "This test is skipped"
  ls /test/no/test
}

@test "Test for something that should not exist" {
  run ls /test/no
  [ "$status" -eq 1 ]
}

@test "Check for individual line of output" {
  run ping -c 1 google.com
  [ "$status" -eq 0 ]
  [ "${lines[3]}" = "1 packets transmitted, 1 packets received, 0.0% packet loss" ]
}

Note: There is much more! Read documentation and have a look on projects which are using it!

Docker Audit

This tutorial shows software testers some simple examples for Docker audit. Here now we will make some audits on Docker environment and Dockerfiles.

Docker environment audit

# check Docker environment with docker-bench-security
$ docker run -it --net host --pid host --cap-add audit_control \
    -v /var/lib:/var/lib \
    -v /var/run/docker.sock:/var/run/docker.sock \
    -v /usr/lib/systemd:/usr/lib/systemd \
    -v /etc :/etc --label docker_bench_security \
    docker/docker-bench-security

Note: 1st the space after /etc is only because of security settings from my provider! 2nd create os specific docker-bench-security (example CentOS)

Dockerfile audit

# install on RedHat, CentOS, Fedora ...
$ yum install epel-release && yum install lynis

# install on Debian, Ubuntu ...
$ apt-get install lynis

# Suse
$ zypper install lynis

# install via Homebrew
$ brew install lynis

# audit Dockerfile
$ lynis audit dockerfile Dockerfile

# check log file
$ cat /var/log/lynis.log
$ cat /var/log/lynis-report.dat

Lint Dockerfile with Haskell Dockerfile Linter

# simply run Container again Dockerfile
$ docker run --rm -i lukasmartinelli/hadolint < Dockerfile

Minimal CentOS 7 base box with Packer

The title says it, … this tutorial is about Packer, CentOS 7 and Vagrant. After that, you should be able to integrate the creation of Vagrant base boxes into your Build-server. There is on small exception to other – the VirtualBox Guest Additions will be provided via PlugIn! Because other users could may have different versions.

Preconditions

Project structure

$ tree
.
├── Makefile
├── packer.json
├── src
│   ├── Vagrantfile.tpl
│   └── ks.cfg
└── target

File contents

CURRENT_DIR := $(shell pwd)

.PHONY: clean

help:
	@echo "Run make with:"
	@echo " > validate       ...to run packer validation"
	@echo " > build          ...to start packer build"
	@echo " > up             ...to start vagrant"
	@echo " > reload         ...to reload vagrant"
	@echo " > ssh            ...to ssh into vm"
	@echo " > clean          ...to cleanup for next build"

validate:
	packer validate $(CURRENT_DIR)/packer.json

build:
	packer build $(CURRENT_DIR)/packer.json
	cp $(CURRENT_DIR)/src/Vagrantfile.tpl $(CURRENT_DIR)/target/Vagrantfile

up:
	vagrant box add packer/centos7 $(CURRENT_DIR)/target/virtualbox-CentOS-7.box
	cd $(CURRENT_DIR)/target && vagrant up

reload:
	cd $(CURRENT_DIR)/target && vagrant reload

ssh:
	cd $(CURRENT_DIR)/target && vagrant ssh

clean:
	cd $(CURRENT_DIR)/target && vagrant halt
	cd $(CURRENT_DIR)/target && vagrant destroy -f
	rm -fr $(CURRENT_DIR)/builds/
	rm -fr $(CURRENT_DIR)/target/* $(CURRENT_DIR)/target/.* 2> /dev/null
	vagrant box remove packer/centos7
{
  "variables": {
    "file": "http://linuxsoft.cern.ch/centos/7/isos/x86_64/CentOS-7-x86_64-Minimal-1511.iso",
    "checksum": "88c0437f0a14c6e2c94426df9d43cd67",
    "type": "md5",
    "non_gui": "false"
  },
  "builders": [
    {
      "type": "virtualbox-iso",
      "iso_url": "{{ user `file` }}",
      "iso_checksum": "{{ user `checksum` }}",
      "iso_checksum_type": "md5",
      "headless": "{{ user `non_gui` }}",
      "output_directory": "builds",
      "vm_name": "CentOS7_to_Vagrant",
      "guest_os_type": "RedHat_64",
      "disk_size": "10240",
      "vboxmanage": [
        ["modifyvm", "{{.Name}}", "--memory", "2048"],
        ["modifyvm", "{{.Name}}", "--cpus", "2"],
        ["modifyvm", "{{.Name}}", "--audio", "none"],
        ["modifyvm", "{{.Name}}", "--usb", "off"]
      ],
      "http_directory": "src",
      "boot_wait": "5s",
      "boot_command": [
        "<tab> text ks=http://{{ .HTTPIP }}:{{ .HTTPPort }}/ks.cfg<enter><wait>"
      ],
      "ssh_username": "vagrant",
      "ssh_password": "vagrant",
      "ssh_port": 22,
      "ssh_wait_timeout": "600s",
      "guest_additions_path": "disable",
      "shutdown_command": "sudo shutdown -h 0"
    }
  ],
  "provisioners": [
    {
      "type": "shell",
      "inline": [
        "sudo yum update -y",
        "sudo rm -rf /tmp/*",
        "sudo rm -f /var/log/wtmp /var/log/btmp ",
        "sudo yum clean all",
        "sudo rm -rf /var/cache/* /usr/share/doc/*",
        "rm -f .bash_history",
        "history -c"
      ]
    }
  ],
  "post-processors": [
    {
      "type": "vagrant",
      "keep_input_artifact": false,
      "compression_level": 9,
      "output": "target/{{.Provider}}-CentOS-7.box"
    }
  ]
}
install
cdrom

lang en_US.UTF-8
keyboard us
timezone UTC

network --bootproto=dhcp
firewall --disabled

rootpw --plaintext packer
user --name=vagrant --password=vagrant
auth --enableshadow --passalgo=sha512 --kickstart
selinux --permissive

text
skipx

clearpart --all --initlabel
zerombr
autopart
bootloader --location=mbr

firstboot --disable
reboot

%packages --instLangs=en_US.utf8 --nobase --ignoremissing --excludedocs
@^minimal
@core

-aic94xx-firmware
-atmel-firmware
-b43-openfwwf
-bfa-firmware
-ipw2100-firmware
-ipw2200-firmware
-ivtv-firmware
-iwl100-firmware
-iwl105-firmware
-iwl135-firmware
-iwl1000-firmware
-iwl2000-firmware
-iwl2030-firmware
-iwl3160-firmware
-iwl3945-firmware
-iwl4965-firmware
-iwl5000-firmware
-iwl5150-firmware
-iwl6000-firmware
-iwl6000g2a-firmware
-iwl6000g2b-firmware
-iwl6050-firmware
-iwl7260-firmware
-libertas-usb8388-firmware
-ql2100-firmware
-ql2200-firmware
-ql23xx-firmware
-ql2400-firmware
-ql2500-firmware
-rt61pci-firmware
-rt73usb-firmware
-xorg-x11-drv-ati-firmware
-zd1211-firmware
%end

%post --log=/root/ks.log
SEE NEXT PICTURE!!!! The security settings of my provider does not allow this content!
%end

ks content

# -*- mode: ruby -*-

Vagrant.require_version ">= 1.8.1"

Vagrant.configure("2") do |config|

  config.vm.box = "packer/centos7"
  config.vm.box_url = "target/virtualbox-CentOS-7.box"
  config.vm.synced_folder ".", "/vagrant", disabled: true

  config.vm.provider "virtualbox" do |vb|
    vb.name = "CentOS-7"
    vb.cpus = "2"
    vb.memory = "2048"
    vb.gui = false
  end

end

Usage

# run packer build (via make)
$ make build

# run vagrant up (via make)
$ make run

# run vagrant reload (via make)
$ make reload

# run vagrant ssh (via make)
$ make ssh

# destroy everything (via make)
$ make clean

Create simple CentOS 7 Virtualbox with Packer

As a software tester you need many virtual machines, the creating can be very time consuming. Of course tools like Vagrant helps a lot but the creation for BaseBoxes starts most with installation from ISO`s. Exact here helps Packer! This tutorial shows an example for CentOS7 – VirtualBox.

Preconditions

Preparation

1st you need to install Packer. The following example shows one way that works well with Mac OS X (El Capitan).

# change into Downloads
$ cd ~/Downloads/

# download packer archive (Mac OS X)
$ curl -O https://releases.hashicorp.com/packer/0.10.1/packer_0.10.1_darwin_amd64.zip

# unzip packer archive
$ unzip packer_0.10.1_darwin_amd64.zip

# move packer binary
$ sudo mv packer /usr/local/bin

# check packer version
$ packer --version

Other OS? Take a look here.

Instructions

# create new project
$ mkdir ~/Projects/PackerExample && cd ~/Projects/PackerExample

# create kickstart directory and configuration
$ mkdir ~/Projects/PackerExample/http && touch ~/Projects/PackerExample/http/ks.cfg

# create new Packer JSON file
$ touch ~/Projects/PackerExample/example.json

# how it looks (before running)
$ tree .
.
├── example.json
└── http
    └── ks.cfg
{
  "variables": {
    "iso": "http://linuxsoft.cern.ch/centos/7/isos/x86_64/CentOS-7-x86_64-Minimal-1511.iso",
    "checksum": "88c0437f0a14c6e2c94426df9d43cd67"
  },
  "builders": [
    {
      "type": "virtualbox-iso",
      "iso_url": "{{ user `iso` }}",
      "iso_checksum": "{{ user `checksum` }}",
      "iso_checksum_type": "md5",
      "vm_name": "MyCentOS7",
      "guest_os_type": "RedHat_64",
      "ssh_username": "root",
      "ssh_password": "packer",
      "ssh_port": 22,
      "ssh_wait_timeout": "600s",
      "vboxmanage": [
        ["modifyvm", "{{.Name}}", "--memory", "2048"],
        ["modifyvm", "{{.Name}}", "--cpus", "2"],
        ["modifyvm", "{{.Name}}", "--audio", "none"]
      ],
      "disk_size": "10240",
      "http_directory": "http",
      "boot_command": [
        "<tab> text ks=http://{{ .HTTPIP }}:{{ .HTTPPort }}/ks.cfg<enter><wait>"
      ],
      "shutdown_command": "/sbin/halt -p"
    }
  ]
}

More about Packer – VirtualBox? Take a look here.

install
cdrom
lang en_US.UTF-8
keyboard us
timezone UTC
network --bootproto=dhcp
rootpw --plaintext packer
user --name=frank --password=Test123
auth --enableshadow --passalgo=sha512 --kickstart
firewall --disabled
selinux --permissive
bootloader --location=mbr

text
skipx
zerombr

clearpart --all --initlabel
autopart

firstboot --disable
reboot

%packages --instLangs=en_US.utf8 --nobase --ignoremissing --excludedocs
@core
%end

%post --log=/root/ks.log
yum -y update
%end

More about CentOS 7 – Kickstart? Take a look here.

Validation and Build

# validate JSON
$ packer validate example.json

# run the build
$ packer build example.json

Result

$ tree .
.
├── example.json
├── http
│   └── ks.cfg
├── output-virtualbox-iso
│   ├── MyCentOS7-disk1.vmdk
│   └── MyCentOS7.ovf
└── packer_cache
    └── 4bbec2cca90f761e144becb1a24c2914eddd21d06292d6dfb415beb51ef9e69f.iso

SSH-life easier with AppleScript

I love the Mac OS X Terminal and to do SSH with it. With increasing age I forget the many SSH connection variables. But with some AppleScript I help myself. Here now 3 simple examples.

Example 1:

User and target are hardcoded.

on RunTerminal()
    set ScriptCommand to "ssh user@123.456.78.9"
    tell application "Terminal"
        activate
        do script with command ScriptCommand in window 1
    end tell
end RunTerminal

on run
    RunTerminal()
end run

Example 2

Dialog for user and only target hardcoded.

global RemoteUser

on RunTerminal()
    set ScriptCommand to "ssh " & RemoteUser & "@192.168.0.1"
    tell application "Terminal"
        activate
        do script with command ScriptCommand in window 1
    end tell
end RunTerminal

on RunDialog()
    display dialog "Who should it be ?" default answer "root"
    set RemoteUser to text returned of result
end RunDialog

on run
    RunDialog()
    RunTerminal()
end run

Example 3

Dialog for user and list for targets.

global RemoteUser
global RemoteTarget

on RunTerminal()
    set ScriptCommand to "ssh " & RemoteUser & "@" & RemoteTarget
    tell application "Terminal"
        activate
        do script with command ScriptCommand in window 1
    end tell
end RunTerminal

on RunUserDialog()
    display dialog "Who should it be ?" default answer "root"
    set RemoteUser to text returned of result
end RunUserDialog

on RunTargetDialog()
    (choose from list {"192.168.0.1", "example.com", "123.456.678.9"} with prompt "What is your target ?")
    set RemoteTarget to result as text
end RunTargetDialog

on run
    RunUserDialog()
    RunTargetDialog()
    RunTerminal()
end run

After exporting as Executable you can put it on places where you want. Do not forget the appropriate icon!

Apache Jmeter and Docker

Okay, this time we will create a Docker-Jmeter test environment. We create some simple (but tiny) Docker images/containers which can be reused for future test runs. Here we follow the DRY rule. Next, we want to achieve.

$ java -jar apache-jmeter-3.0/bin/ApacheJMeter.jar -t /tutorial/jmx/simple.jmx -n -l /tutorial/results/log.jtl

Preconditions

Preparation

# create all directories
$ mkdir -p /tutorial/{java,jmeter,jmx,results}

# create Dockerfile for JAVA
$ cd /tutorial/java && vim Dockerfile

# build JAVA image
$ docker build -t alpine/java .

# create Dockerfile for Jmeter
$ cd /tutorial/jmeter && vim Dockerfile

# build Jmeter image
$ docker build -t alpine/jmeter .

# list Docker images (optional)
$ docker images
...
REPOSITORY          TAG                 IMAGE ID            CREATED             SIZE
alpine/jmeter       latest              0864228be6ef        15 seconds ago      150.2 MB
alpine/java         latest              068005f45866        5 minutes ago       102.8 MB
alpine              latest              f70c828098f5        5 days ago          4.795 MB

Dockerfile JAVA

FROM alpine

RUN apk --update add openjdk8-jre-base

ENTRYPOINT ["/usr/bin/java"]

Dockerfile Jmeter

FROM alpine

RUN apk --update add wget
RUN wget http://mirror.switch.ch/mirror/apache/dist//jmeter/binaries/apache-jmeter-3.0.tgz
RUN tar zxvf apache-jmeter-3.0.tgz
RUN apk del wget
RUN rm -f apache-jmeter-3.0.tgz
RUN rm -fr /apache-jmeter-3.0/docs

VOLUME /apache-jmeter-3.0

CMD ["/bin/true"]

JMX file

Create or copy existing JMX file on folder “/tutorial/jmx” with name “simple.jmx”.

# show JMX (optional)
$ ls /tutorial/jmx
...
simple.jmx

Create Jmeter container

# create jmeter container
$ docker create --name jmeter alpine/jmeter

# list containers (optional)
$ docker ps -a
...
CONTAINER ID        IMAGE               COMMAND             CREATED             STATUS      PORTS       NAMES
0916ff8f25bb        alpine/jmeter       "/bin/true"         7 seconds ago       Created                 jmeter

Note: The container was created but not running!

Test execution

# test run JAVA container (optional)
$ docker run -ti --rm --volumes-from jmeter alpine/java -jar /apache-jmeter-3.0/bin/ApacheJMeter.jar --version

# run Jmeter (without report)
$ docker run -ti --rm -v /tutorial/jmx:/jmx --volumes-from jmeter alpine/java -jar /apache-jmeter-3.0/bin/ApacheJMeter.jar -t /jmx/simple.jmx -n

# run Jmeter (with report)
$ docker run -ti --rm -v /tutorial/jmx:/jmx -v /tutorial/results:/results --volumes-from jmeter alpine/java -jar /apache-jmeter-3.0/bin/ApacheJMeter.jar -t /jmx/simple.jmx -n -l /results/log.jtl

# show report
$ cat /tutorial/results/log.jtl

🙂

Vagrant Plugin Recommendations

Today a few Vagrant Plugin Recommendations.

Preconditions

Preparation

Create a simple Vagrant BaseBox (as here) and if you like use the following Vagrantfile.

# -*- mode: ruby -*-
# vi: set ft=ruby :

Vagrant.configure(2) do |config|
  config.vm.box = "lupin/centos7"
  # config.vm.network "public_network"
  config.vm.synced_folder ".", "/vagrant", disabled: true
  # config.vm.synced_folder "./shared", "/vagrant"

  config.vm.provider "virtualbox" do |vb|
    vb.cpus = "2"
    vb.memory = "2048"
  end

  if Vagrant.has_plugin?("vagrant-hostsupdater")
    config.vm.network :private_network, ip: "10.0.0.10"
    config.hostsupdater.aliases = ["example.test"]
  end

  config.vm.provision "shell", inline: <<-SHELL
    sudo yum update -y
    sudo yum install -y vim docker
    sudo yum clean all
    sudo systemctl enable docker
    sudo systemctl start docker
    sudo setenforce 0
  SHELL

  config.vm.provision "docker" do |d|
    d.run "nginx", args: "-p 8080:80"
  end

  config.vm.provision "shell", inline: "sudo hostname -I"
end

1. vagrant-camera

# install camera plugin
$ vagrant plugin install vagrant-camera

# start VM via Vagrant
$ vagrant up

# do screenshot on current target folder
$ vagrant camera -s .

# show all pictures (Mac OS X)
$ open screenshot_default_*.png

2. vagrant-vbguest

# start VM via Vagrant
$ vagrant up

# ssh into VM (optional)
$ vagrant ssh

# check current version (optional)
$ VBoxControl --version
...
5.0.20r106931

# exit from VM (optional)
$ exit

# install vbguest plugin
$ vagrant plugin install vagrant-vbguest

# reload VM
$ vagrant reload

# ssh into VM (optional)
$ vagrant ssh

# list all downloaded (optional)
$ ls -l /opt
...
VBoxGuestAdditions-5.0.14
VBoxGuestAdditions-5.0.20

3. vagrant-hostsupdater

# install hostsupdater plugin
$ vagrant plugin install vagrant-hostsupdater

# check content of local hosts (optional)
$ cd /etc && cat hosts

# start VM
$ vagrant up

# or reload if already running
$ vagrant reload --provision

# check content of local hosts (optional)
$ cd /etc && cat hosts

# check status
$ vagrant ssh -c 'curl -v example.test:8080'

# stop VM
$ vagrant halt

# check content of local hosts (optional)
$ cd /etc && cat hosts


Monitor running docker containers with cAdvisor

As a software tester, you have several containers run in your environment. Here is an example how easily and quickly you can monitor your test-environment with cAdvisor.

Preconditions

Preparation

# create project (local)
$ mkdir -p ~/Projects/Monitoring && cd ~/Projects/Monitoring

# create shell script (local)
$ vim start-demo.sh
#!/usr/bin/env sh

docker run -d --name cadvisor -P -v /:/rootfs:ro -v /var/run:/var/run:rw -v /sys:/sys:ro -v /var/lib/docker/:/var/lib/docker:ro google/cadvisor:latest
docker run -d --name jenkins -P jenkins
docker run -d --name selenium-hub -P selenium/hub:2.53.0
docker run -d --name selenium-node_1 --link selenium-hub:hub selenium/node-chrome:2.53.0
docker run -d --name selenium-node_2 --link selenium-hub:hub selenium/node-firefox:2.53.0

Note: You can also assign the respective ports!

Run docker containers

# create new VM (local)
$ docker-machine create -d virtualbox monitor

# show status (local)
$ docker-machine ls
...
NAME      ACTIVE   DRIVER       STATE     URL                         SWARM   DOCKER    ERRORS
monitor   -        virtualbox   Running   tcp://192.168.99.100:2376           v1.11.1  

# copy into VM (local) 
$ docker-machine scp ~/Projects/Monitoring/start-demo.sh monitor:/home/docker/

# ssh into VM (local into VM)
$ docker-machine ssh monitor

# change rights (VM)
$ chmod +x start-demo.sh && ls -la

# run shell script (VM)
$ ./start-demo.sh

# list running docker container (VM)
$ docker ps -a
...
CONTAINER ID        IMAGE                          COMMAND                  CREATED              STATUS              PORTS                                               NAMES
57c2598b4261        selenium/node-firefox:2.53.0   "/opt/bin/entry_point"   4 seconds ago        Up 4 seconds                                                            selenium-node_2
d79a5123bcfc        selenium/node-chrome:2.53.0    "/opt/bin/entry_point"   29 seconds ago       Up 29 seconds                                                           selenium-node_1
095f9844346d        selenium/hub:2.53.0            "/opt/bin/entry_point"   About a minute ago   Up About a minute   0.0.0.0:32771->4444/tcp                             selenium-hub
8db3ad58d8ce        jenkins                        "/bin/tini -- /usr/lo"   About a minute ago   Up About a minute   0.0.0.0:32770->8080/tcp, 0.0.0.0:32769->50000/tcp   jenkins
d1e1e1c36d6d        google/cadvisor:latest         "/usr/bin/cadvisor -l"   2 minutes ago        Up 2 minutes        0.0.0.0:32768->8080/tcp                             cadvisor

Open browser

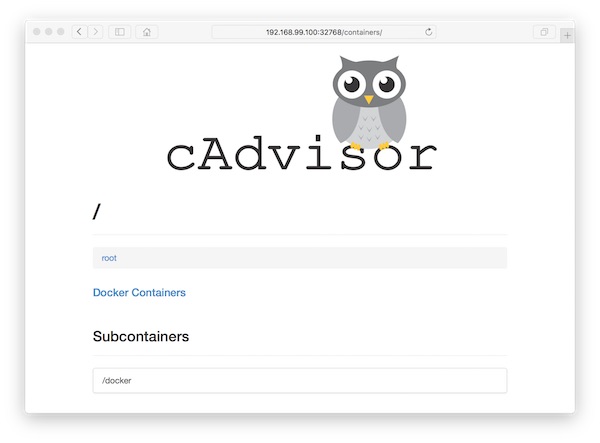
cAdvisor