For various reasons screenshots for webpages are needed. If automated test scripts fail, documentations must be created or in some other situations. With PhantomJS it is very easy to create these screenshots very fast by command-line. All what is needed a small JavaScript like this.
JavaScript
var phantom;
var console;
var system = require('system');
var fs = require('fs');
var page = require('webpage').create();

var Info = {
	isDate: function () {
		'use strict';
		var mydate = new Date().toDateString();
		return mydate;
	},
	isTime: function () {
		'use strict';
		var mytime = new Date().getTime();
		return mytime;
	}
};

var Target = {
	isLocation: function () {
		'use strict';
		var args = system.args,
		    mylocation = 'http://google.com';
		if (args.length > 1) {
			mylocation = system.args[1];
			console.log('[LOG] use argument location');
		} else {
			console.log('[LOG] use default location');
		}
		return mylocation;
	},
	isSaveFolder: function () {
		'use strict';
		var folder = 'log';
		if (!fs.exists(folder)) {
			console.log('[LOG] creat directory ' + folder);
			fs.makeDirectory(folder);
		}
		if (!fs.isWritable(folder)) {
			console.error('[LOG] ' + folder + ' is not writable!');
			phantom.exit(1);
		}
		return folder;
	}
};

page.open(Target.isLocation(), function (status) {
	'use strict';
	switch (status) {
	case 'success':
		console.log('[LOG] page open successfully' + Info.isDate());
		var folder = Target.isSaveFolder();
		page.render(folder + fs.separator + Info.isTime() + '.png');
		phantom.exit(0);
		break;
	case 'fail':
		console.error('[LOG] page not open successfully');
		phantom.exit(1);
		break;
	default:
		console.error('[LOG] fail to open with unknown status:' + status);
		phantom.exit(1);
		break;
	}
});
After save the script you can run it like:
# screenshot of softwaretester.info
$ phantomjs screenshot.js "http://softwaretester.info"
This introduction should give you some hints about Python and Selenium WebDriver. I will use this in following tutorials as a base.
Preconditions
Python installed
pip (package manager) installed
Editor or IDE installed
Preparation
As first step simply install or upgrade the Selenium package.
# install or upgrade selenium
$ pip install -U selenium

# get information about package
$ pip show selenium
This is a fairly simple process. After the successful command execution you will have the Selenium WebDriver client library on your machine with all that is needed to create automated scripts.
The first script
Now start using the unittest library. The script comments help to describe the code.
#!/usr/bin/env python
import unittest
from selenium import webdriver


class SearchContentOnWebsite(unittest.TestCase):
    """define a class that inherits the TestCase class"""

    def setUp(self):
        """perform some tasks at the start of each test"""
        # create a new Firefox session
        self.driver = webdriver.Firefox()
        # wait for a certain amount of time
        self.driver.implicitly_wait(30)
        # maximize browser window
        self.driver.maximize_window()
        # navigate to the start URL
        self.driver.get("http://softwaretester.info")

    def test_search_headline(self):
        """a very simple test case"""
        link_text = 'Modern Status Plugin'
        title = 'Jenkins - Modern Status Plugin | - Softwaretester -'
        # find a element with partial text
        elem = self.driver.find_element_by_partial_link_text(link_text)
        # click element
        elem.click()
        # assert that title have value
        assert title in self.driver.title

    def tearDown(self):
        """method to clean up any initialized values after the test"""
        # close the browser window
        self.driver.close()

if __name__ == "__main__":
    unittest.main(verbosity=2)
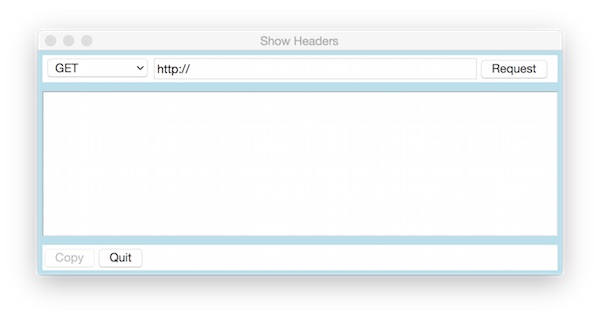
A lot of software testers do have no or less development skills. They also have less skills to use commandline tools and need GUI applications. In addition, the test applications for the respective claims should be easy to use. This guide will show you how to easily deploy software testers the needed test tools. This is just an example, please feel free to expand it!
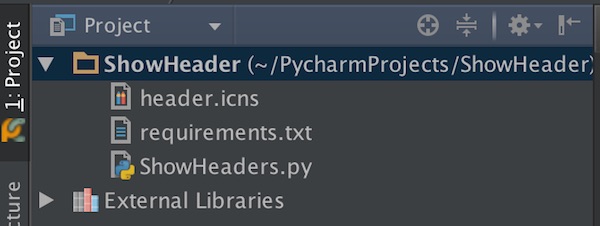
After create a new PyCharm project (with virtualenv), create 2 new empty files (requirements.txt, ShowHeaders.py) and import a icon. You can found icons (*.icns) on iconarchive for free.
Open the “requirements.txt” file and add Requests library.
requests==2.6.0
Open the “ShowHeader.py” and add the following content.
For first test, run the application. If there are no issues – open the PyCharm terminal and run the following command.
$ py2applet --make-setup ShowHeaders.py

# or if you use virtualenv
$ /Users/<username>/ShowHeaderEnv/bin/py2applet --make-setup ShowHeaders.py
Now you should see the generated file “setup.py” in the Project. Open the file and add the icon. The content should look like this:
"""
This is a setup.py script generated by py2applet

Usage:
    python setup.py py2app
"""

from setuptools import setup

APP = ['ShowHeaders.py']
DATA_FILES = []
OPTIONS = {'argv_emulation': True, 'iconfile':'header.icns'}

setup(
    app=APP,
    data_files=DATA_FILES,
    options={'py2app': OPTIONS},
    setup_requires=['py2app'],
)
Now execute the following command to build, for first test.
$ python setup.py py2app -A
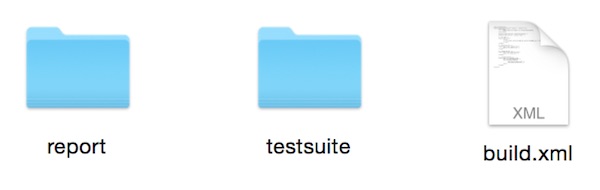
After some messages in terminal, your Project should show 2 new folders (build, dist). The alias mode (-A / –alias) instructs py2app to build an application, but it is not portable to other machines! You can open the Application in Finder or from terminal for your tests. If there are changes, just run the build-command again.
$ open dist/ShowHeaders.app
If everything is fine and your Application is ready for ship, run the following command.
Within the folder “report” all logs and reports should be stored. Inside the folder “testsuite” are all Robot Framework files. The “build.xml” looks like this:
Testing RESTful application is very simple with jMeter. In the first part of the tutorial in this series, the basics are shown. As requests can be created and evaluated. The request going to http://httpbin.org.
Preconditions
JAVA is installed
jMeter is installed
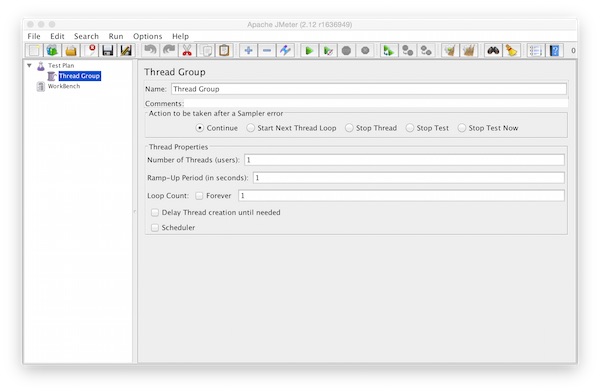
Steps
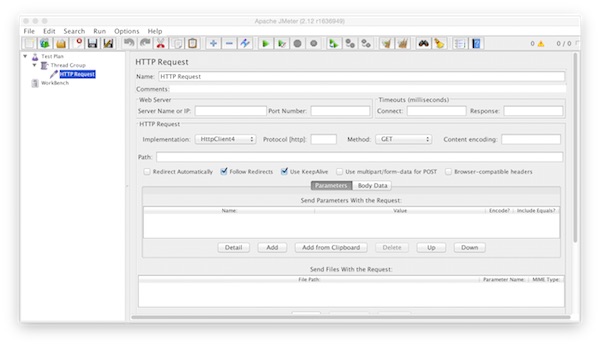
Create new “Thread-Group” on “Test Plan” (Add – Threads (User) – Thread Group)
Now add one “HTTP Request” inside the “Thread Group” (Add – Sampler – HTTP Request)
Inside the “HTTP Request” we add now a “HTTP Header Manager” (Add – Config Element – HTTP Header Manager). For configuring we add the Name/Value – “Content-Type”/”application/json”.
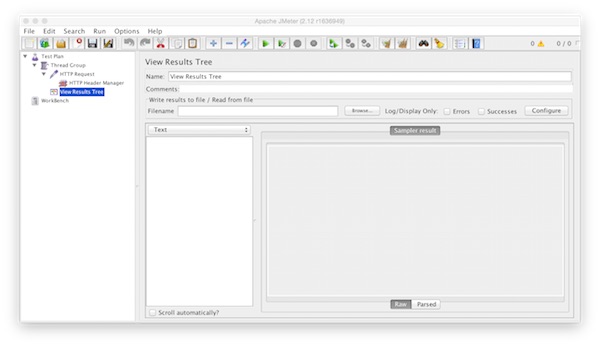
At the end we add the “View Results Tree” on “Thread Group” (Add – Listener – View Results Tree)
Our first request example will be a “GET”. On HTTP Request we add following values.
Server Name or IP: httpbin.org
Method: GET
Path: /ip
Implementation: HttpClient4
Follow Redirects: yes
Use KeepAlive: yes
After save we can start the first run. How to see result will show later. Now second request with POST example. For this we modify the HTTP Request with following values.
Method: POST
Path: /post
Send Parameters With the Request: {“firstName”:”harry”;”lastName”:”Hirsch”}
Include Equals?: yes
Now save and run again. On View Results Tree we can check the results for every http request (Sampler results, Request, Response data).
For the JSON response, switching from Text to JSON view. The same way can used for PUT, DELETE or other requests.
*** Settings ***
Documentation         This is just a tutorial
...
Metadata              VERSION    0.1
Library               Selenium2Library
Suite Setup           Start Browser
Suite Teardown        Close Browser

*** Variables ***
${SERVER}             https://www.google.ch
${BROWSER}            firefox

*** Keywords ***
Start Browser
    [Documentation]   Start firefox browser on Selenium Grid
    Open Browser      ${SERVER}   ${BROWSER}   None    http://127.0.0.1:4444/wd/hub

*** Test Cases ***
Check something
    [Documentation]   Check the page title
    Title Should Be   Google
Now start the Selenium Grid (Hub and Node)
# start the hub (in terminal 1)
$ java -jar selenium-server-standalone-2.44.0.jar -role hub -port 4444

# start the node (in terminal 2)
$ java -jar selenium-server-standalone-2.44.0.jar -role node -hub http://localhost:4444/grid/register
Note: The actual version for selenium-server-standalone may be different!
In the last step we start the test. Open a 3rd terminal, browse to the folder and start the Robot Framework.
# run pybot
$ pybot tutorial.robot
If everything works well, the output should look like this:
================================================================
Tutorial :: This is just a tutorial
================================================================
Check something :: Check the page title                 | PASS |
----------------------------------------------------------------
Tutorial:: This is just a tutorial                      | PASS |
1 critical test, 1 passed, 0 failed
1 test total, 1 passed, 0 failed
================================================================
Output: /output.xml
Log: /log.html
Report: /report.html
This tutorial should show, how easy it is to use the Robot Framework with PyCharm. After this small setup you can use PyCharm for your test automation with Robot Framework.
# check installed modules
$ pip list

# install Robot Framework (if not listed)
$ sudo pip install robotframework

# upgrade to the latest version
$ sudo pip install --upgrade robotframework

# verify installation
$ pybot --version
Configuration of PyCharm
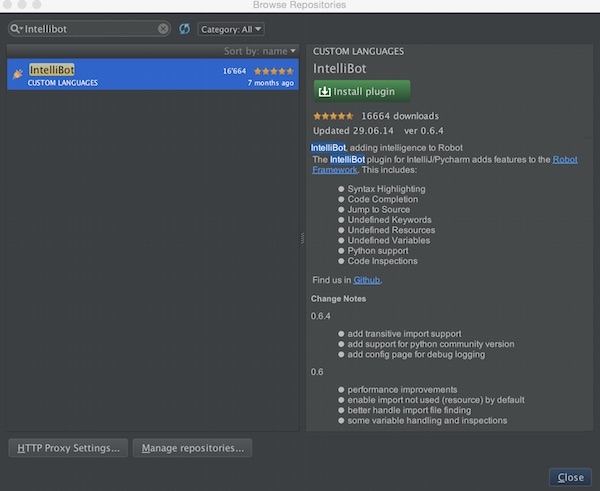
Now start PyCharm and open “Preferences” – “Plugins”. Press “Browse repositories…” button and search for “Intellibot”. Press “Install plugin” button and restart PyCharm.
Now create a new directory “testsuite” with new file named “example.robot” inside and insert the following content.
*** Test Cases ***

Example action log         this is a test
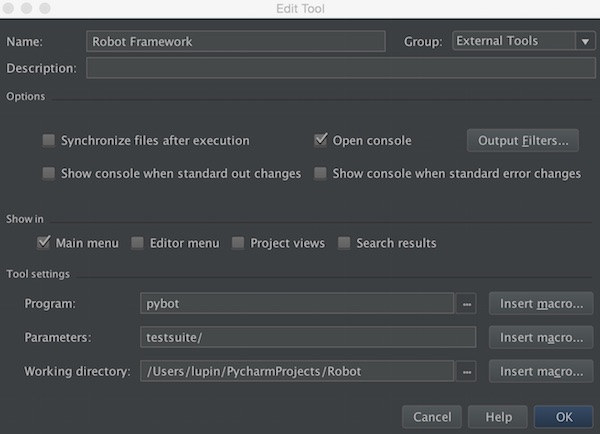
Open “Preferences” – “Tools” – “External Tools” and press “+” button. Insert a value for “Name”, enable checkbox “Open console”, insert “pybot” into Program, “test suite/” into Parameters and select you specific Working directory.
After press “OK” buttons, go to menu “Tools” – “External Tools” and select your given name. The output should show something like this:
Now we create inside the “testsuite” directory a file called “1st_test.robot” with following content.
*** Settings ***
Documentation           This is a simple test with Robot Framework
Library                 Selenium2Library

*** Variables ***
${SERVER}               http://google.com
${BROWSER}              Firefox
${DELAY}                0

*** Keywords ***
Open Browser To Login Page
   Open Browser         ${SERVER}   ${BROWSER}
   Maximize Browser Window
   Set Selenium Speed   ${DELAY}

*** Test Cases ***
Valid Login Open Browser To Login Page
[Teardown].             Close Browser
After running the output should look like this:
/usr/local/bin/pybot testsuite/
=============================================================
Testsuite
=============================================================
Testsuite.1St Test :: This is a simple test with Robot Framework
=============================================================
Valid Login                                          | PASS |
-------------------------------------------------------------
Testsuite.1St Test :: This is a simple test with Robot Framework      | PASS |
1 critical test, 1 passed, 0 failed
1 test total, 1 passed, 0 failed
=============================================================
Testsuite.Example
=============================================================
Example action                                       | PASS |
-------------------------------------------------------------
Testsuite.Example                                    | PASS |
1 critical test, 1 passed, 0 failed
1 test total, 1 passed, 0 failed
=============================================================
Testsuite                                            | PASS |
2 critical tests, 2 passed, 0 failed
2 tests total, 2 passed, 0 failed
=============================================================
Output: /output.xml
Log: /log.html
Report: /report.html

Process finished with exit code 0
var message = Device.isName();
UIALogger.logMessage("Name: " + message);

var message = Device.isSystemName();
UIALogger.logMessage("SystemName: " + message);

var message = Device.isSystemVersion(); UIALogger.logMessage("SystemVersion: " + message);

if (!Device.isIPad()) {
  throw new Error("Test suite only works on iPad");
}