macOS, Docker, Prometheus and Grafana

I like Grafana … the dashboards are just cool! Here (again) a tutorial about docker monitoring. In less minutes you should be done. As a comment … for Linux and Windows you can do that too! There are only partial changes.

Prepare Project

# create project
$ mkdir -p ~/Projects/DPG && cd ~/Projects/DPG

# show current IP
$ ifconfig | grep "inet " | grep -v 127.0.0.1

# create and edit prometheus.yml
$ vim prometheus.yml

Replace <yourLocalIP> with your IP. On Docker website you can find templates for Linux and Windows, too!

# my global config
global:
  scrape_interval:     15s # Set the scrape interval to every 15 seconds. Default is every 1 minute.
  evaluation_interval: 15s # Evaluate rules every 15 seconds. The default is every 1 minute.
  # scrape_timeout is set to the global default (10s).

  # Attach these labels to any time series or alerts when communicating with
  # external systems (federation, remote storage, Alertmanager).
  external_labels:
      monitor: 'codelab-monitor'

# Load rules once and periodically evaluate them according to the global 'evaluation_interval'.
rule_files:
  # - "first.rules"
  # - "second.rules"

# A scrape configuration containing exactly one endpoint to scrape:
# Here it's Prometheus itself.
scrape_configs:
  # The job name is added as a label `job=<job_name>` to any timeseries scraped from this config.
  - job_name: 'prometheus'

    # metrics_path defaults to '/metrics'
    # scheme defaults to 'http'.

    static_configs:
      - targets: ['localhost:9090']

  - job_name: 'docker'
         # metrics_path defaults to '/metrics'
         # scheme defaults to 'http'.

    static_configs:
      - targets: ['<yourLocalIP>:9323']

Configure Docker

This step is very easy. Just open Docker “Preferences” and specify in section “Daemon” -> “Advanced” the metrics-address. Just ensure that you use valid JSON!
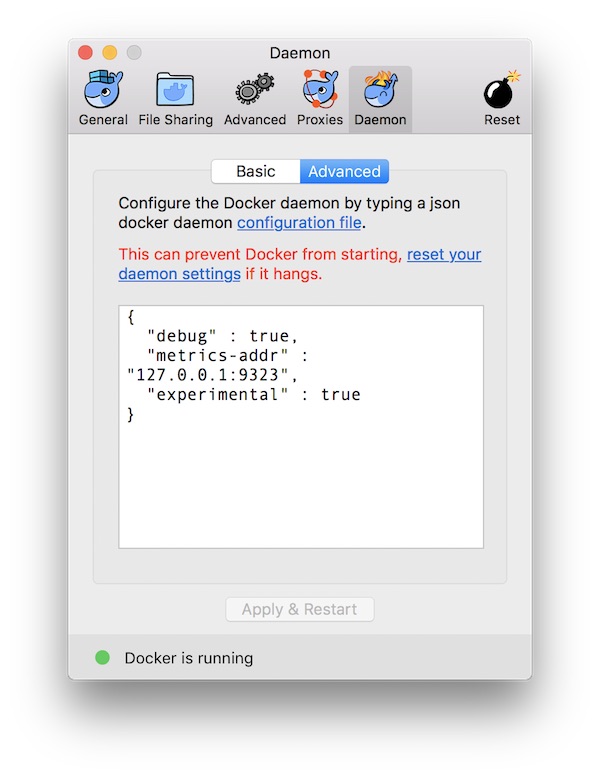
macOS Docker Metrics

When you are done, press “Apply and Restart” button.

# view Docker metrics in browser
$ open -a Safari http://127.0.0.1:9323/metrics

Prepare Prometheus

# run Prometheus
$ docker run --name prometheus -p 9090:9090 -v $PWD/prometheus.yml:/etc /prometheus/prometheus.yml prom/prometheus

# open Prometheus WebUI
$ open -a Safari http://localhost:9090/targets

# get Prometheus IP
$ docker inspect --format '{{ .NetworkSettings.IPAddress }}' prometheus

Note: The space after /etc is just because of security settings of my provider! Please remove the space.

prometheus WebUI

Just for fun you can create already some graphs in Prometheus.
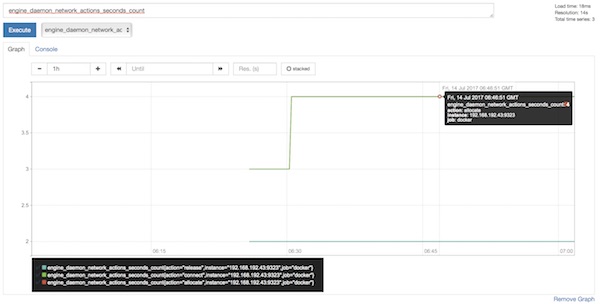
prometheus Graph

Prepare and run Grafana

# run Grafana
$ docker run --name grafana -i -p 3000:3000 grafana/grafana

# open Grafana WebUI and login (admin:admin)
$ open -a Safari http://localhost:3000

After login (admin:admin) configure new DataSource for Prometheus.
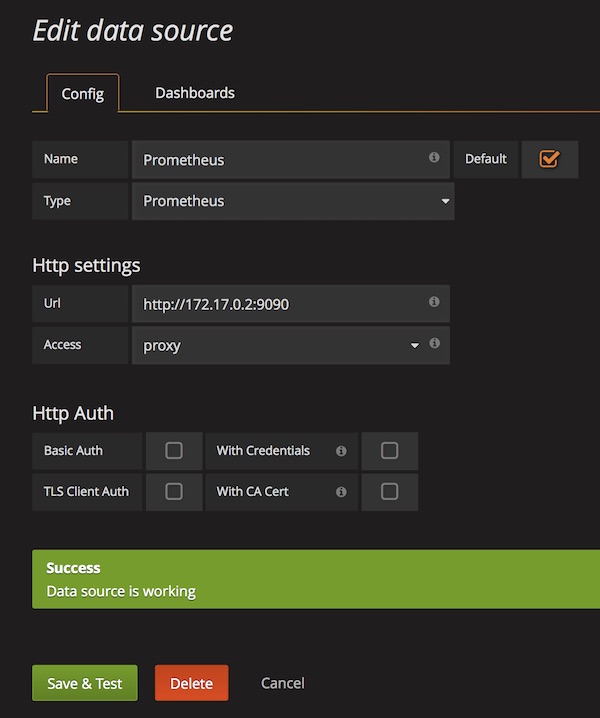
Grafana DataSource Prometheus

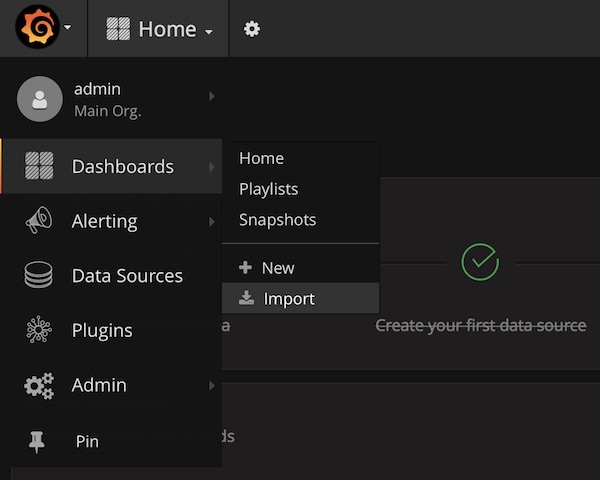
Import Dashboard (ID: 1229)

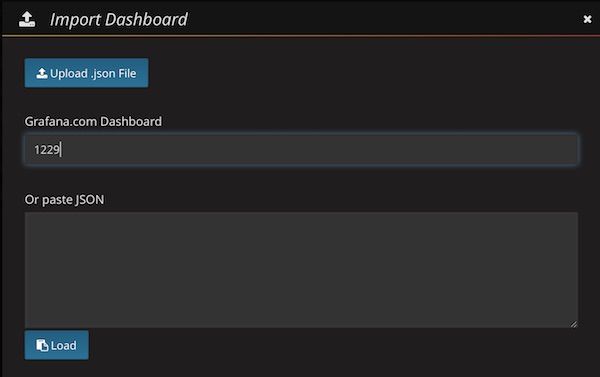
Grafana Import Dashboard

… enter ID 1229 …

Grafana Dashboard Search

… be patient (don’t press any button) …
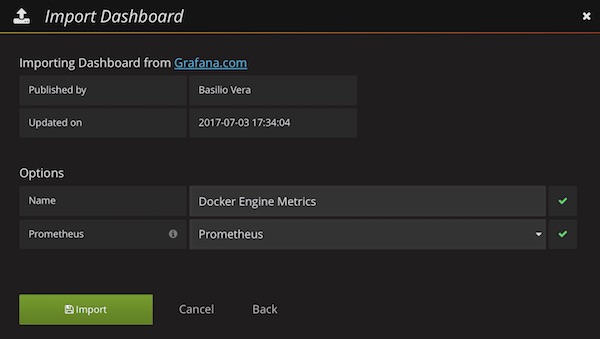
Docker Engine Metrics Dashboard

Select already created DataSource (Prometheus) and press “Import” button. Now you should see the awesome Grafana Dashboard.
Build notifications with CatLight

CatLight is the the perfect app if you would like to know the current status of your continuous delivery pipelines, tasks and bugs. Without looking on E-Mails or visit build servers you know when attention is needed. It’s available for Debian, Ubuntu, Windows and MacOS.

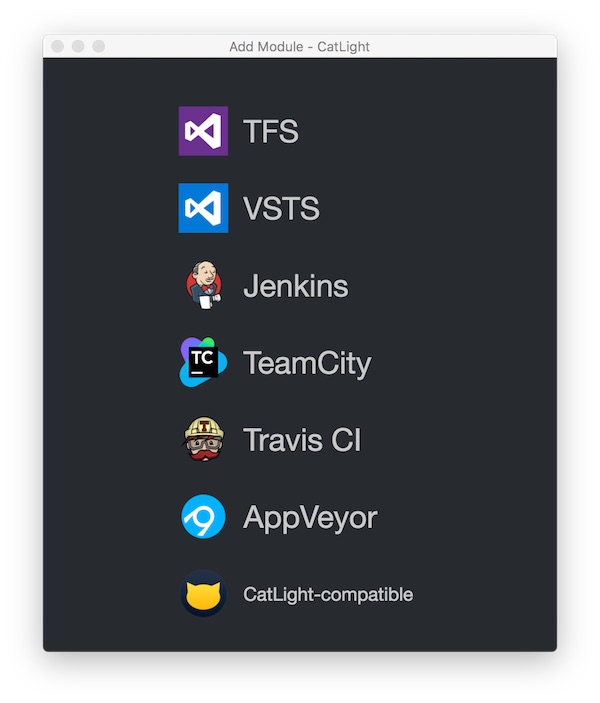
CatLight works with Jenkins, TFS, Travis CI and many more.

catlight setup

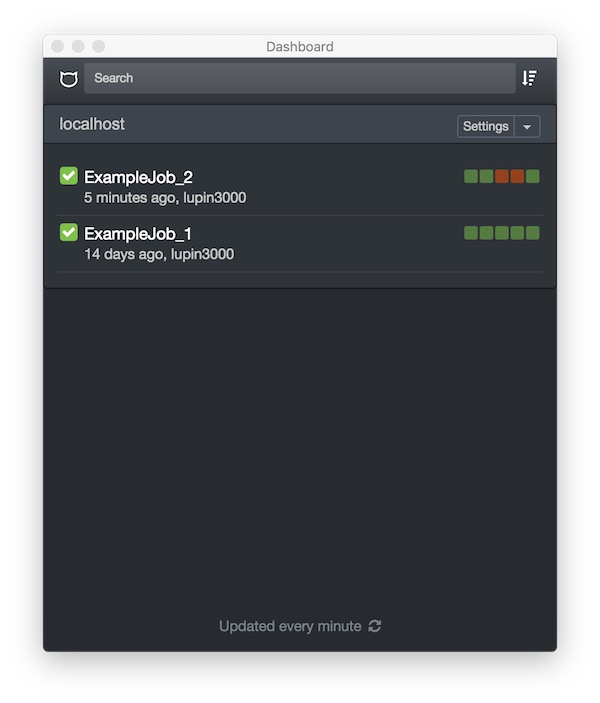
After successful installation and configuration, CatLight offers a lot of cool features.

catlight jobs

For personal usage it’s free, you only have to register.

Vagrant Manager

Do you like Vagrant? … Yes? … Then you will love Vagrant Manger! Vagrant Manager is free and available for Mac OS and Windows. But pictures say more than 1000 words…

Windows

windows demo

Copyright © by Lanayo Technologies

Mac OS

mac os demo

Copyright © by Lanayo Technologies

Downloads are available via GitHub (WindowsMac OS). The developers of Lanayo have done a very good job here!

Create Windows 10 Vagrant Base Box

In the first part I have shown how to create the Windows 10 VirtualBox VM. This time I will show you how to create a Vagrant Base Box.

Preconditions

Important Windows 10 Settings

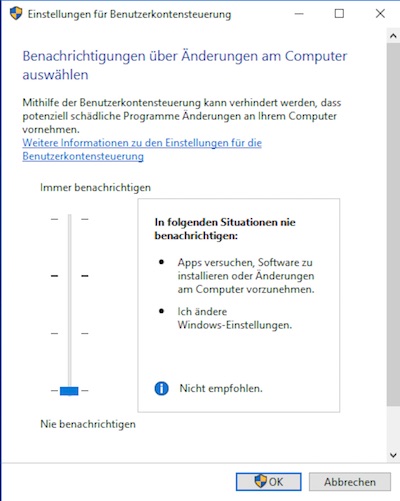
Turn off and disable UAC (here you will find different ways)

disable windows 10 uac

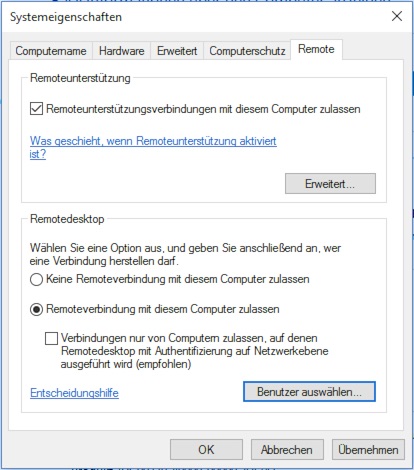
Enable Remote Desktop

remote desktop settings

Configure WinRM on Windows

open the Command Prompt as Admin

> winrm quickconfig -q
> winrm set winrm/config/winrs @{MaxMemoryPerShellMB="300"}
> winrm set winrm/config @{MaxTimeoutms="1800000"}
> winrm set winrm/config/service @{AllowUnencrypted="true"}
> winrm set winrm/config/service/auth @{Basic="true"}
> sc config WinRM start=auto

Optional Settings for Windows

open the PowerShell as Admin

# remove all of the metro apps
> Get-AppXPackage -AllUsers | Remove-AppXPackage

# remove log files
> Get-Childitem "C:\Windows\Logs\dosvc" | Remove-Item -Verbose

# disables the system restore feature
> Disable-ComputerRestore c:

# disable hibernation
> powercfg -h off

# allow Powershell scripts to provision
> Set-ExecutionPolicy -ExecutionPolicy Unrestricted

Okay,… that is all. Now shutdown windows…

Create Vagrant BaseBox

# goto default directory
$ cd VirtualBox\ VMs/

# create base box from VM
$ vagrant package --base Win10x64 --output Win10x64.box

# add box
$ vagrant box add lupin/windows10 Win10x64.box

# check vagrant boxes
$ vagrant box list

Create and run test project

# create project folder
$ mkdir ~/test_project && cd ~/test_project

# initializes to be a Vagrant environment
$ vagrant init lupin/windows10

# edit Vagrantfile
$ vim Vagrantfile

# start VM
$ vagrant up

# start rdp client
$ vagrant rdp
# -*- mode: ruby -*-
# vi: set ft=ruby :

Vagrant.configure(2) do |config|

  config.vm.box = "lupin/windows10"
  config.vm.guest = :windows
  config.vm.communicator = "winrm"
  config.winrm.username = "vagrant"
  config.winrm.password = "vagrant"
  config.vm.boot_timeout = 600
  config.vm.network :forwarded_port, guest: 3389, host: 3389
  config.vm.network :forwarded_port, guest: 5985, host: 5985, id: "winrm", auto_correct: true

  config.vm.provider "virtualbox" do |vb|
    # vb.gui = true
    vb.memory = "2048"
    vb.cpus = 2
    vb.name = "Windows_Vagrant"
  end

end

Values for username and password should match your needs!

Create Windows 10 VirtualBox VM

This tutorial is designed to prepare for another!

Preconditions

Prepare VM

# switch into default VirtualBox directory
$ cd VirtualBox\ VMs/

# create new VirtualBox VM
$ VBoxManage createvm --name "Win10x64" --ostype Windows10_64 --register

# configure system settings of VM
$ VBoxManage modifyvm "Win10x64" --memory 2048 --cpus 2 --acpi on --pae on --hwvirtex on --nestedpaging on

# configure boot settings of VM
$ VBoxManage modifyvm "Win10x64" --boot1 dvd --boot2 disk --boot3 none --boot4 none

# configure video settings
$ VBoxManage modifyvm "Win10x64" --vram 128 --accelerate3d on

# configure audio settings
$ VBoxManage modifyvm "Win10x64" --audio coreaudio --audiocontroller hda

# configure network settings
$ VBoxManage modifyvm "Win10x64" --nic1 nat

# configure usb settings
$ VBoxManage modifyvm "Win10x64" --usb on

# create storage medium for VM
$ VBoxManage createhd --filename ./Win10x64/Win10x64.vdi --size 30000

# modify a storage controller
$ VBoxManage storagectl "Win10x64" --name "SATA" --add sata

# attache storage medium to VM
$ VBoxManage storageattach "Win10x64" --storagectl "SATA" --port 0 --device 0 --type hdd --medium ./Win10x64/Win10x64.vdi

# add windows iso
$ VBoxManage storageattach "Win10x64" --storagectl "SATA" --port 1 --device 0 --type dvddrive --medium /path/to/windows.iso

# add guest addition iso
$ VBoxManage storageattach "Win10x64" --storagectl "SATA" --port 2 --device 0 --type dvddrive --medium /path/to/VBoxGuestAdditions.iso

# start VM
$ VBoxManage startvm Win10x64

You can now begin the installation. Do not forget the Guest Additions! After successful installation and configuration, you can remove the unnecessary media.

# remove media (on stopped VM)
$ VBoxManage storageattach "Win10x64" --storagectl "SATA" --port 1 --device 0 --type dvddrive --medium none
$ VBoxManage storageattach "Win10x64" --storagectl "SATA" --port 2 --device 0 --type dvddrive --medium none