Python, cmake and dlib on macOS

There is a very easy possibility to use dlib on macOS. Additional packages and package manager (for example brew) are not needed. Here are the instructions which you can follow independently in a few minutes.

Requirements

Steps

Download latest cmake version as *.dmg or *.tar.gz from cmake.org. After the app has been successfully installed, you can start it (but it is not necessary).
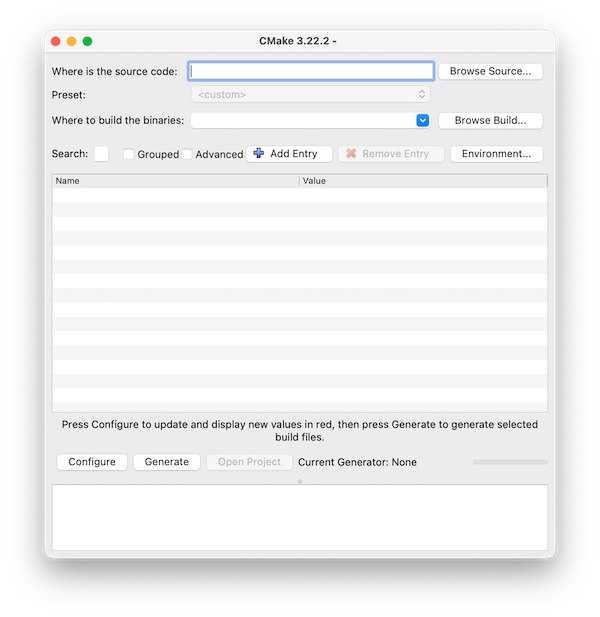
CMake.app on macOS

Inside the CMake application you will find the needed binary. All you have to do now is create a symlink and optionally check the version.

# create symlink
$ sudo ln -s /Applications/CMake.app/Contents/bin/cmake /usr/local/bin/cmake

# check version (optional)
$ cmake --version

Note: Close the terminal and restart if cmake is not found.

If you now want to install dlib in your Python project (in the virtual environment), there will no longer be an error message. Note that the installation may take some time.

# install dlib
(venv) $ pip3 install dlib

# verify dlib installation (optional)
(venv) $ pip3 freeze

That’s it. Made super easy and super fast without bloating the entire system with unnecessary ballast.

Install Ansible inside virtualenv on CentOS7

There are many ways to install Ansible inside virtualenv on CentOS7, I would like to show now a very simple variant. Important are actually the CentOS packages at the beginning.

Steps

# install needed packages
$ yum install -y python-setuptools python-devel openssl-devel libffi-devel

# install pip
$ easy_install pip

# install virtualenv
$ pip install virtualenv

# create and activate virtualenv
$ virtualenv .env && . .env/bin/activate

# install latest ansible
(.env) [demo@centos7 ~]$ pip install ansible

# show python packages
(.env) [demo@centos7 ~]$ pip freeze
ansible==2.3.1.0
asn1crypto==0.22.0
bcrypt==3.1.3
cffi==1.10.0
cryptography==1.9
enum34==1.1.6
idna==2.5
ipaddress==1.0.18
Jinja2==2.9.6
MarkupSafe==1.0
paramiko==2.2.1
pyasn1==0.2.3
pycparser==2.17
pycrypto==2.6.1
PyNaCl==1.1.2
PyYAML==3.12
six==1.10.0

# exit virtualenv
(.env) [demo@centos7 ~]$ deactivate

it can be so easy 😉

PyCharm with Virtualenv on Mac OS X

This guide shows you how to use PyCharm with virtualenv on Mac OS X.

Preconditions

PyCharm installed

Steps

First install we install Virtualenv and Virtualenvwrapper.

# if pip not installed
$ sudo easy_install pip

# install virtualenv
$ sudo pip install virtualenv

# install virtualenvwrapper
$ sudo pip install virtualenvwrapper

Now we start PyCharm to create new project.

PyCharm Virtualenv

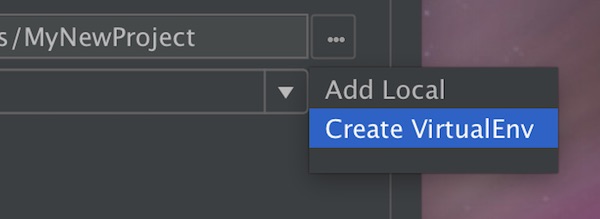
After given the new name for the project on Location, select for Interpreter “Create VirtualEnv”.

PyCharm Create Virtualenv

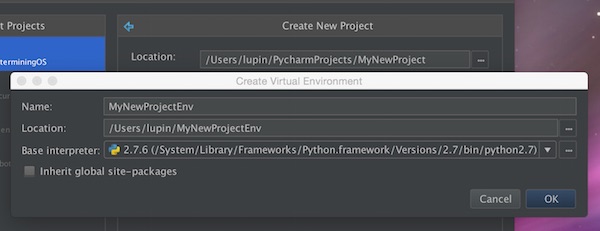
Create Virtual Environment dialog box opens. Here type the name of the new virtual environment and specify the target directory for he new virtual environment on Location. Select one “Base interpreter” and if needed, select the check box “Inherit global site-packages”.

PyCharm Virtualenv Setup

Press “OK” button to apply changes and close the dialog box. After press the  “Create” button – PyCharm create the new project.