Many times I’v got asked (directly, via messages or forums) why the macOS internet connection does not work anymore, while using devices like Shark Jack, O.MG Cable and so on. In my tutorials I also did not mention this in detail, because I assumed this should be clear. A big mistake from my side. Therefore now this article. I will now do my best to explain, using a few examples, how to prioritize the services so that you do not lose your internet connection from your macOS. I will use the internet connection via Wifi hotspot.
Note: I show here an specific example for Shark Jack now. But main target is that you understand and can reuse your knowledge also for different other situations.
Network locations
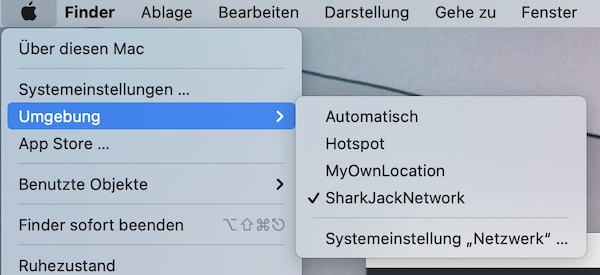
The first part is about macOS network locations. To not destroy your current settings, we will create a new network location (all via command line).
Warning: The following steps will disconnect your internet connection (briefly), because the new created network location is not populated. Read the tutorial carefully before you execute any command!
# list all network locations
$ networksetup -listlocations

# show name of the current location
$ networksetup -getcurrentlocation

# create new location (SharkJackNetwork)
$ networksetup -createlocation SharkJackNetwork

# change location
$ networksetup -switchtolocation SharkJackNetwork

# lists network interfaces (should be empty)
$ networksetup -listallnetworkservices
Services
The newly created network location does not contain any service now. In the next second part we create two (Wifi and Bluetooth), set own DNS server and test. If you have stored your Wifi credentials (see Keychain Access.app), the internet connection will automatically established again.
# list all hardware ports with corresponding device name and port
$ networksetup -listallhardwareports

# create WI-FI service (named WLAN)
$ networksetup -createnetworkservice WLAN "WI-FI"

# create Bluetooth PAN service (named Bluetooth)
$ networksetup -createnetworkservice Bluetooth "Bluetooth PAN"

# lists network interfaces (WLAN and Bluetooth)
$ networksetup -listallnetworkservices

# add dns server (to WLAN)
$ networksetup -setdnsservers WLAN 8.8.8.8 8.8.4.4

# verify DNS settings (optional)
$ dig +all example.com
My MacBook Pro does not provide an RJ45 interface (only USB-C). Therefore I buyed a Multi-Port-Adapter from Satechi. After plug in, I add this device now to my services. There are many other vendors as well, for such please choose your own name.
# list all hardware ports with corresponding device name and port
$ networksetup -listallhardwareports

# create adapter service (named Satechi)
$ networksetup -createnetworkservice Satechi "USB 10/100/1000 LAN"
Now it’s time to use Shark Jack. Turn it on (arming mode), plug into adapter, wait for IP and test. If you haven’t changed it, the default IP is “172.16..24.1”, the user is “root” and password is “hak5shark”.
# wait for IP
$ ifconfig en8

# run command over SSH
$ ssh -C4 root@172.16.24.1 -C 'pwd'

# ping google dns
$ ping -c 1 google.com
The internet connection is not working anymore but Wifi seems working correctly!
Service order
Now it comes to the order of all services (prioritization). Here we ensure that internet connection works again.
# show services in the order they are contacted for a connection
$ networksetup -listnetworkserviceorder

# command to designate the order network services are contacted
$ networksetup -ordernetworkservices WLAN Satechi Bluetooth

# ping google dns
$ ping -c 1 google.com
All good now … The newly created network location (incl. services) can be used as soon you develop your Shark Jack payloads. Specific to your environment needs, you can create and use many of these network locations (to quickly switch between).

