Apache Jmeter and Docker

Okay, this time we will create a Docker-Jmeter test environment. We create some simple (but tiny) Docker images/containers which can be reused for future test runs. Here we follow the DRY rule. Next, we want to achieve.

$ java -jar apache-jmeter-3.0/bin/ApacheJMeter.jar -t /tutorial/jmx/simple.jmx -n -l /tutorial/results/log.jtl

Preconditions

Preparation

# create all directories
$ mkdir -p /tutorial/{java,jmeter,jmx,results}

# create Dockerfile for JAVA
$ cd /tutorial/java && vim Dockerfile

# build JAVA image
$ docker build -t alpine/java .

# create Dockerfile for Jmeter
$ cd /tutorial/jmeter && vim Dockerfile

# build Jmeter image
$ docker build -t alpine/jmeter .

# list Docker images (optional)
$ docker images
...
REPOSITORY          TAG                 IMAGE ID            CREATED             SIZE
alpine/jmeter       latest              0864228be6ef        15 seconds ago      150.2 MB
alpine/java         latest              068005f45866        5 minutes ago       102.8 MB
alpine              latest              f70c828098f5        5 days ago          4.795 MB

Dockerfile JAVA

FROM alpine

RUN apk --update add openjdk8-jre-base

ENTRYPOINT ["/usr/bin/java"]

Dockerfile Jmeter

FROM alpine

RUN apk --update add wget
RUN wget http://mirror.switch.ch/mirror/apache/dist//jmeter/binaries/apache-jmeter-3.0.tgz
RUN tar zxvf apache-jmeter-3.0.tgz
RUN apk del wget
RUN rm -f apache-jmeter-3.0.tgz
RUN rm -fr /apache-jmeter-3.0/docs

VOLUME /apache-jmeter-3.0

CMD ["/bin/true"]

JMX file

Create or copy existing JMX file on folder “/tutorial/jmx” with name “simple.jmx”.

# show JMX (optional)
$ ls /tutorial/jmx
...
simple.jmx

Create Jmeter container

# create jmeter container
$ docker create --name jmeter alpine/jmeter

# list containers (optional)
$ docker ps -a
...
CONTAINER ID        IMAGE               COMMAND             CREATED             STATUS      PORTS       NAMES
0916ff8f25bb        alpine/jmeter       "/bin/true"         7 seconds ago       Created                 jmeter

Note: The container was created but not running!

Test execution

# test run JAVA container (optional)
$ docker run -ti --rm --volumes-from jmeter alpine/java -jar /apache-jmeter-3.0/bin/ApacheJMeter.jar --version

# run Jmeter (without report)
$ docker run -ti --rm -v /tutorial/jmx:/jmx --volumes-from jmeter alpine/java -jar /apache-jmeter-3.0/bin/ApacheJMeter.jar -t /jmx/simple.jmx -n

# run Jmeter (with report)
$ docker run -ti --rm -v /tutorial/jmx:/jmx -v /tutorial/results:/results --volumes-from jmeter alpine/java -jar /apache-jmeter-3.0/bin/ApacheJMeter.jar -t /jmx/simple.jmx -n -l /results/log.jtl

# show report
$ cat /tutorial/results/log.jtl

🙂
JMeter and Taurus

Taurus from Blazemeter seems really to have a potential to be a star. There are new and easy ways to ease the workflow with JMeter. It allows, for example, configuration options and reports which JMeter does not offer by default.

Installation

# install via pip
$ sudo pip install bzt

On error look for installed libxml2 and libxslt libraries!

Usage

├── example.jmx
├── example.yml
└── requirements.txt
bzt==0.5.0

You don`t need jMeter or jMeter PlugIns installed! All will automatically downloaded in given path (see YAML).

---
modules:
  jmeter:
    path: ~/.bzt/jmeter-taurus/bin/jmeter
    download-link: http://apache.claz.org/jmeter/binaries/apache-jmeter-{version}.zip
    version: 2.13

execution:
  scenario:
    script: example.jmx
    variables:
      MY_TARGET_HOST: softwaretester.info

reporting:
  - module: console
  - module: final_stats
    summary: true
    percentiles: true
    test-duration: true
  - module: junit-xml
    filename: report/report.xml
    data-source: sample-labels

example.jmx

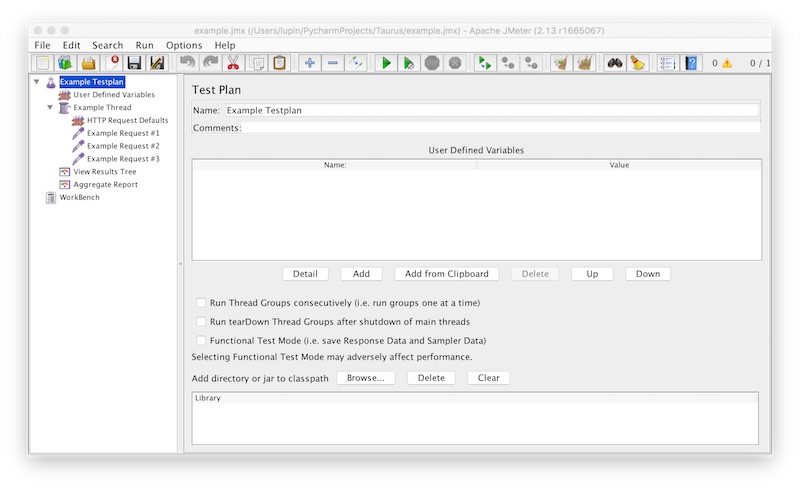
Create a JMeter testplan with “User Defined Variables”, one “Thread” with one “HTTP Request Defaults” and some “HTTP Requests”.

Taurus jMeter Example 1

On “User Defined Variables” – “Name” insert “MY_TARGET_HOST” this value will be set by Taurus YAML file.

Taurus jMeter Example 2

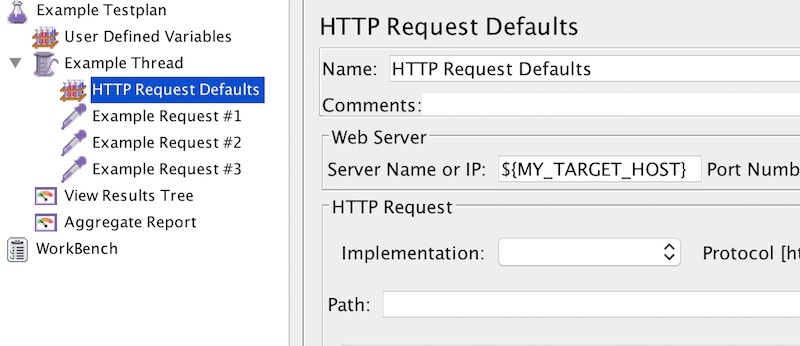
On “HTTP Request Defaults” – “WebServer” use the variable (MY_TARGET_HOST).

Taurus jMeter Example 3

Running JMeter test

# running headless by yaml file
$ bzt example.yml

# running headless by jmx file
$ bzt example.jmx

# running with JMeter GUI by yaml file
$ bzt example.yml -gui

# running with JMeter GUI by jmx file
$ bzt example.jmx -gui

Two folders will created on each test run. “report” (configured in YAML) and “Artifacts” (as Date/Time string). Attention – report.xml will replaced on each run!

REST testing with jMeter

Testing RESTful application is very simple with jMeter. In the first part of the tutorial in this series, the basics are shown. As requests can be created and evaluated. The request going to http://httpbin.org.

Preconditions

  • JAVA is installed
  • jMeter is installed

Steps

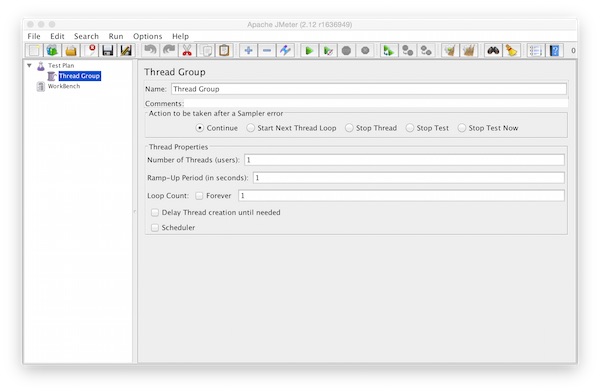
Create new “Thread-Group” on “Test Plan” (Add – Threads (User) – Thread Group)

jmeter thread group

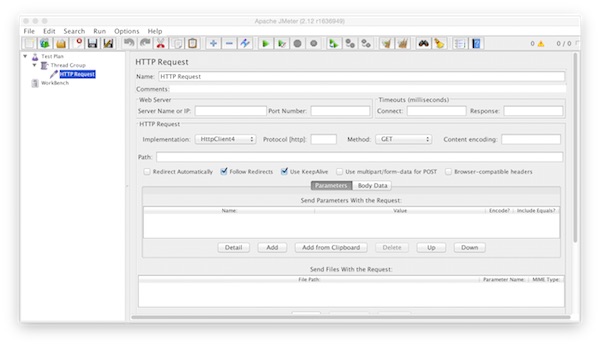
Now add one “HTTP Request” inside the “Thread Group” (Add – Sampler – HTTP Request)

jmeter http request

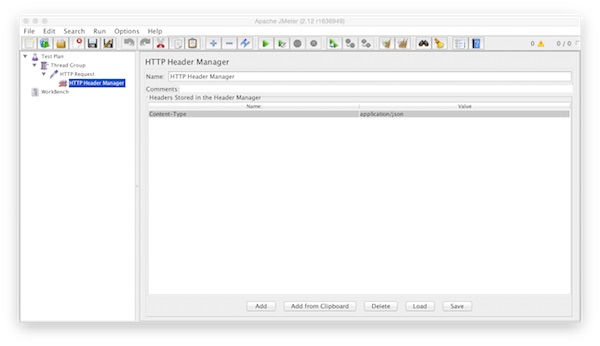
Inside the “HTTP Request” we add now a “HTTP Header Manager” (Add – Config Element – HTTP Header Manager). For configuring we add the Name/Value – “Content-Type”/”application/json”.

jmeter http header manager

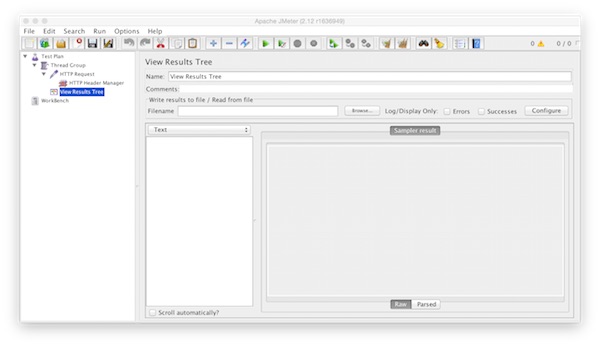
At the end we add the “View Results Tree” on “Thread Group” (Add – Listener – View Results Tree)

jmeter view results tree

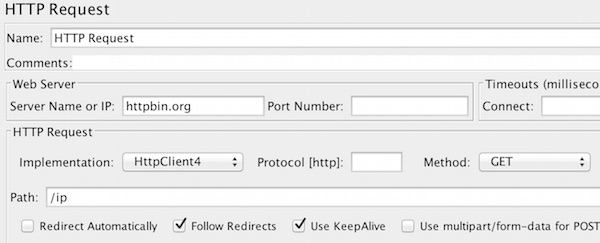
Our first request example will be a “GET”. On HTTP Request we add following values.

  • Server Name or IP: httpbin.org
  • Method: GET
  • Path: /ip
  • Implementation: HttpClient4
  • Follow Redirects: yes
  • Use KeepAlive: yes
jmeter get request

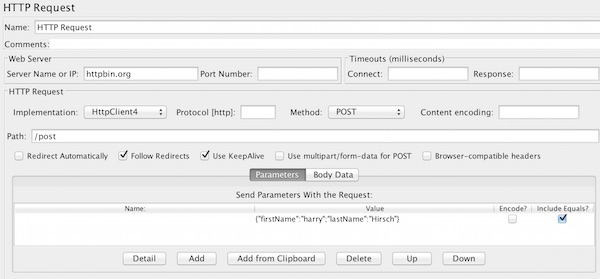
After save we can start the first run. How to see result will show later. Now second request with POST example. For this we modify the HTTP Request with following values.

  • Method: POST
  • Path: /post
  • Send Parameters With the Request: {“firstName”:”harry”;”lastName”:”Hirsch”}
  • Include Equals?: yes
jmeter post request

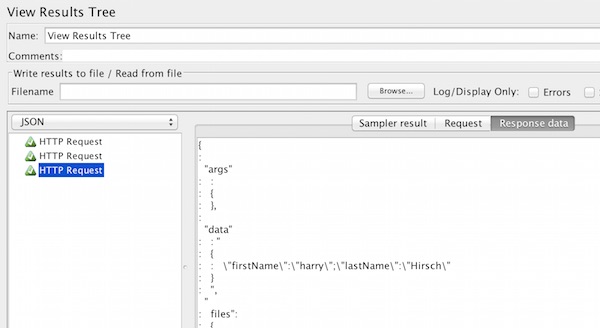
Now save and run again. On View Results Tree we can check the results for every http request (Sampler results, Request, Response data).

jmeter rest results

For the JSON response, switching from Text to JSON view. The same way can used for PUT, DELETE or other requests.

Dynamic data for JMeter

Preparation

JAVA and JMeter are already installed.

Steps

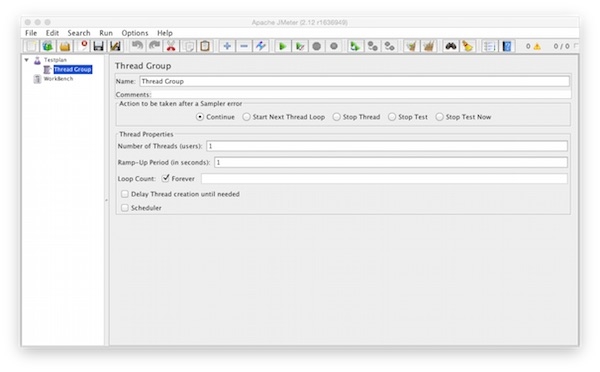
Create new “Test Plan” and add one “Thread Group” (Threads (Users)).

  • Number of Threads: 1
  • Ramp-Up Period: 1
  • Loop Count Forever: checked
meter thread group

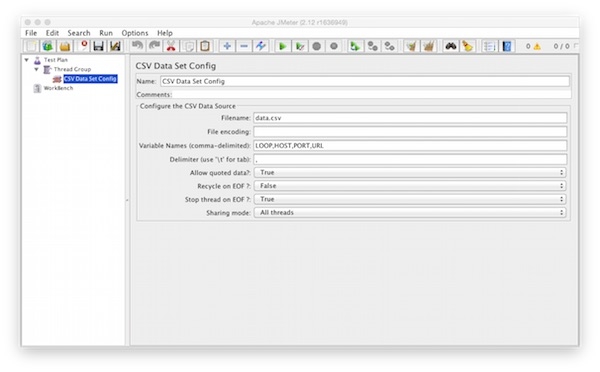
Add to the “Thread Group” one “CSV Data Set Config” (Config Element).

  • Filename: Path to your CSV file
  • Variable Names: LOOP,HOST,PORT,URL
  • Delimiter: ,
  • Allow quoted data: true
  • Recycle on EOF: false
  • Stop thread on EOF: true
jmeter csv data set config

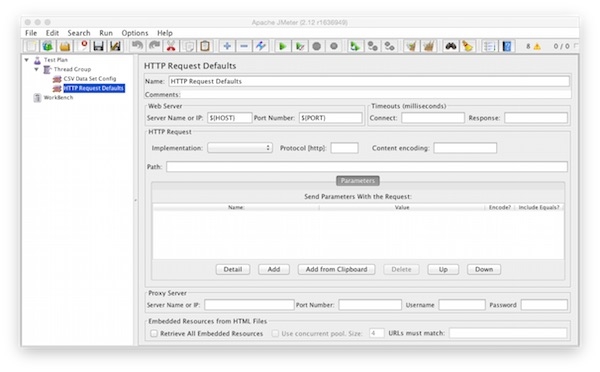
Add to the “Thread Group” one “HTTP Request Defaults” (Config Element).

  • Server Name or IP: ${HOST}
  • Port Number: ${PORT}
jmeter http request defaults

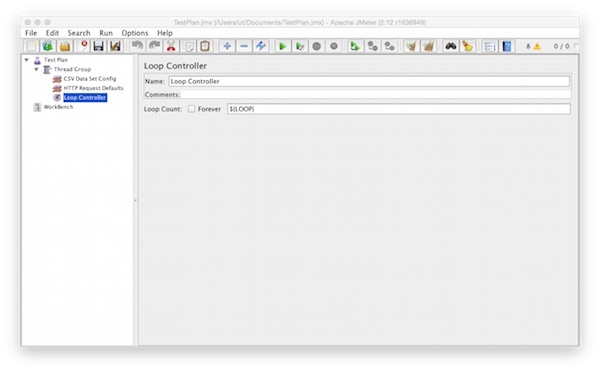
Add to the “Thread Group” one “Loop Controller” (Logic Controller).

  • Loop Count: ${LOOP}
  • Forever: not checked
jmeter loop controller

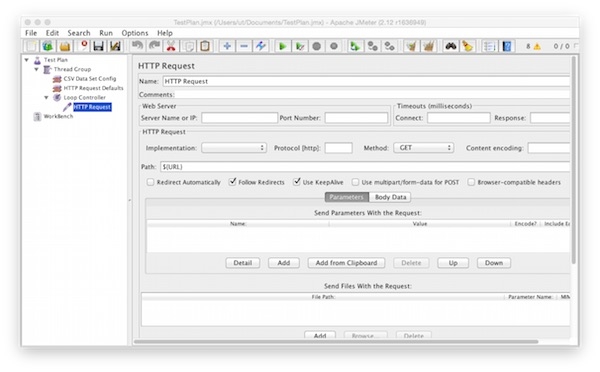
Add to the “Loop Controller” one “HTTP Request” (Sampler).

  • Method: GET
  • Path: ${URL}
  • Follow Redirects: checked
  • Use KeepAlive: checked
jmeter http request

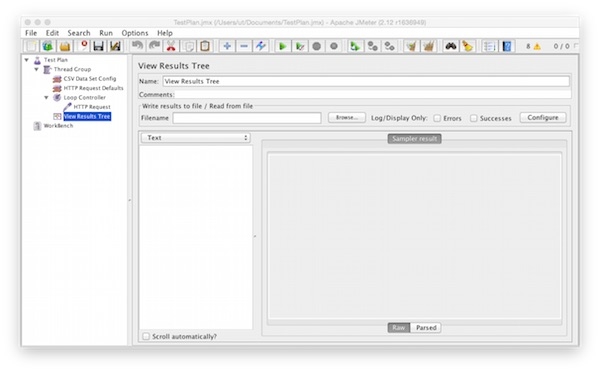
Add to the “Thread Group” one “View Results Tree” (Listener).

meter view result tree

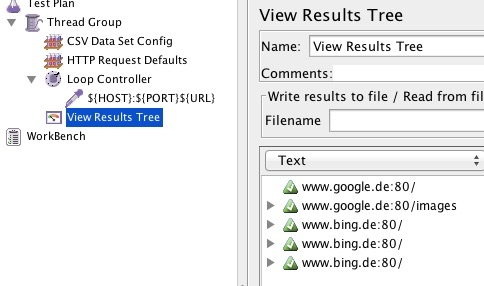
Rename the “HTTP Request” into “${HOST}:${PORT}${URL}”.

jmeter http request extension

Create the CSV file with some comma separated values (LOOP,HOST,PORT,URL).

jmeter csv

Run

Save the test plan as JMX file and run the test plan.

jmeter result