Suitcase’s full of fun

This time I am not writing a tutorial on software. I would like to introduce you to my DIY project here. At a later point in time, however, I will focus on the newly used and partly self-developed software deeper.

Why this little project?

Over the years I have accumulated various electronic devices, cables and lots of other electrical scrap. Always storing it neatly is hell (I hate cardboard or plastic boxes). In addition, I do not live alone and should actually take all other people in the household into account. So I was looking for a better solution for my beloved girlfriend, my dog ​​(who also likes to eat things) and of course my self. In addition, everything should be tidy, ready to hand and mobile. When I then remembered my training as an electrician (especially on my toolbox), it quickly became clear to me which solution would be suitable for me. Different Suitcases made of aluminum (light and stable), where each of them have slightly different scope.
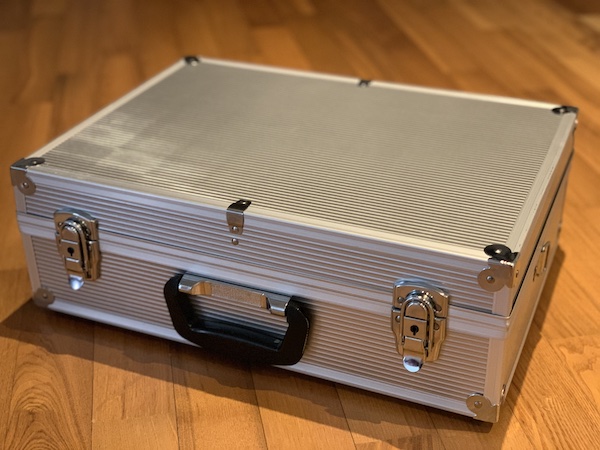
DIY Suitcase closed

What’s in there?

Actually there are several suitcases with different contents (depending on what I have planned). I would like to show you now, two of my personal favorites here.

Suitcase 1

This called by myself the RadioBox.

RadioBox open
  • Raspberry Pi 4 Model B/8GB
  • Yardstick One (incl. ANT700 antenna)
  • Ubertooth One (incl. 2.4 GHz antenna)
  • ALFA Atheros (AWUS036NHA)
  • BashBunny + RubberDucky
  • GL.iNet GL-AR300M (Shadow) Mini VPN Router
  • Fresh’n’Rebel Powerbank (18000 mAh)
  • external USB SSD
  • HackRF One (incl. ANT500)
  • Waveshare monitor FHD (12.5inch, 1920×1080 pixels, IPS screen)

Suitcase 2

This called by myself the Hak5Box
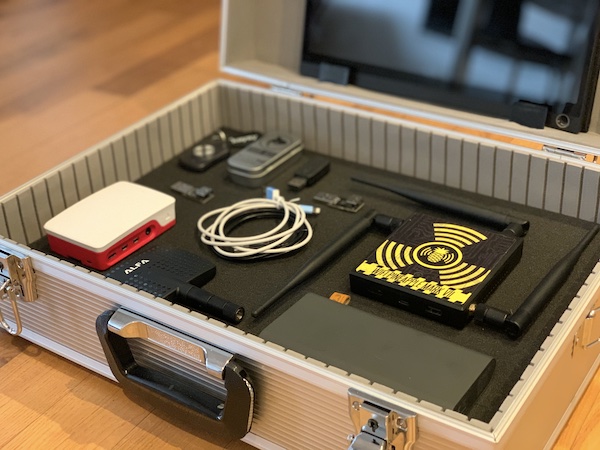
Hak5Box open
  • Raspberry Pi 4 Model B/8GB
  • Keysy + SharkJack + KeyLogger
  • OM.G Cabel’s + Cable Programmer + Malicious cable detector
  • WiFi Pineapple (M7)
  • Alfa Network APA-M04 7dBi WLAN antenna (2,4 GHz)
  • Fresh’n’Rebel Powerbank (18000 mAh)
  • Waveshare monitor FHD (12.5inch, 1920×1080 pixels, IPS screen)

In addition, all cases are filled with brackets and foam so that the connecting cables are not visible (this is not shown in the pictures) and each device has a specific place.

Do you want such suitcases, too?

If you also want one (or more) suitcases and don’t have the time or inclination to build them yourself – just contact me! We can talk about it.

Note: It is important to know that each case and its contents are freely configurable (but it should fit).

Install Gqrx and GNU Radio on macOS (Big Sur)

I’ve tried many times and different ways but the installation of Gqrx and GNU Radio on macOS Big Sur via MacPorts failed always. I did not give up and found a working solution for me (my HackRF One) and these two needed tools. In this tutorial I would like to show you the installation (Gqrx & GNU Radio). If you need first to install HackRF One on macOS, please have a look here.

Install XQuartz

First download and installation starts with XQuartz. Download the latest DMG, run the installation and logout/login from your system.

Install Gqrx SDR

As already mentioned, Gqrx (at least for me) cannot installed on Big Sur via MacPorts. Therefore download and install the precompiled binary from Gqrx. As soon the installation was successful, you can connect and use the HackRF One.

Gqrx and HackRF One on macOS Big Sur

Install Python 3.7

The third step also requires a download and installation. Look for the version Python 3.7! Any version below will not work.

Install GNU Radio

Finally, at the last step, we can start to download and install GNU Radio. It’s a quite big application, so please be patient while processing. Also the startup of GNU Radio (inside XQuartz) takes always some few seconds.

GNU Radio on macOS Big Sur

If you consider the time (download/installation) compared to the MacPorts installation (download/build/installation), a time gain. Of course Xquartz is also needed for MacPorts. Here if you will try via MacPorts:

# install gr-osmosdr (incl hackrf + gnu radio)
$ sudo port install gr-osmosdr

# install gr-fosphor (needed by gnu radio)
$ sudo port install gr-fosphor

# install gqrx
$ sudo port install gqrx

Install HackRF One on macOS (Big Sur)

This time it’s about installing HackRF One binaries on the macOS Big Sur. In another later tutorial I will dive deeper into macOS, HackRF ONE and GnuRadio (gnuradio-companion), but not yet. The installation takes place via latest MacPorts.

Preparation

  • macPorts installed
  • Commandline Tools installed (SDK higher 11)
  • HackRF One connected and started (via USB cable)

CommandLineTools SDK

My first installation failed with a error (even as MacPorts where completely new installed and Command Line Tools where installed, too). I looked into log file and saw a issue with clang version.

# read log file (optional)
$ cat /opt/local/var/macports/logs/_opt_local_var_macports_sources_rsync.macports.org_macports_release_tarballs_ports_science_hackrf/hackrf/main.log
 …
 clang: error: invalid version number in 'MACOSX_DEPLOYMENT_TARGET=11.0'
 …
 

# show clang version (optional)
$ clang --version

So looked it up on the Internet and saw that the clang version in the new SDK is higher and will solve this issue. To confirm I had a look installed SDK’s.

# list SDKs (optional)
$ ls /Library/Developer/CommandLineTools/SDKs/
MacOSX.sdk MacOSX10.14.sdk MacOSX10.15.sdk
CommandLine Tools 12.3

To be really sure. Yes new SDK is installed.

# list SDKs (optional)
$ ls /Library/Developer/CommandLineTools/SDKs/
MacOSX.sdk MacOSX10.14.sdk MacOSX10.15.sdk MacOSX11.1.sdk

# show xcrun configs (optional)
$ xcrun --sdk macosx11.1 --show-sdk-path
$ xcrun --sdk macosx11.1 --show-sdk-version

Installation

After the installation and verification (yes the new sdk was getting installed), I tried the macPorts installation again.

# install hackrf via mac ports
$ sudo port install hackrf

Test installation

This time all went fine and I could start testing the device.

# show USB device info (optional)
$ ioreg -p IOUSB -l -w 0 -b

# show hackrf info
$ hackrf_info

# start debug (optional)
$ hackrf_debug --si5351c -n 0 -r

# start record
$ hackrf_transfer -r myRecord.raw -f 433780000

# start transmit record
$ hackrf_transfer -t myRecord.raw -f 433780000 -x 20