Add remote CentOS to docker-machine

This tutorial shows how to add a remote CentOS to your local docker-machine.

Conditions

Preparation

The first step is to install docker on CentOS 7.

# update packages
$ yum update

# change into repository directory
$ cd /etc /yum.repos.d/

# add the docker repo
$ tee docker.repo <<-'EOF'
[dockerrepo]
name=Docker Repository
baseurl=https://yum.dockerproject.org/repo/main/centos/$releasever/
enabled=1
gpgcheck=1
gpgkey=https://yum.dockerproject.org/gpg
EOF

# install docker
$ yum install docker-engine

# start docker
$ service docker start

# check version
$ docker --version && docker images

Second step is to setup firewall rules on CentOS 7.

# change firewalld
$ firewall-cmd --permanent --zone=public --add-port=2376/tcp
$ firewall-cmd --reload

# check rules
$ firewall-cmd --list-all

The last step on CentOS 7 is to share ssh public key.

# create ssh key (local)
$ ssh-keygen -t rsa -b 4096

Add CentOS 7 server to docker-machine

# list docker-machines
$ docker-machine ls

# add remote to local docker-machine
$ docker-machine create -d generic --generic-ip-address <IP | Domain> --generic-ssh-key ~/.ssh/id_rsa --generic-ssh-user <user> myServer

# pointing shell
$ eval $(docker-machine env myServer)

# list docker-machines
$ docker-machine ls
...
NAME        ACTIVE   DRIVER       STATE     URL                SWARM   DOCKER    ERRORS
myServer      *      generic      Running   tcp://<ip>:2376    v1.11.1

Python, Selenium Grid and Docker

With Docker you can quickly and easily install, configure and use Selenium Grid. This tutorial shows the respective steps that you need as a software tester (or Developer). Instead of Python you can also use other languages, which are supported by Selenium​.

Preconditions

Preparation of files

# create new project
$ mkdir -p ~/Project/SeleniumTutorial && cd ~/Project/SeleniumTutorial

# create docker-compose.yml (version 1)
$ vim v1-docker-compose.yml

# or create docker-compose.yml (version 2)
$ vim v2-docker-compose.yml

# create python example.py
$ vim example.py

Note: You can opt for a version of docker-compose.yml!

Version: 1

---
selenium_hub:
  image: selenium/hub
  ports:
    - 4444:4444
node_1:
  image: selenium/node-chrome
  links:
    - selenium_hub:hub
node_2:
  image: selenium/node-firefox
  links:
    - selenium_hub:hub

Version: 2

---
version: '2'
services:
  selenium_hub:
    image: selenium/hub
    ports:
      - 4444:4444
  node_1:
    image: selenium/node-chrome
    depends_on:
      - selenium_hub
    environment:
      - HUB_PORT_4444_TCP_ADDR=selenium_hub
  node_2:
    image: selenium/node-firefox
    environment:
      - HUB_PORT_4444_TCP_ADDR=selenium_hub
    depends_on:
      - selenium_hub
import os
import datetime
import time
import unittest
from selenium import webdriver


class Example(unittest.TestCase):

    def setUp(self):

        self.driver = webdriver.Remote(
            command_executor='http://192.168.99.100:4444/wd/hub',
            desired_capabilities={
                'browserName': 'firefox',
                'javascriptEnabled': True
            }
        )

        self.driver.get('http://softwaretester.info/')

    def test_something(self):

        dt_format = '%Y%m%d_%H%M%S'
        cdt = datetime.datetime.fromtimestamp(time.time()).strftime(dt_format)
        current_location = os.getcwd()
        img_folder = current_location + '/images/'

        if not os.path.exists(img_folder):
            os.mkdir(img_folder)

        picture = img_folder + cdt + '.png'
        self.driver.save_screenshot(picture)

    def tearDown(self):

        self.driver.quit()


if __name__ == "__main__":

    unittest.main(verbosity=1)

Create environment

# create new VM
$ docker-machine create -d virtualbox Grid

# pointing shell
$ eval $(docker-machine env Grid)

# show status (optional)
$ docker-machine ls
...
NAME   ACTIVE   DRIVER       STATE     URL                         SWARM   DOCKER    ERRORS
Grid   *        virtualbox   Running   tcp://192.168.99.100:2376           v1.11.1 

# run docker-compose (Version: 1)
$ docker-compose -f v1-docker-compose.yml up -d

# run docker-compose (Version: 2)
$ docker-compose -f v2-docker-compose.yml up -d

# show status (Version: 1)
$ docker-compose -f v1-docker-compose.yml ps
...
             Name                         Command           State           Ports          
------------------------------------------------------------------------------------------
seleniumtutorial_node_1_1         /opt/bin/entry_point.sh   Up                           
seleniumtutorial_node_2_1         /opt/bin/entry_point.sh   Up                           
seleniumtutorial_selenium_hub_1   /opt/bin/entry_point.sh   Up      0.0.0.0:4444->4444/tcp

# show status (Version: 2)
$ docker-compose -f v2-docker-compose.yml ps
...
             Name                         Command           State           Ports          
------------------------------------------------------------------------------------------
seleniumtutorial_node_1_1         /opt/bin/entry_point.sh   Up                           
seleniumtutorial_node_2_1         /opt/bin/entry_point.sh   Up                           
seleniumtutorial_selenium_hub_1   /opt/bin/entry_point.sh   Up      0.0.0.0:4444->4444/tcp

Open Browser

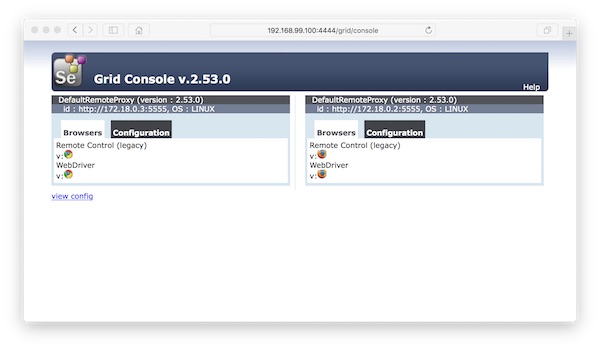
Selenium Grid Console

Run Python script

# run python selenium script
$ python -B ~/Projects/Selenium/example.py

Note: Via browserName (example.py) you can choose the respective browser (firefox or chrome)!

Note: Via docker-compose scale you can add/remove node instances!

# create 2 instances (Version: 1)
$ docker-compose -f v1-docker-compose.yml scale node_1=2

# create 3 instances (Version: 2)
$ docker-compose -f v2-docker-compose.yml scale node_2=3
Monitor running docker containers with cAdvisor

As a software tester, you have several containers run in your environment. Here is an example how easily and quickly you can monitor your test-environment with cAdvisor.

Preconditions

Preparation

# create project (local)
$ mkdir -p ~/Projects/Monitoring && cd ~/Projects/Monitoring

# create shell script (local)
$ vim start-demo.sh
#!/usr/bin/env sh

docker run -d --name cadvisor -P -v /:/rootfs:ro -v /var/run:/var/run:rw -v /sys:/sys:ro -v /var/lib/docker/:/var/lib/docker:ro google/cadvisor:latest
docker run -d --name jenkins -P jenkins
docker run -d --name selenium-hub -P selenium/hub:2.53.0
docker run -d --name selenium-node_1 --link selenium-hub:hub selenium/node-chrome:2.53.0
docker run -d --name selenium-node_2 --link selenium-hub:hub selenium/node-firefox:2.53.0

Note: You can also assign the respective ports!

Run docker containers

# create new VM (local)
$ docker-machine create -d virtualbox monitor

# show status (local)
$ docker-machine ls
...
NAME      ACTIVE   DRIVER       STATE     URL                         SWARM   DOCKER    ERRORS
monitor   -        virtualbox   Running   tcp://192.168.99.100:2376           v1.11.1  

# copy into VM (local) 
$ docker-machine scp ~/Projects/Monitoring/start-demo.sh monitor:/home/docker/

# ssh into VM (local into VM)
$ docker-machine ssh monitor

# change rights (VM)
$ chmod +x start-demo.sh && ls -la

# run shell script (VM)
$ ./start-demo.sh

# list running docker container (VM)
$ docker ps -a
...
CONTAINER ID        IMAGE                          COMMAND                  CREATED              STATUS              PORTS                                               NAMES
57c2598b4261        selenium/node-firefox:2.53.0   "/opt/bin/entry_point"   4 seconds ago        Up 4 seconds                                                            selenium-node_2
d79a5123bcfc        selenium/node-chrome:2.53.0    "/opt/bin/entry_point"   29 seconds ago       Up 29 seconds                                                           selenium-node_1
095f9844346d        selenium/hub:2.53.0            "/opt/bin/entry_point"   About a minute ago   Up About a minute   0.0.0.0:32771->4444/tcp                             selenium-hub
8db3ad58d8ce        jenkins                        "/bin/tini -- /usr/lo"   About a minute ago   Up About a minute   0.0.0.0:32770->8080/tcp, 0.0.0.0:32769->50000/tcp   jenkins
d1e1e1c36d6d        google/cadvisor:latest         "/usr/bin/cadvisor -l"   2 minutes ago        Up 2 minutes        0.0.0.0:32768->8080/tcp                             cadvisor

Open browser

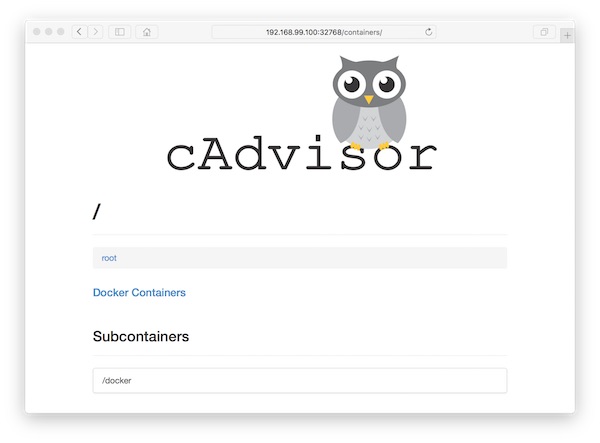
cAdvisor

docker-compose and Jenkins

In this tutorial i show an example, how to install Jenkins (version 2.0) via docker-compose (and docker-machine).

Preconditions

Preparation

# create example directories
$ mkdir -p ~/Projects/Example/Jenkins_HOME && cd ~/Projects/Example

# create new and edit compose files
$ vim docker-compose.yml
---
version: '2'
services:
  jenkins:
    image: jenkins:2.0
    container_name: jenkins
    restart: always
    ports:
      - 8080:8080
    volumes:
      - ./FOR_JENKINS:/var/jenkins_home

Build and run

# create new VM
$ docker-machine create -d virtualbox --virtualbox-memory "2048" example-vm

# point shell
$ eval $(docker-machine env example-vm)

# show current state
$ docker-machine ls
...
NAME         ACTIVE   DRIVER       STATE     URL                         SWARM   DOCKER    ERRORS
example-vm   *        virtualbox   Running   tcp://192.168.99.100:2376           v1.11.0 

# run docker-compose
$ docker-compose up -d

# show state
$ docker-compose ps
...
Name                Command               State                 Ports               
------------------------------------------------------------------------------------
jenkins   /bin/tini -- /usr/local/bi ...   Up      50000/tcp, 0.0.0.0:8080->8080/tcp

# get administrator password
$ docker exec jenkins cat /var/jenkins_home/secrets/initialAdminPassword

Run Browser

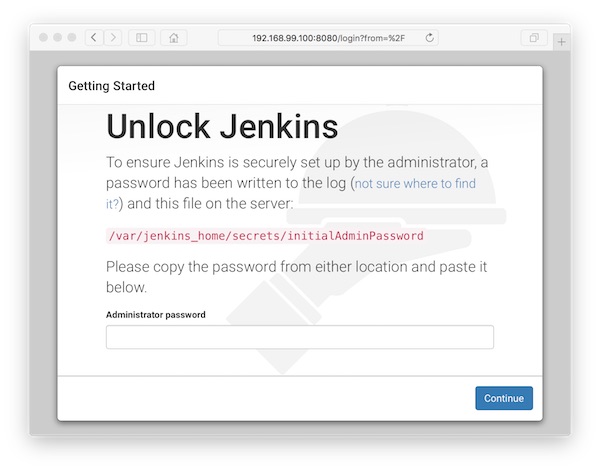
docker jenkins container

Easier work with docker-machine

Okay,… I think now everyone knows that i like it to work with docker-machine. This tutorial should give some hints – how to put local files and directories into a Docker container and change the default VM settings.

Preconditions

Let’s start local

# create new project (local)
$ mkdir -p ~/Projects/tutorial-project/config && cd ~/Projects/tutorial-project

# create some files and directory (local)
$ touch Dockerfile && touch .dockerignore && touch .git && touch config/file_{1..5}

# show content (local)
$ tree -a .
.
├── .dockerignore
├── .git
├── Dockerfile
└── config
    ├── file_1
    ├── file_2
    ├── file_3
    ├── file_4
    └── file_5

# edit Dockerfile (local)
$ echo -e "FROM centos:7\nRUN yum install -y tree\nCOPY . /home/docker-target" > Dockerfile

# edit .dockerignore (local)
$ echo -e ".*\nDockerfile\n*/file_5" > .dockerignore

Create new VM with specific settings

# create new VM (local)
$ docker-machine create -d virtualbox --virtualbox-cpu-count "2" --virtualbox-memory "2048" tutorial-vm

Note: there is a very well documented reference for all supported drivers!

Copy local stuff into vm

# copy local folder into VM (local)
$ docker-machine scp -r ~/Projects/tutorial-project tutorial-vm:tutorial-project

# ssh into VM (local)
$ docker-machine ssh tutorial-vm

# show content of directory (VM)
$ ls -la ~/tutorial-project/
$ ls -la ~/tutorial-project/config/

Create Docker image and container

# create Docker image from Dockerfile (VM)
$ docker build -t centos/tutorial ~/tutorial-project/

# create Docker container from image (VM)
$ docker run -ti --rm centos/tutorial

# show content of directory (Container)
$ tree -a /home/docker-target/
/home/docker-target/
`-- config
    |-- file_1
    |-- file_2
    |-- file_3
    `-- file_4

Bang… this is just one way… !

Create desktop environments on the fly

In this tutorial we will create desktop environments via docker on the fly. This environments could be used for development and/or testing purposes. For example you could expand it with Selenium-Grid nodes or provide manual testers all they need.

Preconditions

Steps

# create new VM
$ docker-machine create -d virtualbox xserver

# ssh into VM
$ docker-machine ssh xserver

# create Dockerfile
$ vi Dockerfile
FROM centos:centos7

MAINTAINER Lupin3000

RUN yum update -y
RUN yum install -y epel-release
RUN yum install -y x2goserver x2goserver-xsession
RUN yum groupinstall -y Xfce
RUN yum install -y firefox

RUN /usr/bin/ssh-keygen -t rsa -f /etc /ssh/ssh_host_rsa_key -N ''
RUN /usr/bin/ssh-keygen -t ecdsa -f /etc /ssh/ssh_host_ecdsa_key -N ''
RUN /usr/bin/ssh-keygen -t ed25519 -f /etc /ssh/ssh_host_ed25519_key -N ''

RUN adduser testuser
RUN echo 'testuser:test123' | chpasswd
RUN echo 'root:test123' | chpasswd

EXPOSE 22

CMD ["/usr/sbin/sshd", "-D"]

* Note: the space after etc is because of the security settings of my provider!

# build Docker image from Dockerfile
$ docker build -t centos7/xserver .

# run Docker container from image
$ docker run -p 2222:22 -d --name centos7-xserver centos7/xserver

Connect with x2go client

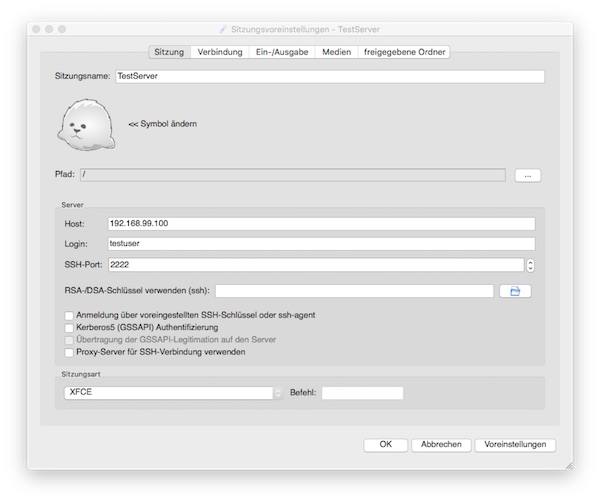
The following example shows the client configuration. Important are values ​​for host (192.168.99.100), port (2222) and session type (XFCE).

x2go client settings

Now it’s up to you to add more users, tools etc. – or to integrate everything into a build process.

Create private docker registry with UI

Today I’ll show you how to create a private Docker registry. Note however you should use it only for development and testing purposes!

Preconditions

Preparation

# create new vms my-registry and my-workspace
$ docker-machine create -d virtualbox my-registry && docker-machine create -d virtualbox my-workspace

# show created vms 
$ docker-machine ls

NAME           ACTIVE   DRIVER       STATE     URL                         SWARM   DOCKER    ERRORS  
my-registry    -        virtualbox   Running   tcp://192.168.99.100:2376           v1.11.0   
my-workspace   -        virtualbox   Running   tcp://192.168.99.101:2376           v1.11.0

Create and run Docker registry container

# pointing shell to my-registry
$ eval $(docker-machine env my-registry)

# create new container (registry version 2)
$ docker run -d -p 5000:5000 --name registry-v2 --restart=always registry:2

# show created container on my-registry
$ docker ps -a

Prepare and push into registry

# ssh into my-workspace
$ docker-machine ssh my-workspace

# modify profile
$ sudo vi /var/lib/boot2docker/profile

# add new content like:
EXTRA_ARGS='
--label provider=virtualbox
--insecure-registry 192.168.99.100:5000
'

# close ssh
$ exit

# restart my-workspace
$ docker-machine restart my-workspace

# pointing shell to my-workspace
$ eval $(docker-machine env my-workspace)

# pull a public image
$ docker pull centos:centos7

# create new tag
$ docker tag centos:centos7 192.168.99.100:5000/lupin/centos7

# show images (2 images should be there)
$ docker images

# push image
$ docker push 192.168.99.100:5000/lupin/centos7

Create registry Browser-UI

# create new vm my-registry-gui
$ docker-machine create -d virtualbox my-registry-gui

# pointing shell to my-registry-gui
$ eval $(docker-machine env my-registry-gui)

# create new container
$ docker run -d -p 8080:80 -e ENV_DOCKER_REGISTRY_HOST=192.168.99.100 -e ENV_DOCKER_REGISTRY_PORT=5000 --name registry-v2-gui --restart=always konradkleine/docker-registry-frontend:v2

# show created container
$ docker ps -a

# show created vms
$ docker-machine ls

NAME              ACTIVE   DRIVER       STATE     URL                         SWARM   DOCKER    ERRORS
my-registry       -        virtualbox   Running   tcp://192.168.99.100:2376           v1.11.0   
my-registry-gui   *        virtualbox   Running   tcp://192.168.99.102:2376           v1.11.0   
my-workspace      -        virtualbox   Running   tcp://192.168.99.101:2376           v1.11.0

Run browser

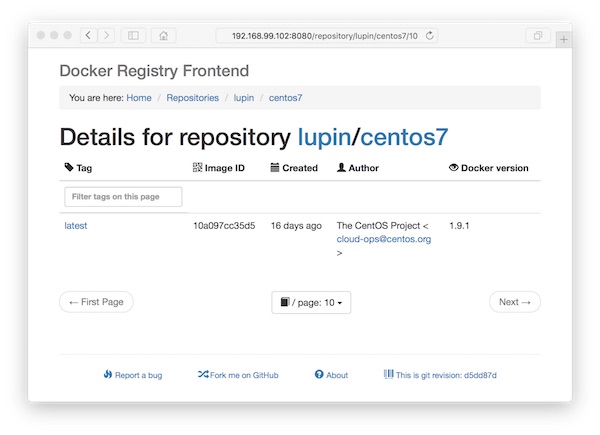
docker registry gui

create docker swarm

In this tutorial I will show how easy it is to create a Docker Swarm.

Precondition

Instructions

# create a new cluster identifier
$ docker-machine create -d virtualbox local
$ eval "$(docker-machine env local)"

# generate discovery token
$ docker run --rm swarm create

Copy the resulting value for <TOKEN-ID>. The following commands will create a Swarm cluster.

# create swarm master
$ docker-machine create -d virtualbox --swarm --swarm-discovery token://<TOKEN-ID> --swarm-master swarm-manager

# create swarm nodes
$ docker-machine create -d virtualbox --swarm --swarm-discovery token://<TOKEN-ID> swarm-node-01
$ docker-machine create -d virtualbox --swarm --swarm-discovery token://<TOKEN-ID> swarm-node-02
$ docker-machine create -d virtualbox --swarm --swarm-discovery token://<TOKEN-ID> swarm-node-03

# delete unused cluser identifier vm
$ docker-machine rm local

# pointing shell to swarm master
$ eval $(docker-machine env --swarm swarm-manager)

# show information
$ docker-machine ls
$ docker info