Create a simple video test environment (Part 3)

Okay, now is time to see some command line tools to analysis videos. I selected 4 Open-Source applications (avprobe, mediainfo, mplayer, exiftool).

Specification

  • docker
  • git

Get ready for docker images

On Bitbucket I created a repository with needed Dockerfiles for fast usage. You can also choose the installation method.

# change directory (optional)
$ cd ~/Projects/

# clone repository
$ git clone https://bitbucket.org/Lupin3000/tinydockerapps ~/Projects/tinydockerapps

# change directory
$ cd ~/Projects/VideoTest/

# build docker image for mediainfo
$ docker build -t debian/mediainfo ~/Projects/tinydockerapps/mediainfo/

# build docker image for mplayer
$ docker build -t debian/mplayer ~/Projects/tinydockerapps/mplayer/

# build docker image for exiftool
$ docker build -t debian/exiftool ~/Projects/tinydockerapps/exiftool/

# build docker image for avprobe
$ docker build -t debian/avprobe ~/Projects/tinydockerapps/avprobe/

# check available images (optional)
$ docker images

mediainfo

Lets start with mediainfo. Here some information about on wikipedia.

# list help
$ docker run --rm -i -v ~/Projects/VideoTest/:/mnt debian/mediainfo --help

# run simple scan
$ docker run --rm -i -v ~/Projects/VideoTest/:/mnt debian/mediainfo demo.mp4

# run full scan
$ docker run --rm -i -v ~/Projects/VideoTest/:/mnt debian/mediainfo -f demo.mp4

# show aspect ratio
$ docker run --rm -i -v ~/Projects/VideoTest/:/mnt debian/mediainfo --Inform="Video;%DisplayAspectRatio%" demo.mp4

# show duration
$ docker run --rm -i -v ~/Projects/VideoTest/:/mnt debian/mediainfo --Inform="General;%Duration/String3%" demo.mp4

# show audio format
$ docker run --rm -i -v ~/Projects/VideoTest/:/mnt debian/mediainfo --Inform="Audio;%Format%" demo.mp4

# show resolution and codec
$ docker run --rm -i -v ~/Projects/VideoTest/:/mnt debian/mediainfo --Inform="Video;Resolution=%Width%x%Height%\nCodec=%CodecID%" demo.mp4

# list all possible file parameters
$ docker run --rm -i -v ~/Projects/VideoTest/:/mnt debian/mediainfo --info-parameters | less

# create XML report (all internal tags)
$ docker run --rm -i -v ~/Projects/VideoTest/:/mnt debian/mediainfo -f --Output=XML demo.mp4

# show mediatrace info
$ docker run --rm -i -v ~/Projects/VideoTest/:/mnt debian/mediainfo --Details=1 demo.mp4

# create report file
$ docker run --rm -i -v ~/Projects/VideoTest/:/mnt debian/mediainfo demo.mp4 --LogFile="Report.log"

mplayer

Second application is mplayer. Here the wikipedia link.

# list help
$ docker run --rm -i -v ~/Projects/VideoTest/:/mnt debian/mplayer --help

# show all properties
$ docker run --rm -i -v ~/Projects/VideoTest/:/mnt debian/mplayer -vo null -ao null -frames 0 -identify demo.mp4

# show all video properties
$ docker run --rm -i -v ~/Projects/VideoTest/:/mnt debian/mplayer -vo null -ao null -frames 0 -identify demo.mp4 | grep VIDEO

# show all audio properties
$ docker run --rm -i -v ~/Projects/VideoTest/:/mnt debian/mplayer -vo null -ao null -frames 0 -identify demo.mp4 | grep AUDIO

# show video format
$ docker run --rm -i -v ~/Projects/VideoTest/:/mnt debian/mplayer -vo null -ao null -frames 0 -identify demo.mp4 | grep ID_VIDEO_FORMAT

exiftool

Now we take a look on exiftool. Here the wikipedia article and the official documentation.

# show all parameters
$ docker run --rm -i -v ~/Projects/VideoTest/:/mnt debian/exiftool demo.mp4

# show all parameters sort by group (including duplicate and unknown tags)
$ docker run --rm -i -v ~/Projects/VideoTest/:/mnt debian/exiftool -a -u -g1 demo.mp4

# show friendly parameters
$ docker run --rm -i -v ~/Projects/VideoTest/:/mnt debian/exiftool -s -G demo.mp4

# show Height and Width
$ docker run --rm -i -v ~/Projects/VideoTest/:/mnt debian/exiftool '-*source*image*' demo.mp4

# show audio format
$ docker run --rm -i -v ~/Projects/VideoTest/:/mnt debian/exiftool '-*Audio*Format*' demo.mp4

# show video duration
$ docker run --rm -i -v ~/Projects/VideoTest/:/mnt debian/exiftool '-*Duration*' demo.mp4 | head -1

# create json output with specific values
$ docker run --rm -i -v ~/Projects/VideoTest/:/mnt debian/exiftool -j -VideoFrameRate -MediaDuration demo.mp4 > report.json

# create csv report file with specific values
$ docker run --rm -i -v ~/Projects/VideoTest/:/mnt debian/exiftool -csv -FileSize -ImageWidth -ImageHeight -AudioFormat -AudioChannels demo.mp4 > report.csv

avprobe

Last but not least avprobe. Here the wikipedia article and detailed official documentation.

# list help
$ docker run --rm -i -v ~/Projects/VideoTest/:/mnt debian/avprobe --help

# list available formats
$ docker run --rm -i -v ~/Projects/VideoTest/:/mnt debian/avprobe -formats

# list available codecs
$ docker run --rm -i -v ~/Projects/VideoTest/:/mnt debian/avprobe -codecs

# show all properties
$ docker run --rm -i -v ~/Projects/VideoTest/:/mnt debian/avprobe demo.mp4

# show stream properties in json format
$ docker run --rm -i -v ~/Projects/VideoTest/:/mnt debian/avprobe -of json -loglevel quiet -show_streams demo.mp4

# show specific properties
$ docker run --rm -i -v ~/Projects/VideoTest/:/mnt debian/avprobe -show_format -show_streams -pretty demo.mp4

# show size properties
$ docker run --rm -i -v ~/Projects/VideoTest/:/mnt debian/avprobe -show_entries format=size demo.mp4

# show duration and size properties
$ docker run --rm -i -v ~/Projects/VideoTest/:/mnt debian/avprobe -loglevel quiet -show_entries format=duration,size demo.mp4

# show duration and size properties in json format
$ docker run --rm -i -v ~/Projects/VideoTest/:/mnt debian/avprobe -of json -loglevel quiet -show_entries format=duration,size demo.mp4

Compare tools by expecting specific result

I will not judge the applications against each other! But here a compare of complexity of commands and output for video duration.

# get duration by exiftool
$ exiftool -s -s -s  -MediaDuration demo.mp4
...
0:01:04

# get duration by mediainfo
$ mediainfo --Inform="General;%Duration/String3%" demo.mp4
...
00:01:04.884

# get duration by avprobe
$ avprobe -v error -sexagesimal -show_entries format=duration -of default=noprint_wrappers=1:nokey=1 demo.mp4
...
0:01:04.884000

# get duration by mplayer
$ mplayer -vo null -ao null -frames 0 -nolirc -identify demo.mp4 | grep ID_LENGTH | cut -d'=' -f2
...
64.88
Build notifications with CatLight

CatLight is the the perfect app if you would like to know the current status of your continuous delivery pipelines, tasks and bugs. Without looking on E-Mails or visit build servers you know when attention is needed. It’s available for Debian, Ubuntu, Windows and MacOS.

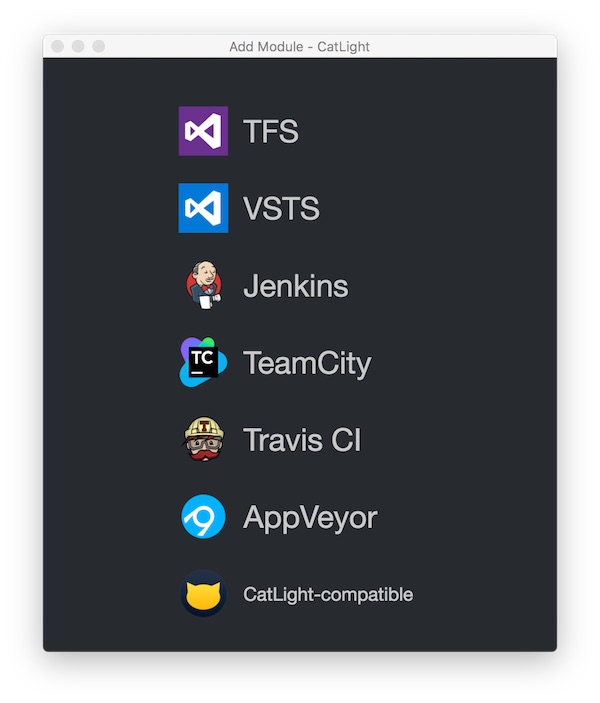
CatLight works with Jenkins, TFS, Travis CI and many more.

catlight setup

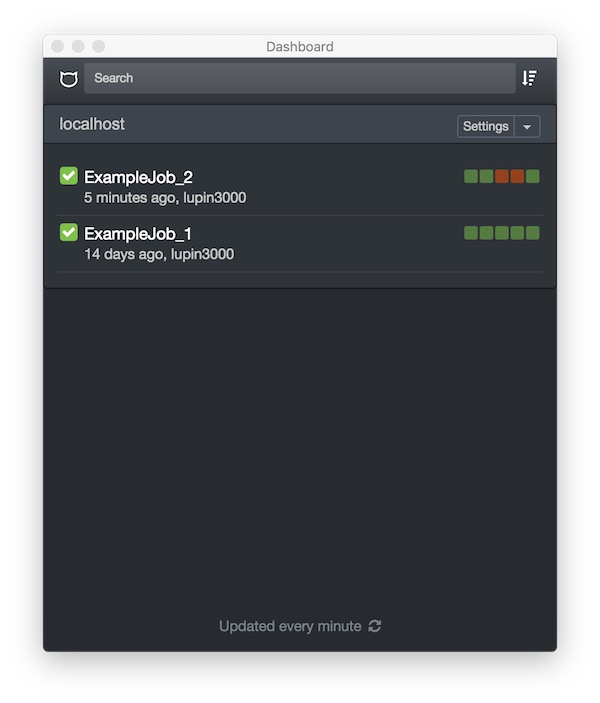
After successful installation and configuration, CatLight offers a lot of cool features.

catlight jobs

For personal usage it’s free, you only have to register.

Lunar – a UNIX security auditing tool

LUNAR is a open source UNIX security auditing tool written in Shell script. It offers the audit for various operating systems like Linux (RHEL, CentOS, Debian, Ubuntu), Solaris and Mac OS with less requirements. Services like Docker and AWS are also supported.

Download

Clone repository

# git clone
$ git clone https://github.com/lateralblast/lunar.git

Download via curl

# download via curl
$ curl -L -C - -o lunar.zip https://github.com/lateralblast/lunar/archive/master.zip

# extract archive
$ unzip lunar.zip

Usage

The use is very easy… but the outcome brings much values.

# show help
$ sh lunar.sh -h

# list functions
$ sh lunar.sh -S

# run ssh audit
$ sh lunar.sh -s audit_ssh_config

# run selinux audit in verbose mode
$ sh lunar.sh -s audit_selinux -v

# run all audits
$ sh lunar.sh -a

TCP port scanner Brutescan

Brutescan is a fast and noisy TCP port scanner written in go.

Preparation

# install git and curl packages
$ sudo apt install -y curl git

# download go (do not install from Debian)
$ curl -O https://storage.googleapis.com/golang/go1.8.linux-amd64.tar.gz

# unzip archive
$ tar xvf go1.8.linux-amd64.tar.gz

# set owner and group (recursive)
$ sudo chown -R root:root go

# move all into target directory
$ sudo mv go /usr/local/

Configure go (for user)

# create hidden go directory
$ mkdir ~/.go

# configure needed paths (inside .bashrc)
$ echo "GOPATH=$HOME/.go" >> ~/.bashrc
$ echo "export GOPATH" >> ~/.bashrc
$ echo "PATH=\$PATH:/usr/local/go/bin:\$GOPATH/bin" >> ~/.bashrc

# reload
$ source ~/.bashrc

# check go version
$ go version
go version go1.8 linux/amd64

Install brutescan

# install packages from github
$ go get github.com/asciimoo/brutescan

# show bombardier help
$ brutescan --help

Usage/Examples

# scan all ports on localhost
$ brutescan localhost
...
Scanning localhost (127.0.0.1)
Port range: 1-65535 (65534 ports)
Concurrent connections: 65512

port 22    open
port 25    open
port 111   open
port 42619 open

Scan finished in 2.970551852s
...

# scan port range with specific concurrent pool size
$ brutescan -pmin 22 -pmax 2000 -pool 100 heise.de
...
Scanning heise.de (193.99.144.80)
Port range: 22-2000 (1978 ports)
Concurrent connections: 100

no open ports found

Scan finished in 1m0.087341111s ...

HTTP benchmarking with Bombardier

Bombardier is a nice HTTP(S) benchmarking tool, written in Go language, for software performance testers.

Preparation

# install git and curl packages
$ sudo apt install -y curl git

# download go (do not install from Debian)
$ curl -O https://storage.googleapis.com/golang/go1.8.linux-amd64.tar.gz

# unzip archive
$ tar xvf go1.8.linux-amd64.tar.gz

# set owner and group (recursive)
$ sudo chown -R root:root go

# move all into target directory
$ sudo mv go /usr/local/

Configure go (for user)

# create hidden go directory
$ mkdir ~/.go

# configure needed paths (inside .bashrc)
$ echo "GOPATH=$HOME/.go" >> ~/.bashrc
$ echo "export GOPATH" >> ~/.bashrc
$ echo "PATH=\$PATH:/usr/local/go/bin:\$GOPATH/bin" >> ~/.bashrc

# reload
$ source ~/.bashrc

# check go version
$ go version
go version go1.8 linux/amd64

Install bombardier

# install packages from github
$ go get -u github.com/codesenberg/bombardier

# show bombardier help
$ bombardier --help

Usage/Examples

# run with 5 connections on 10 sec.
$ bombardier -c 5 -k https://www.heise.de
...
Statistics        Avg      Stdev        Max
  Reqs/sec        32.44      37.83        201
  Latency      152.35ms    72.93ms      1.24s
  HTTP codes:
    1xx - 0, 2xx - 329, 3xx - 0, 4xx - 0, 5xx - 0
    others - 0
  Throughput:     6.18MB/s
...

# run with 10 connections on 5 sec and show latency statistics.
$ bombardier -d 5s -c 10 -l -k https://www.heise.de
...
Statistics        Avg      Stdev        Max
  Reqs/sec        56.51      59.10        251
  Latency      173.10ms   102.95ms      1.32s
  Latency Distribution
     50%   155.83ms
     75%   164.06ms
     90%   174.99ms
     99%   542.91ms
  HTTP codes:
    1xx - 0, 2xx - 294, 3xx - 0, 4xx - 0, 5xx - 0
    others - 0
  Throughput:    10.63MB/s
...


HTTP inspection with Wuzz

Wuzz is a very easy command line tool for HTTP(S) inspection with very much potential. In this tutorial I will show the installation on Debian 8.7 (jessie).

Preparation

# install git and curl packages
$ sudo apt install -y curl git

# download go (do not install from Debian)
$ curl -O https://storage.googleapis.com/golang/go1.8.linux-amd64.tar.gz

# unzip archive
$ tar xvf go1.8.linux-amd64.tar.gz

# set owner and group (recursive)
$ sudo chown -R root:root go

# move all into target directory
$ sudo mv go /usr/local/

Configure go (for user)

# create hidden go directory
$ mkdir ~/.go

# configure needed paths (inside .bashrc)
$ echo "GOPATH=$HOME/.go" >> ~/.bashrc
$ echo "export GOPATH" >> ~/.bashrc
$ echo "PATH=\$PATH:/usr/local/go/bin:\$GOPATH/bin" >> ~/.bashrc

# reload
$ source ~/.bashrc

# check go version
$ go version
go version go1.8 linux/amd64

Install wuzz

# install packages from github
$ go get github.com/asciimoo/wuzz

# check wuzz version
$ wuzz --version wuzz 0.2.0

# show wuzz help
$ wuzz --help

# simple run
$ wuzz

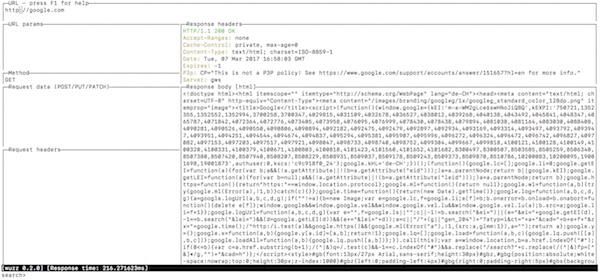
If everything is going well, the terminal should look like this and you can start.

example wuzz cli

Install w3af on Debian (Jessie)

W3AF is a free is a Web Application Attack and Audit Framework. This tutorial shows how to install w3af on Debian 8.6 (not by Debian package w3af-console).

Preparation

# update system
$ apt-get update && apt-get upgrade

# install needed packages
$ apt-get install -y build-essential sudo git libssl-dev openssl libxml2-dev libxslt1-dev libssl-dev libffi-dev python-dev python-pip

# upgrade python pip
$ pip install --upgrade pip

Install and run w3af

# clone from git repository
$ git clone https://github.com/andresriancho/w3af.git

# change directory
$ cd w3af/

# run console (this step creates the install script)
$ ./w3af_console

# run installation script
$ . /tmp/w3af_dependency_install.sh

# start (accept the terms and conditions)
$ ./w3af_console

# show version
w3af>>> version

# show help
w3af>>> help

Note: read the user guide on http://docs.w3af.org

Install v3n0m on Debian (Jessie)

V3n0m is a free penetration scanner. This tutorial shows how to install v3n0m on Debian 8.6.

Preparation

# update and upgrade system
$ apt-get update && apt-get upgrade

# install needed packages
$ apt-get install -y build-essential sudo git libssl-dev openssl

# download python 3.5 source
$ wget https://www.python.org/ftp/python/3.5.0/Python-3.5.0.tgz

# unzip archive
$ tar xzvf Python-3.5.0.tgz

# change directory
$ cd Python-3.5.0

# configure for compile
$ ./configure

# compile python 3.5
$ make

# install python 3.5
$ make install

# check pip version
$ pip3 --version
...
pip 7.1.2 from /usr/local/lib/python3.5/site-packages (python 3.5)

# change directory (home dir)
$ cd

# install python libraries
$ pip3 install dnspython3 aiohttp httplib2 socksipy-branch requests url

Install and run v3n0m

# clone git repository
$ git clone https://github.com/v3n0m-Scanner/V3n0M-Scanner.git

# change directory
$ cd V3n0M-Scanner/src/

# run V3n0M
$ python3.5 v3n0m.py

Output…

|----------------------------------------------------------------|
| Release Date 07/10/2016                                        |
|                                                                |
|        Proxy Enabled  [ False ]                                |
|                                                                |
|                    _____       _____                           |
|                   |____ |     |  _  |                          |
|             __   __   / /_ __ | |/' |_ __ ___                  |
|             \ \ / /   \ \ '_ \|  /| | '_ ` _ \                 |
|              \ V /.___/ / | | \ |_/ / | | | | |                |
|    Official   \_/ \____/|_| |_|\___/|_| |_| |_| Release 410.1  |
|                     NovaCygni  Architect                       |
|----------------------------------------------------------------|

[1] Dork and vuln scan
[2] Admin page finder
[3] FTP crawler and vuln scan
[4] DNS brute
[5] Enable Tor/Proxy Support
[6] Misc Options
[7] Check for and apply update
[0] Exit

:

Have fun but be careful!