W3AF is a free is a Web Application Attack and Audit Framework. This tutorial shows how to install w3af on Debian 8.6 (not by Debian package w3af-console).
# clone from git repository
$ git clone https://github.com/andresriancho/w3af.git

# change directory
$ cd w3af/

# run console (this step creates the install script)
$ ./w3af_console

# run installation script
$ . /tmp/w3af_dependency_install.sh

# start (accept the terms and conditions)
$ ./w3af_console

# show version
w3af>>> version

# show help
w3af>>> help
This time i show YAWAST (Antecedent Web Application Security Toolkit) on Debian 8.6. YAWAST performs basic checks for penetration testers and security auditors.
System preparation
# update and upgrade system
$ apt-get update && apt-get upgrade

# install needed packages
$ apt-get install -y build-essential libssl-dev

# download ruby archive
$ wget https://cache.ruby-lang.org/pub/ruby/2.3/ruby-2.3.1.tar.gz

# unzip archive
$ tar -zxvf ruby-2.3.1.tar.gz

# change directory
$ cd ruby-2.3.1/

# run configuration
$ ./configure

# run compilation
$ make

# run intsallation
$ make install

# check version
$ ruby --version
Install YAWAST
# install YAWAST via gem
$ gem install yawast

# show help
$ yawast --help
Do you like Vagrant? … Yes? … Then you will love Vagrant Manger! Vagrant Manager is free and available for Mac OS and Windows. But pictures say more than 1000 words…
Today we build a penetration test environment via Docker. That means no Plug-Ins (for example: Java) are needed! If you are Mac OS X users, a VNC client is already included (since Yosemite).
Preparation:
# download all needed Docker images
$ docker pull owasp/zap2docker-stable
$ docker pull citizenstig/dvwa
$ docker pull jmbmxer/threadfix

# list local Docker images
$ docker images
...
REPOSITORY                TAG                 IMAGE ID            CREATED             SIZE
owasp/zap2docker-stable   latest              a774bdc65502        3 months ago        1.557 GB
jmbmxer/threadfix         latest              b6f1907a61cd        5 months ago        941 MB
citizenstig/dvwa          latest              c8312743bc09        23 months ago       478.5 MB
ZAP Attack Proxy
# run Docker container with ZAP Attack Proxy (insert and remember password)
$ docker run -u zap -p 5900:5900 -p 8080:8080 -v /tmp/reports:/home/zap/reports --name zap -i owasp/zap2docker-stable x11vnc --forever --usepw --create
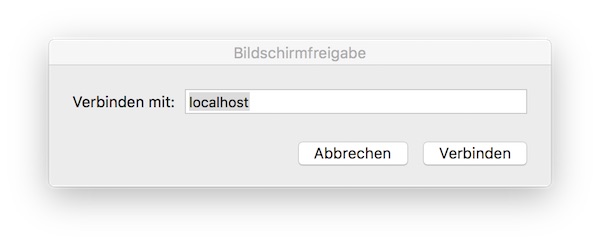
# start VNC (Mac OS X)
$ open /System/Library/CoreServices/Applications/Screen\ Sharing.app/
…or use the short way via: [cmd] + [space] and type screen sharing
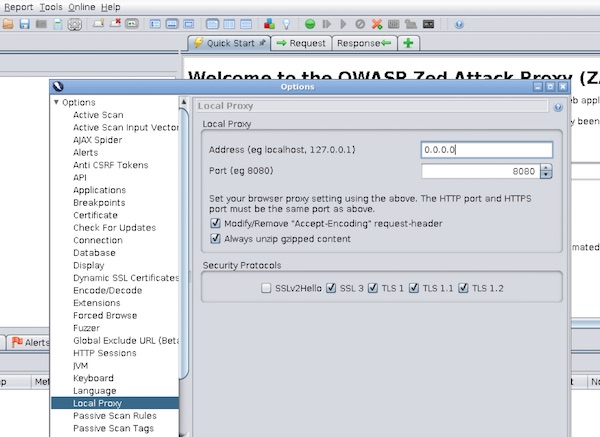
Insert “localhost” and your given password… and follow introduction for ZAP startup. Now you configure the ZAP Proxy Settings.
Note: Select IP “0.0.0.0” for later use. You can also use “$ docker inspect zap” to find out the internal IP, but this could change on next start.
DVWA
# run Docker container with DVWA (2nd terminal)
$ docker run -d -p 8081:80 --name dvwa citizenstig/dvwa

# wait for startup
$ docker logs -f dvwa

# get host ip (from where you run browser)
$ ifconfig
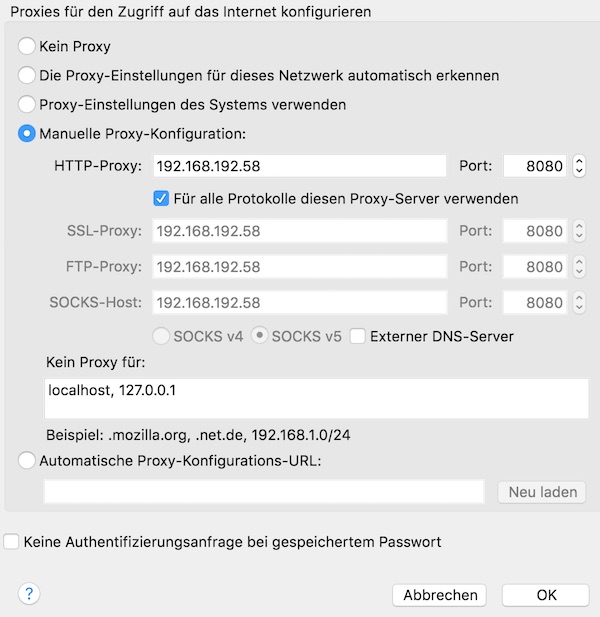
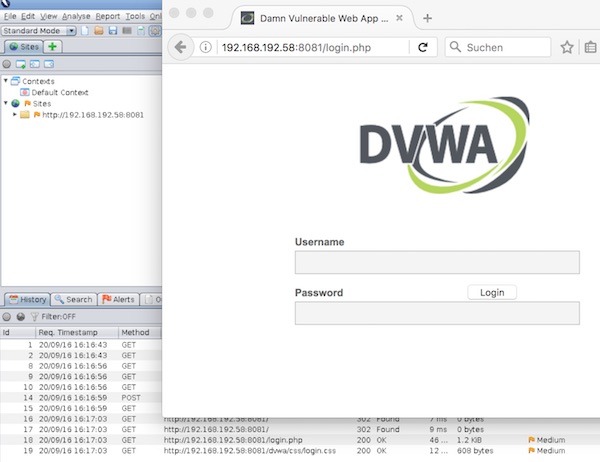
Now start your Firefox browser and change proxy settings. Insert your IP!
Call URL for DVWA in Firefox and run your penetration tests.
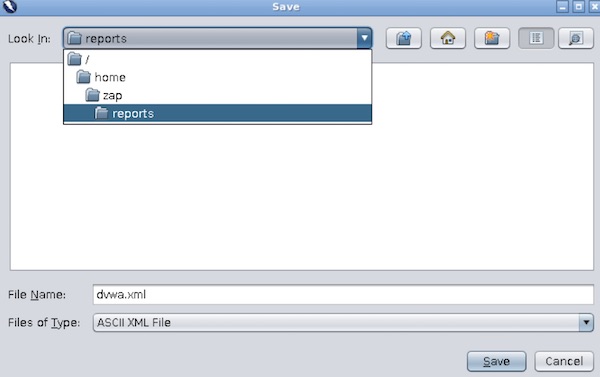
When you are done, export XML report
From now on, you can stop all running docker container.
ThreadFix
# run Docker container with ThreadFix
$ docker run -d -p 8443:8443 --name threadfix jmbmxer/threadfix start

# wait for startup
$ docker logs -f threadfix
Open Safari and call URL: https://localhost:8443/threadfix. Login with User: “user” and Password: “password”. Create a new team and add a application to team.
# open directory in finder
$ open /tmp/reports/
Import the ZAP XML report.
That is it… enjoy and expand your pentest laboratory!
Today a tutorial for creating a Alpine Linux VM with VirtualBox. The only limitation is that VirtualBox is already installed. Furthermore, all of the steps are performed in the terminal (without VirtualBox-GUI).
Creation of VM
# change directory
$ cd VirtualBox\ VMs/

# download alpine iso
$ curl -o alpine-3.4.3-x86_64.iso http://dl-cdn.alpinelinux.org/alpine/v3.4/releases/x86_64/alpine-3.4.3-x86_64.iso

# checksum sha1 (optional)
$ openssl sha1 alpine-3.4.3-x86_64.iso

# create new directory
$ mkdir AlpineVM

# create storage medium for VM
$ VBoxManage createhd --filename ./AlpineVM/AlpineVM.vdi --size 8192

# list available OS types (just for fun and good to know)
$ VBoxManage list ostypes

# register new alpine VM
$ VBoxManage createvm --name "AlpineVM" --ostype Linux26_64 --register

# configure system settings of alpine VM
$ VBoxManage modifyvm "AlpineVM" --memory 1024 --cpus 1 --acpi on --pae off --hwvirtex on --nestedpaging on --rtcuseutc on --vram 16 --audio none --accelerate3d off --accelerate2dvideo off --usb on

# configure boot settings of VM
$ VBoxManage modifyvm "AlpineVM" --boot1 dvd --boot2 disk --boot3 none --boot4 none

# modify a storage controller (IDE)
$ VBoxManage storagectl "AlpineVM" --name "IDE" --add ide

# modify a storage controller (SATA)
$ VBoxManage storagectl "AlpineVM" --name "SATA" --add sata

# add storage medium to VM
$ VBoxManage storageattach "AlpineVM" --storagectl "SATA" --port 0 --device 0 --type hdd --medium ./AlpineVM/AlpineVM.vdi

# add alpine iso
$ VBoxManage storageattach "AlpineVM" --storagectl "IDE" --port 1 --device 0 --type dvddrive --medium alpine-3.4.3-x86_64.iso

# start alpine VM
$ VBoxManage startvm "AlpineVM"
Basic Alpine installation
# after login as user "root" (passwordless)

# run setup
$ setup-alpine

>>>
keyboard layout: "us"
keyboard variant: "us"
system hostname: "localhost"
initialise interface: "eth0, dhcp, no manual setup"
enter root password
timezone: "UTC"
HTTP/FTP proxy URL: "none"
Detect and add fastest mirror: "f"
SSH server: "openssh"
NTP client: "chrony"
install to disk: "sda"
install type: "sys"
erase & continue: "y"
<<<

# shutdown system
$ poweroff
Explainshell.com rocks! Nevertheless, you lose time to leave the terminal (open browser, copy-paste). But there is a cool solution from ManKier. All what you need is curl.
With a tiny script it will be more comfortable! Add the following to your .bashrc or .bash_profile (MAC OS X).
# explain.sh begins
explain () {
	if [ "$#" -eq 0 ]; then
		while read  -p "Command: " cmd; do
			curl -Gs "https://www.mankier.com/api/explain/?cols="$(tput cols) --data-urlencode "q=$cmd"
		done
		echo "Bye!"
	elif [ "$#" -eq 1 ]; then
		curl -Gs "https://www.mankier.com/api/explain/?cols="$(tput cols) --data-urlencode "q=$1"
	else
		echo "Usage"
		echo "explain                  interactive mode."
		echo "explain 'cmd -o | ...'   one quoted command to explain it."
	fi
}
Now you can do …
# explain one command
$ explain 'df -h'
...
df(1)
  df displays the amount of disk space available on the file system containing each file name
  argument. If no file name is given, the space available on all currently mounted file systems is
  shown. Disk space is shown in 1K blocks by default, unless the environment variable
  POSIXLY_CORRECT is set, in which case 512-byte blocks are used. If an argument is the absolute
  file name of a disk device node containing a mounted file system, df shows the space available on
  that file system rather than on the file system containing the device node. This version of df
  cannot show the space available on unmounted file systems, because on most kinds of systems doing
  so requires very nonportable intimate knowledge of file system structures.

  -h (-H, --HUMAN-READABLE)
    print sizes in powers of 1024 (e.g., 1023M)
… if you insert only “explain” an interactive mode will started!
Today’s tutorial shows how quickly and easily a Docker port scanner can be created. With the knowledge you can then create additional Docker applications.