This guide shows you how to use PyCharm with virtualenv on Mac OS X.
Preconditions
PyCharm installed
Steps
First install we install Virtualenv and Virtualenvwrapper.
# if pip not installed
$ sudo easy_install pip

# install virtualenv
$ sudo pip install virtualenv

# install virtualenvwrapper
$ sudo pip install virtualenvwrapper
Now we start PyCharm to create new project.

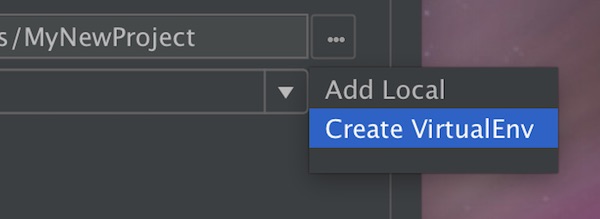
After given the new name for the project on Location, select for Interpreter “Create VirtualEnv”.

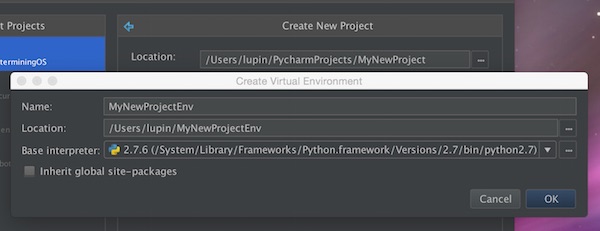
Create Virtual Environment dialog box opens. Here type the name of the new virtual environment and specify the target directory for he new virtual environment on Location. Select one “Base interpreter” and if needed, select the check box “Inherit global site-packages”.

Press “OK” button to apply changes and close the dialog box. After press the “Create” button – PyCharm create the new project.