Sometimes you need an own Docker registry for testing purpose. Here a simple way to setup and use a private insecure registry. For production – don’t do that!
Requirements
- Docker for Mac
- Dedicated server with IP (e.q. Dedibox)
Create insecure repository
SSH into your dedicated server…
# create directory
$ mkdir /opt/registry-data

# run docker registry
$ docker run -d --name registry --restart=always -p 5000:5000 -v /opt/registry-data:/var/lib/registry registry:2

# verify container run (optional)
$ docker ps -a

# logout
$ exit
Configure Docker for Mac
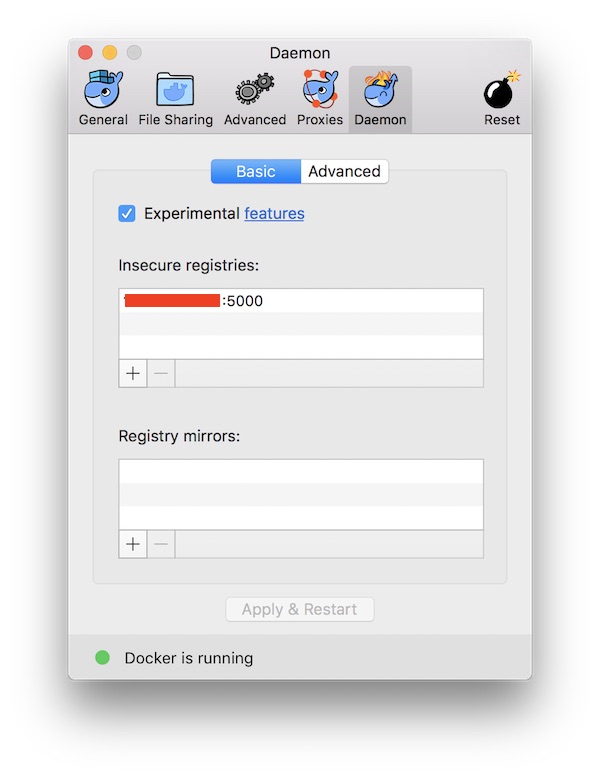
Start Docker for Mac and open “Preferences” – “Daemon”. Here just insert the IP plus specific port. When you are done press “Apply and Restart” button.
Build new image, tag and push
Create a new Dockerfile.
FROM alpine:latest

# install needed packages
RUN apk --update add wget

# download archive
RUN wget -q --no-check-certificate https://storage.googleapis.com/shellcheck/shellcheck-latest.linux.x86_64.tar.xz

# unzip archive
RUN tar xvfJ shellcheck-latest.linux.x86_64.tar.xz

# move binary
RUN mv /shellcheck-latest/shellcheck /usr/local/bin/shellcheck

# cleanup
RUN apk del wget
RUN rm -f shellcheck-latest.linux.x86_64.tar.xz
RUN rm -fr shellcheck-latest/

# change to mount directory
WORKDIR /mnt

# set entrypoint
ENTRYPOINT ["/usr/local/bin/shellcheck"]
Now build the image, tag the image and push to your private registry.
# build image
$ docker build -t alpine/shellcheck .

# tag image
$ docker tag alpine/shellcheck <IP>:5000/shellcheck

# push to private registry
$ docker push <IP>:5000/shellcheck
Use insecure registry
# remove all local images
$ docker rmi alpine/shellcheck
$ docker rmi <IP>:5000/shellcheck

# pull image from private registry
$ docker pull <IP>:5000/shellcheck

# list images (optional)
$ docker images
Additional
You can see the images stored on your registry. Therefor SSH into your dedicated server again.
# list content (optional)
$ ls -la /opt/registry-data/docker/registry/v2/repositories/

