I have already presented various tutorials on docker monitoring. This time we will use Telegraf.
Project preparation
# create new project
$ mkdir -p Projects/DTIG/influxdb && cd Projects/DTIG/

# create telegraf.conf
$ touch telegraf.conf
InfluxDB preparation
# start InfluxDB
$ docker run --name influxdb -p 8086:8086 -v $PWD/influxdb:/var/lib/influxdb influxdb

# create new user
$ curl -G http://localhost:8086/query --data-urlencode "q=CREATE USER telegraf WITH PASSWORD 'password123' WITH ALL PRIVILEGES"

# create database for telegraf
$ curl -G http://localhost:8086/query -u telegraf:password123 --data-urlencode "q=CREATE DATABASE telegraf_db"

# show ip of influxdb container
$ docker inspect --format '{{ .NetworkSettings.IPAddress }}' influxdb
...
172.17.0.2
...
Telegraf preparation
# Telegraf Configuration

[agent]
  interval = "10s"
  round_interval = true
  metric_batch_size = 1000
  metric_buffer_limit = 10000
  collection_jitter = "0s"
  flush_interval = "10s"
  flush_jitter = "0s"
  precision = ""
  debug = false
  quiet = false
  logfile = ""
  hostname = ""
  omit_hostname = false

[[outputs.influxdb]]
  urls = ["http://172.17.0.2:8086"] # required
  database = "telegraf_db" # required
  retention_policy = ""
  write_consistency = "any"
  timeout = "5s"

[[inputs.cpu]]
  percpu = true
  totalcpu = true
  collect_cpu_time = false

[[inputs.disk]]
  ignore_fs = ["tmpfs", "devtmpfs", "devfs"]

[[inputs.docker]]
  endpoint = "unix:///var/run/docker.sock"
  container_names = []
  timeout = "5s"
  perdevice = true
  total = false
  # docker_label_include = []
  # docker_label_exclude = []
… Read more about Telegraf on documentation page …
# edit telegraf.conf
$ vim telegraf.conf

# start Telegraf
$ docker run --name telegraf -v $PWD/telegraf.conf:/etc /telegraf/telegraf.conf -v /var/run/docker.sock:/var/run/docker.sock telegraf
Note: The space after /etc is just because of security settings of my provider.
… after short time …
# show measurements (be patient)
$ curl -G http://localhost:8086/query -u telegraf:password123 --data-urlencode "db=telegraf_db" --data-urlencode "q=SHOW MEASUREMENTS"
Grafana preparation
# run grafana container
$ docker run --name grafana -i -p 3000:3000 grafana/grafana

# open Grafana WebUI and login (admin:admin)
$ open -a Safari http://localhost:3000
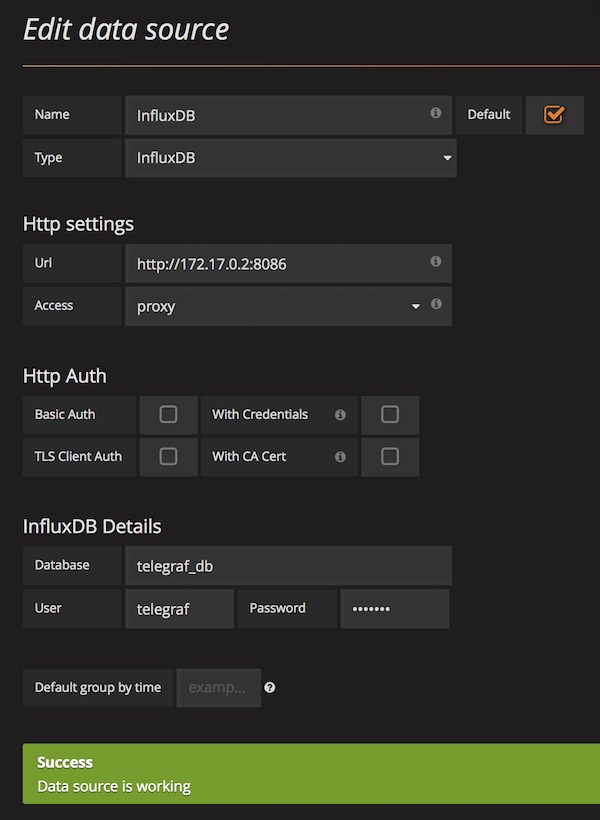
After login (admin:admin) you can add new Data Source.

Okay … all done … you can start to create Dashboards or search for existing Dashboards for import.