Install RfCat on Kali Linux (2020.4)

I finally received my Yard Stick One (Yet Another Radio Dongle) and can get started with it. It is available from Hak5 (incl. ANT500 antenna) and various other resellers. In this tutorial I would like to show you, how to install RfCat on Kali Linux (version 2020.4) and point out the necessary steps, so that you can start pentesting immediately with this awesome device.

Install needed packages

The installation is actually very simple. Python3 is not a problem, even if many sources claim different. The following steps show the installation of the necessary packages (before RfCat can be installed and used). You may have already installed some of them on your system (depends on Kali Metapackages installed).

On my system following packages are installed already: curl, git, make, libusb-1.0-0, python3-numpy, python3-serial, python3-future and ipython3.

# update packages
$ sudo apt update -y

# install packages via apt
$ sudo apt install -y python3-pip python3-usb 

# show python3 packages (optional)
$ pip3 freeze

# install needed python3 packages
$ sudo pip3 install PySide2 pyreadline

The RfCat website explicitly indicates the version of SDCC (max. 3.5.0), so you can decide now to follow this request or take latest by apt.

# show package info
$ apt info sdcc

# install via apt
$ sudo apt install -y sdcc

# verify version (optional)
$ sdcc --version

If you will not use the Kali apt repository. You can find all needed packages for “Debian stretch” here (SDCC & SDCC-Libraries).

# download sdcc-libraries package (version 3.5.0)
$ curl -l -C- http://ftp.de.debian.org/debian/pool/main/s/sdcc/sdcc-libraries_3.5.0+dfsg-2_all.deb -o sdcc-libraries_3.5.0+dfsg-2_all.deb

# download sdcc package (version 3.5.0)
$ curl -l -C- http://ftp.de.debian.org/debian/pool/main/s/sdcc/sdcc_3.5.0+dfsg-2+b1_amd64.deb -o sdcc_3.5.0+dfsg-2+b1_amd64.deb

# install sdcc-libraries
$ sudo dpkg -i sdcc-libraries_3.5.0+dfsg-2_all.deb

# install sdcc package
$ sudo dpkg -i sdcc_3.5.0+dfsg-2+b1_amd64.deb

# show version (optional)
$ sdcc --version

Also for RfCat we don’t use the Kali apt repository but clone the GitHub repository from https://github.com/atlas0fd00m/rfcat (and install it from there).

# clone repository
$ git clone https://github.com/atlas0fd00m/rfcat.git

# change into cloned directory
$ cd rfcat/

# install rfcat
$ sudo python3 setup.py install

Note: Because of security settings (of my provider), I need to show the next command as picture.

copy Yard Stick One rules
# refresh rules
$ sudo udevadm control --reload-rules

Test the installation

That was actually super easy and also happened very quickly. A little test (show help) and then you can start using Yard Stick One.

# change back to home directory
$ cd ~

# show rfcat help (optional)
$ rfcat -h

If you do not get help or an error message, please verify that all dependencies are installed or that you did not mix up different Python versions.

You may need to install the following packages: python3-pyside2.qtcore, python3-pyside2.qtgui and python3-pyside2.qtwidgets.

Run RfCat

I do run Kali Linux as VirtualBox (6.1) VM, so it’s time to plugin and passthrough the USB device.

Yard Stick One - VirtualBox

Note: I don’t like Passwordless Sudo, but you’re welcome to customize it, to suit your needs.

# verify USB device (optional)
$ lsusb
...
Bus 002 Device 003: ID 1d50:605b OpenMoko, Inc. RfCat YARD Stick One
...

# start rfcat (interactive + d.* objects)
$ sudo rfcat -r

The following commands should help you to get familiar with the Yard Stick One device, as I want just to show the setup in this tutorial and will end here with these examples.

# show help (optional)
In [1]: help(d.setRFRegister)

# show current settings (optional)
In [2]: print(d.reprRadioConfig())

# start listen (ENTER stops)
In [3]: d.RFlisten()

# reset after scan/transmit (important)
In [4]: d.setModeIDLE()

# exit rfcat
In [5]: exit
Show NAT type and external IP

PyStun is an nice Python STUN client which will help you to detect your NAT type and your external IP address.Β Here now a simple tutorial for usage.

Requirements

  • min. Python 2.7.x installed
  • Python virtualenv installed

Preparation

# create project and change directory
$ mkdir -p Projects/NAT && cd Projects/NAT

# create virtualenv and activate it
$ virtualenv .env && . .env/bin/activate

# install pystun
$ pip install pystun

# check pystun version (optional)
$ pystun --version

Run pystun

# run pystun with STUN host and STUN port
$ pystun -H stun.12connect.com -P 3478
NAT Type: Restric NAT
External IP: 178.81.75.18
External Port: 54320

# run pystun with STUN host and STUN port
$ pystun -H stun4.l.google.com -P 19302
NAT Type: Full Cone
External IP: 178.81.75.18
External Port: 54320

NAT Variations

On ietf.orgΒ you will find very detailed documentation on STUN.

Create phishing sites with SocialFish

With SocialFish you can easily and quickly create phishing sites. Of course, only for learning purposes! Here is a little tutorial to getting started.

Requirements

  • make, PHP, sudo
  • Python 2.7
  • Python PIP
  • Python virtualenv

Preparation

# create new project
$ mkdir -p ~/Projects/SocialFish && cd ~/Projects/SocialFish

# create Makefile
$ vim Makefile
VIRTUALENV_DIR = .env

.PHONY: destroy

CURRENT_DIR := $(shell pwd)
INTERPRETER = $(CURRENT_DIR)/$(VIRTUALENV_DIR)/bin
PATH := ${PATH}:$(INTERPRETER)/

help :
	@echo "Usage: $ make <target>"
	@echo " > create    : create project"
	@echo " > run       : run project"
	@echo " > destroy   : destroy project"

create :
	@echo "[RUN]: clone from git"
	@git clone https://github.com/UndeadSec/SocialFish.git
	@make env

destroy :
	@echo "[RUN]: destroy project"
	@rm -fr ./$(VIRTUALENV_DIR)/
	@rm -fr ./SocialFish/

env :
	@echo "[RUN]: create virtualenv"
	@virtualenv $(VIRTUALENV_DIR) && \
	. $(VIRTUALENV_DIR)/bin/activate
	@make deps

deps :
	@echo "[RUN]: install dependencies"
	@$(INTERPRETER)/pip install -r $(CURRENT_DIR)/SocialFish/requirements.txt

run :
	@echo "[RUN]: start SocialFish"
	@cd SocialFish && \
	../.env/bin/python SocialFish.py

Usage

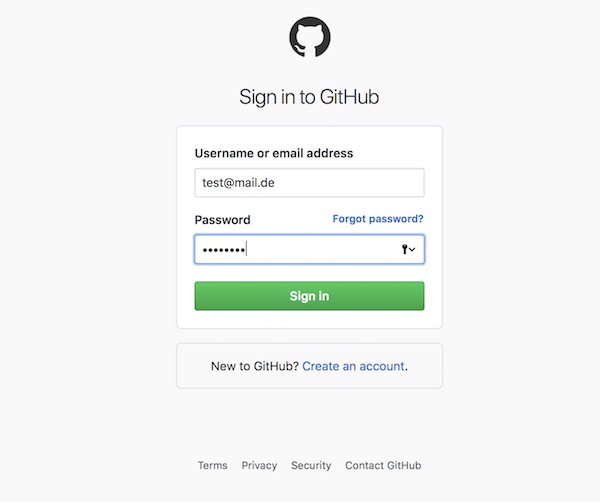
Here an phishing example for GitHub.

# download and create
$ make create

# start SocialFish
$ make run

 [!] Do you agree to use this tool for educational purposes only? (y/n)
 SF > y

Select an option:

 [1] Facebook

 [2] Google

 [3] LinkedIn

 [4] Github

 [5] StackOverflow

 [6] WordPress

 [7] Twitter

 SF >  4


   _.-=-._     .-, 
 .'       "-.,' / 
(          _.  < 
 `=.____.="  `._\


 [*] Github module loaded. Building site...
Password:

 [*] Ngrok URL: https://5cf8cc89.ngrok.io

 [*] Waiting for credentials... 

PHP 7.1.7 Development Server started at Sun Feb 18 16:11:23 2018
Listening on http://127.0.0.1:80
Document root is /Users/lupin/Projects/SocialFish/SocialFish/Server/www
Press Ctrl-C to quit.

SocialFish

[Sun Feb 18 16:13:06 2018] 127.0.0.1:50603 [200]: /
[Sun Feb 18 16:13:07 2018] 127.0.0.1:50612 [404]: /opensearch.xml - No such file or directory
[Sun Feb 18 16:13:18 2018] 127.0.0.1:50618 [302]: /login.php
 [ CREDENTIALS FOUND ]:
 [EMAIL]: test@mail.de [PASS]: test1234

# destroy all
$ make destroy

πŸ˜‰ super easy …

CURL visualization via httpstat

CURL is awesome … but sometimes the feature for visualization of statistics is missing. Exactly here helps httpstat as an wrapper.

httpstat is available for different languages:

Prepare project

Since I am a Python lover I will also work with my favorite language provided by Xiao Meng. It’s a single file with no dependencies and compatible to Python 2.7 and 3.

# create project folder
$ mkdir -p ~/Projects/httpstat && cd ~/Projects/httpstat

# download python script
$ curl -C - -O https://raw.githubusercontent.com/reorx/httpstat/master/httpstat.py

# change file permission
$ chmod u+x httpstat.py

Usage examples

# show help
$ python httpstat.py --help

# show simple GET statistics
$ python httpstat.py -k https://softwaretester.info/

# show html body (truncated)
$ export HTTPSTAT_SHOW_BODY=true
$ python httpstat.py -k https://softwaretester.info/

# show download and upload speed
$ export HTTPSTAT_SHOW_SPEED=true
$ python httpstat.py -k https://softwaretester.info/

Note: httpstat has a bunch of environment variables, please use help!

Fingerprinting with Spaghetti

In this tutorial I would like to introduce Spaghetti. Spaghetti is a cool project by m4ll0k on GitHub written in Python with less dependencies. The main idea behind Spaghetti is to find out fingerprints from Server, Web Frameworks, WAF, CMS, OS and languages. The following tutorial will show you how to set up and use spaghetti quickly and easily.

Requirements

  • Python (2.7.x)
  • Virtualenv

Prepare Project

# create directory
$ mkdir -p ~/Projects/Spaghetti && cd cd ~/Projects/Spaghetti

# create makefile
$ vim Makefile
VIRTUALENV_DIR = .env

.PHONY: destroy

CURRENT_DIR := $(shell pwd)
INTERPRETER = $(CURRENT_DIR)/$(VIRTUALENV_DIR)/bin
PATH := ${PATH}:$(INTERPRETER)/

help :
	@echo "Usage: $ make <target>"
	@echo " > create    : create project"
	@echo " > destroy   : destroy project"

create :
	@echo "[RUN]: clone from git"
	@git clone https://github.com/m4ll0k/Spaghetti.git
	@make env

destroy :
	@echo "[RUN]: destroy project"
	@rm -fr ./$(VIRTUALENV_DIR)/
	@rm -fr ./Spaghetti/

env :
	@echo "[RUN]: create virtualenv"
	@virtualenv $(VIRTUALENV_DIR) && \
	. $(VIRTUALENV_DIR)/bin/activate
	@make deps

deps :
	@echo "[RUN]: install dependencies"
	@$(INTERPRETER)/pip install -r $(CURRENT_DIR)/Spaghetti/requirements.txt

Usage

# create project
$ make create

# create alias
$ alias spaghetti="~/Projects/Spaghetti/.env/bin/python ~/Projects/Spaghetti/Spaghetti/spaghetti.py"

# check alias is created (optional)
$ compgen -a | grep 'spaghetti'

# show help
$ spaghetti --help

# run full scan with random agent and verbose mode
$ spaghetti --url http://google.ch --scan 0 --random-agent --verbose

# remove alias
$ unalias spaghetti

# destroy everything
$ make destroy

Install Ansible inside virtualenv on CentOS7

There are many ways to install Ansible inside virtualenv on CentOS7, I would like to show now a very simple variant. Important are actually the CentOS packages at the beginning.

Steps

# install needed packages
$ yum install -y python-setuptools python-devel openssl-devel libffi-devel

# install pip
$ easy_install pip

# install virtualenv
$ pip install virtualenv

# create and activate virtualenv
$ virtualenv .env && . .env/bin/activate

# install latest ansible
(.env) [demo@centos7 ~]$ pip install ansible

# show python packages
(.env) [demo@centos7 ~]$ pip freeze
ansible==2.3.1.0
asn1crypto==0.22.0
bcrypt==3.1.3
cffi==1.10.0
cryptography==1.9
enum34==1.1.6
idna==2.5
ipaddress==1.0.18
Jinja2==2.9.6
MarkupSafe==1.0
paramiko==2.2.1
pyasn1==0.2.3
pycparser==2.17
pycrypto==2.6.1
PyNaCl==1.1.2
PyYAML==3.12
six==1.10.0

# exit virtualenv
(.env) [demo@centos7 ~]$ deactivate

it can be so easy πŸ˜‰

Test your infrastructure

Infrastructures can be very big. Luckily, there are provisioner like Chef, Salt, Ansible and etc. These provisioners can be very complex and possibly the developer has done something wrong. Therefore the infrastructure has to be tested! Tools like goss, Serverspec and Testinfra helps testers to validate. This tutorial show the first steps with Testinfra.

Testinfra is written in Python very small and easy to understand. Here is the GitHub repository.

Precondition

  • Vagrant (min. 1.9.3) installed
  • Python (min. 2.7) installed
  • pip (min. 9.0.1) and virtualenv (min. 15.1.0) installed
  • make (min. 3.81) installed

Project structure

To get used to it – i prepared some files for you. You only need to change the box name/url in Vagrantfile.

$ tree
.
β”œβ”€β”€ Makefile
β”œβ”€β”€ requirements.txt
β”œβ”€β”€ Vagrantfile
└── tests.py
ENV_DIR = .env
CURRENT_DIR := $(shell pwd)
INTERPRETER = $(CURRENT_DIR)/$(ENV_DIR)/bin/
PATH := ${PATH}:$(INTERPRETER)

help:
	@echo "run make <target> with:"
	@echo " > env       : create virtualenv directory $(ENV_DIR)"
	@echo " > deps      : install dependencies from requirements.txt"
	@echo " > clean_env : delete virtualenv directory $(ENV_DIR)"
	@echo " > up        : run vagrant up"
	@echo " > destroy   : run vagrant destroy"
	@echo " > test      : run testinfra on vagrant environment"
	@echo " > clean_all : delete all files and directories"

env:
	@echo "[RUN]: create virtualenv"
	virtualenv $(ENV_DIR) && \
	. $(ENV_DIR)/bin/activate && \
	make deps

deps:
	@echo "[RUN]: install dependencies"
	$(INTERPRETER)/pip install -r requirements.txt

up:
	@echo "[RUN]: vagrant up"
	vagrant up

destroy:
	@echo "[RUN]: vagrant destroy -f"
	vagrant destroy -f
	rm -fr $(CURRENT_DIR)/.vagrant

test:
	@echo "[RUN]: run testinfr on vagrant environment"
	vagrant ssh-config > $(CURRENT_DIR)/ssh-config
	$(INTERPRETER)/pytest -v --hosts=default --ssh-config=$(CURRENT_DIR)/ssh-config tests.py

clean_all:
	@echo "[RUN]: delete all files and directories"
	rm -fr $(CURRENT_DIR)/.cache $(CURRENT_DIR)/__pycache__
	rm -f $(CURRENT_DIR)/ssh-config
	make destroy
	make clean_env

clean_env:
	@echo "[RUN]: delete virtualenv"
	rm -fr $(ENV_DIR)
testinfra==1.5.4
paramiko==2.1.2
#!/usr/bin/env python

def test_system_type(SystemInfo):
    '''Check OS type'''
    type = SystemInfo.type
    assert type == 'linux'

def test_user_exists(User):
    '''Check user exists'''
    user = User('vagrant')
    assert user.exists

def test_firewalld_is_installed(Package):
    '''Check firewalld is installed'''
    package = Package('firewalld')
    assert package.is_installed

def test_firewalld_running_and_enabled(Service):
    '''Check firewalld service is running and enabled'''
    service = Service('firewalld')
    assert service.is_running
    assert service.is_enabled
# -*- mode: ruby -*-
# vi: set ft=ruby :

Vagrant.configure("2") do |config|

  # disable ssh key update
  config.ssh.insert_key = false

  # vagrant box name
  config.vm.box = ""

  # vagrant box url
  config.vm.box_url = ""

  # disable box update
  config.vm.box_check_update = false

  # disable synced_folder
  config.vm.synced_folder ".", "/vagrant", disabled: true

  # 2nd network interface (public)
  # config.vm.network "public_network"

  # virtualbox settings
  config.vm.provider "virtualbox" do |vb|
    vb.name = "example_vm"
    vb.cpus = "2"
    vb.memory = "2048"
    vb.gui = false
  end

end

Usage

# create virtualenv and install dependencies
$ make env

# create vagrant environment
$ make up

# run tests
$ make test

# delete all generated files and directories
$ make clean_all

Testinfra offers several connections backends for remote command execution and can be used with python standard unit test framework: unittest. So the integration with build servers is easily possible.

Create Flask projects via Makefile

I’m not sure if there is something already! This tutorial should show you the value of Makefiles to make steps easier. The following Makefile can be used for creating new Flask projects.

CURRENT_DIR := $(shell pwd)

ifndef NAME
  NAME = Flaskproject
endif

VIRTUALENV_DIR = ${NAME}/.env
INTERPRETER = $(CURRENT_DIR)/$(VIRTUALENV_DIR)/bin/
PATH := ${PATH}:$(INTERPRETER)

help:
	@echo "Usage: $ make <target> [NAME=Flaskproject]"
	@echo " > create    : create flask project ${NAME}"
	@echo " > destroy   : destroy flask project ${NAME}"
	@echo " > deps      : install dependentcies via pip"

create:
	@echo "[RUN]: create flask project"
	@mkdir -p $(CURRENT_DIR)/${NAME}/app/{templates,static/{images,css,js,public},controllers}
	echo "Flask==0.11.1\nFlask-SQLAlchemy==2.1\nFlask-Script==2.0.5\nFlask-Assets==0.12\nFlask-Cache==0.13.1\nFlask-DebugToolbar==0.10.0\ncssmin==0.2.0\njsmin==2.2.1" \
	> $(CURRENT_DIR)/${NAME}/requirements.txt
	make env

destroy:
	@echo "[RUN]: destroy flask project"
	@rm -fr $(CURRENT_DIR)/${NAME}

env:
	@echo "[RUN]: create/activate virtualenv"
	@virtualenv $(VIRTUALENV_DIR) && \
	. $(VIRTUALENV_DIR)/bin/activate && \
	make deps

deps:
	@echo "[RUN]: install dependentcies"
	$(VIRTUALENV_DIR)/bin/pip install -r $(CURRENT_DIR)/${NAME}/requirements.txt

Usage

# create new project
$ make create

# create new project with own name
$ make create NAME=MyFlaskProject

# install python packages via pip (after adding to requirements.txt)
$ make deps

# delete specific project
$ make destroy NAME=MyFlaskProject