Build notifications with CatLight

CatLight is the the perfect app if you would like to know the current status of your continuous delivery pipelines, tasks and bugs. Without looking on E-Mails or visit build servers you know when attention is needed. It’s available for Debian, Ubuntu, Windows and MacOS.

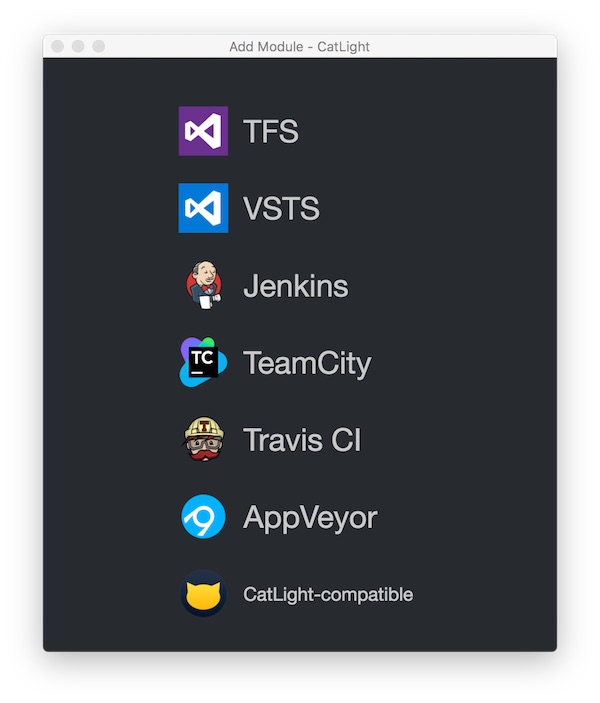
CatLight works with Jenkins, TFS, Travis CI and many more.

catlight setup

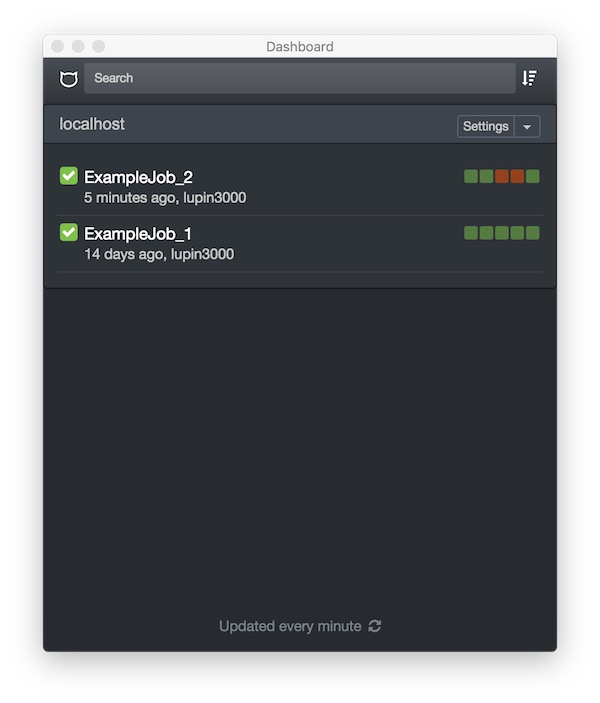
After successful installation and configuration, CatLight offers a lot of cool features.

catlight jobs

For personal usage it’s free, you only have to register.

Lunar – a UNIX security auditing tool

LUNAR is a open source UNIX security auditing tool written in Shell script. It offers the audit for various operating systems like Linux (RHEL, CentOS, Debian, Ubuntu), Solaris and Mac OS with less requirements. Services like Docker and AWS are also supported.

Download

Clone repository

# git clone
$ git clone https://github.com/lateralblast/lunar.git

Download via curl

# download via curl
$ curl -L -C - -o lunar.zip https://github.com/lateralblast/lunar/archive/master.zip

# extract archive
$ unzip lunar.zip

Usage

The use is very easy… but the outcome brings much values.

# show help
$ sh lunar.sh -h

# list functions
$ sh lunar.sh -S

# run ssh audit
$ sh lunar.sh -s audit_ssh_config

# run selinux audit in verbose mode
$ sh lunar.sh -s audit_selinux -v

# run all audits
$ sh lunar.sh -a

PyCharm – TERM environment variable not set

It can happen that you get this message in the PyCharm console. “TERM environment variable not set.” Here now the simple way to solve that issue.

The example Python script

#!/usr/bin/env python
# -*- coding: utf8 -*-

import os

os.system('clear')

The annoying error will displayed in PyCharm.

Solution

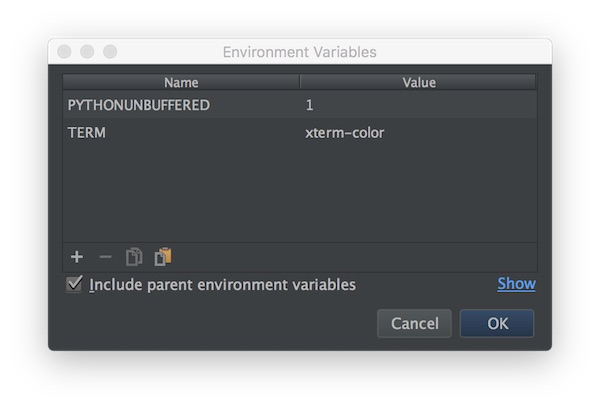
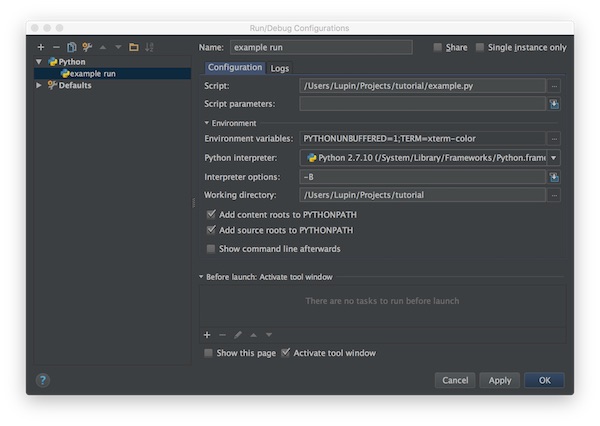
Open “Run/Debug configuration” and add an environment variable “TERM=xterm-color”

PyCharm environment variable
PyCharm run debug configuration

That’s it already … The message should no longer appear.

Build a Docker Penetration Test environment

Today we build a penetration test environment via Docker. That means no Plug-Ins (for example: Java) are needed! If you are Mac OS X users, a VNC client is already included (since Yosemite).

Preparation:

# download all needed Docker images
$ docker pull owasp/zap2docker-stable
$ docker pull citizenstig/dvwa
$ docker pull jmbmxer/threadfix

# list local Docker images
$ docker images
...
REPOSITORY                TAG                 IMAGE ID            CREATED             SIZE
owasp/zap2docker-stable   latest              a774bdc65502        3 months ago        1.557 GB
jmbmxer/threadfix         latest              b6f1907a61cd        5 months ago        941 MB
citizenstig/dvwa          latest              c8312743bc09        23 months ago       478.5 MB

ZAP Attack Proxy

# run Docker container with ZAP Attack Proxy (insert and remember password)
$ docker run -u zap -p 5900:5900 -p 8080:8080 -v /tmp/reports:/home/zap/reports --name zap -i owasp/zap2docker-stable x11vnc --forever --usepw --create

# start VNC (Mac OS X)
$ open /System/Library/CoreServices/Applications/Screen\ Sharing.app/

…or use the short way via: [cmd] + [space] and type screen sharing

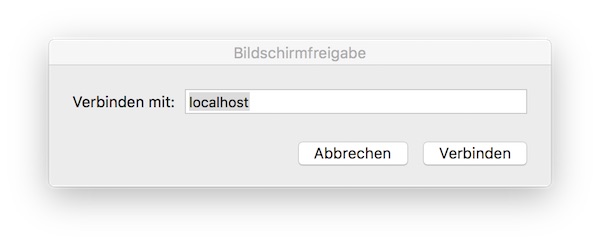
vnc connection to zap

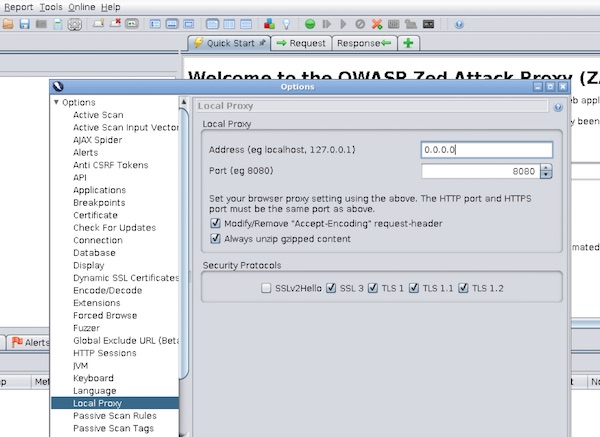
Insert “localhost” and your given password… and follow introduction for ZAP startup. Now you configure the ZAP Proxy Settings.

zap proxy configuration

Note: Select IP “0.0.0.0” for later use. You can also use “$ docker inspect zap” to find out the internal IP, but this could change on next start.

DVWA

# run Docker container with DVWA (2nd terminal)
$ docker run -d -p 8081:80 --name dvwa citizenstig/dvwa

# wait for startup
$ docker logs -f dvwa

# get host ip (from where you run browser)
$ ifconfig

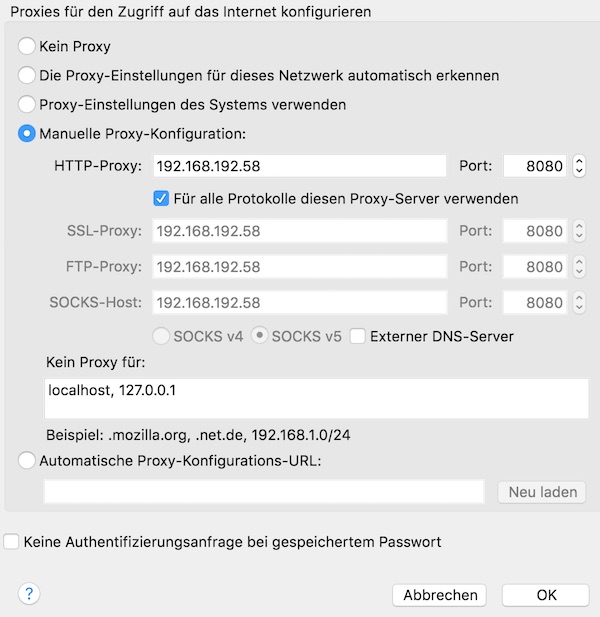
Now start your Firefox browser and change proxy settings. Insert your IP!

firefox proxy settings

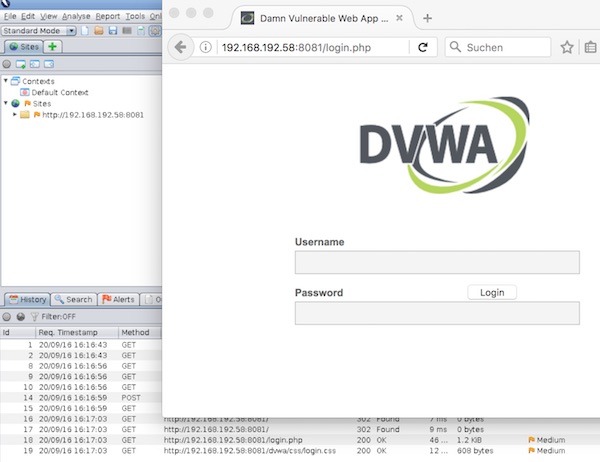
Call URL for DVWA in Firefox and run your penetration tests.

pentest firefox zap

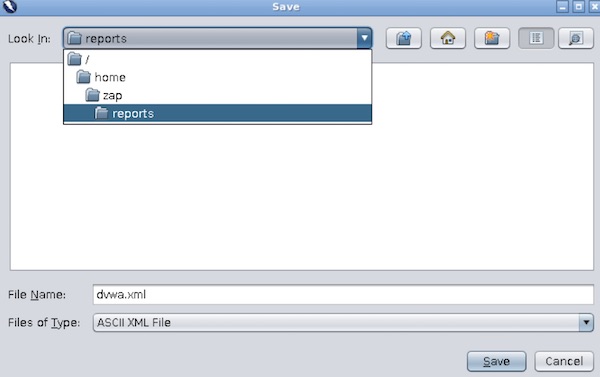
When you are done, export XML report

zap xml report
From now on, you can stop all running docker container.

ThreadFix

# run Docker container with ThreadFix
$ docker run -d -p 8443:8443 --name threadfix jmbmxer/threadfix start

# wait for startup
$ docker logs -f threadfix

Open Safari and call URL: https://localhost:8443/threadfix. Login with User: “user” and Password: “password”. Create a new team and add a application to team.

# open directory in finder
$ open /tmp/reports/

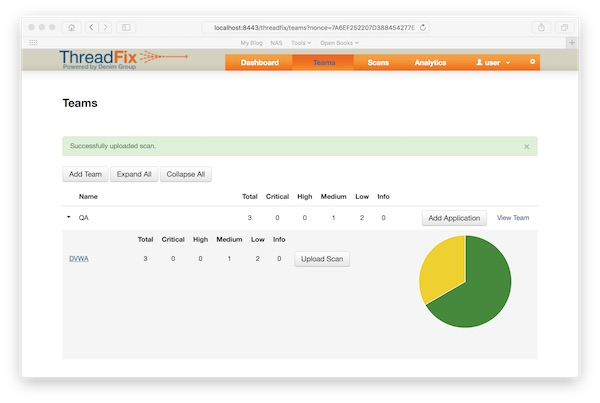
Import the ZAP XML report.

threadfix zap report

That is it… enjoy and expand your pentest laboratory!

Explain Shell direct from terminal

Explainshell.com rocks! Nevertheless, you lose time to leave the terminal (open browser, copy-paste). But there is a cool solution from ManKier. All what you need is curl.

Usage

# curl request for whoami
$ curl -Gs "https://www.mankier.com/api/explain/?cols="$(tput cols) --data-urlencode "q=whoami"

# curl request for df -h
$ curl -Gs "https://www.mankier.com/api/explain/?cols="$(tput cols) --data-urlencode "q=df -h"

Simpler usage

With a tiny script it will be more comfortable! Add the following to your .bashrc or .bash_profile (MAC OS X).

# explain.sh begins
explain () {
	if [ "$#" -eq 0 ]; then
		while read  -p "Command: " cmd; do
			curl -Gs "https://www.mankier.com/api/explain/?cols="$(tput cols) --data-urlencode "q=$cmd"
		done
		echo "Bye!"
	elif [ "$#" -eq 1 ]; then
		curl -Gs "https://www.mankier.com/api/explain/?cols="$(tput cols) --data-urlencode "q=$1"
	else
		echo "Usage"
		echo "explain                  interactive mode."
		echo "explain 'cmd -o | ...'   one quoted command to explain it."
	fi
}

Now you can do …

# explain one command
$ explain 'df -h'
...
df(1)
  df displays the amount of disk space available on the file system containing each file name
  argument. If no file name is given, the space available on all currently mounted file systems is
  shown. Disk space is shown in 1K blocks by default, unless the environment variable
  POSIXLY_CORRECT is set, in which case 512-byte blocks are used. If an argument is the absolute
  file name of a disk device node containing a mounted file system, df shows the space available on
  that file system rather than on the file system containing the device node. This version of df
  cannot show the space available on unmounted file systems, because on most kinds of systems doing
  so requires very nonportable intimate knowledge of file system structures.

  -h (-H, --HUMAN-READABLE)
    print sizes in powers of 1024 (e.g., 1023M)

… if you insert only “explain” an interactive mode will started!

Create simple CentOS 7 Virtualbox with Packer

As a software tester you need many virtual machines, the creating can be very time consuming. Of course tools like Vagrant helps a lot but the creation for BaseBoxes starts most with installation from ISO`s. Exact here helps Packer! This tutorial shows an example for CentOS7 – VirtualBox.

Preconditions

Preparation

1st you need to install Packer. The following example shows one way that works well with Mac OS X (El Capitan).

# change into Downloads
$ cd ~/Downloads/

# download packer archive (Mac OS X)
$ curl -O https://releases.hashicorp.com/packer/0.10.1/packer_0.10.1_darwin_amd64.zip

# unzip packer archive
$ unzip packer_0.10.1_darwin_amd64.zip

# move packer binary
$ sudo mv packer /usr/local/bin

# check packer version
$ packer --version

Other OS? Take a look here.

Instructions

# create new project
$ mkdir ~/Projects/PackerExample && cd ~/Projects/PackerExample

# create kickstart directory and configuration
$ mkdir ~/Projects/PackerExample/http && touch ~/Projects/PackerExample/http/ks.cfg

# create new Packer JSON file
$ touch ~/Projects/PackerExample/example.json

# how it looks (before running)
$ tree .
.
├── example.json
└── http
    └── ks.cfg
{
  "variables": {
    "iso": "http://linuxsoft.cern.ch/centos/7/isos/x86_64/CentOS-7-x86_64-Minimal-1511.iso",
    "checksum": "88c0437f0a14c6e2c94426df9d43cd67"
  },
  "builders": [
    {
      "type": "virtualbox-iso",
      "iso_url": "{{ user `iso` }}",
      "iso_checksum": "{{ user `checksum` }}",
      "iso_checksum_type": "md5",
      "vm_name": "MyCentOS7",
      "guest_os_type": "RedHat_64",
      "ssh_username": "root",
      "ssh_password": "packer",
      "ssh_port": 22,
      "ssh_wait_timeout": "600s",
      "vboxmanage": [
        ["modifyvm", "{{.Name}}", "--memory", "2048"],
        ["modifyvm", "{{.Name}}", "--cpus", "2"],
        ["modifyvm", "{{.Name}}", "--audio", "none"]
      ],
      "disk_size": "10240",
      "http_directory": "http",
      "boot_command": [
        "<tab> text ks=http://{{ .HTTPIP }}:{{ .HTTPPort }}/ks.cfg<enter><wait>"
      ],
      "shutdown_command": "/sbin/halt -p"
    }
  ]
}

More about Packer – VirtualBox? Take a look here.

install
cdrom
lang en_US.UTF-8
keyboard us
timezone UTC
network --bootproto=dhcp
rootpw --plaintext packer
user --name=frank --password=Test123
auth --enableshadow --passalgo=sha512 --kickstart
firewall --disabled
selinux --permissive
bootloader --location=mbr

text
skipx
zerombr

clearpart --all --initlabel
autopart

firstboot --disable
reboot

%packages --instLangs=en_US.utf8 --nobase --ignoremissing --excludedocs
@core
%end

%post --log=/root/ks.log
yum -y update
%end

More about CentOS 7 – Kickstart? Take a look here.

Validation and Build

# validate JSON
$ packer validate example.json

# run the build
$ packer build example.json

Result

$ tree .
.
├── example.json
├── http
│   └── ks.cfg
├── output-virtualbox-iso
│   ├── MyCentOS7-disk1.vmdk
│   └── MyCentOS7.ovf
└── packer_cache
    └── 4bbec2cca90f761e144becb1a24c2914eddd21d06292d6dfb415beb51ef9e69f.iso
Visualization of package dependencies

Documentation takes time – sometimes a lot of time. Here a few examples how to create dependencies pictures with Graphviz via command line. These commands can then be easily transferred to a build-process to save your time.

Mac OS X

# install Graphviz on Mac OS X
$ curl -O http://www.graphviz.org/pub/graphviz/stable/macos/mountainlion/graphviz-2.36.0.pkg
$ open graphviz-2.36.0.pkg

# check installation
$ dot -V
dot - graphviz version 2.36.0 (20140111.2315)

# clone PureDarwin
$ git clone https://github.com/PureDarwin/PureDarwin.git

# change directory
$ cd PureDarwin/scripts/

# create graph for non-installed mtr
$ sudo ./pd_portviz mtr

CentOS 7

# install Graphviz on CentOS 7
$ yum install -y graphviz

# check installation
$ dot -V
dot - graphviz version 2.30.1 (20150306.0020)

# install rpmdep
$ yum install -y epel-release && yum install -y rpmorphan

# create graph for installed which
$ rpmdep -dot which.dot which

Debian 8

# install Graphviz on Debian 8
$ apt-get install -y graphviz

# check installation
$ dot -V
dot - graphviz version 2.38.0 (20140413.2041)

# install debtree
$ apt-get install -y debtree

# create graph for non-installed make
$ debtree --with-suggests make > make.dot

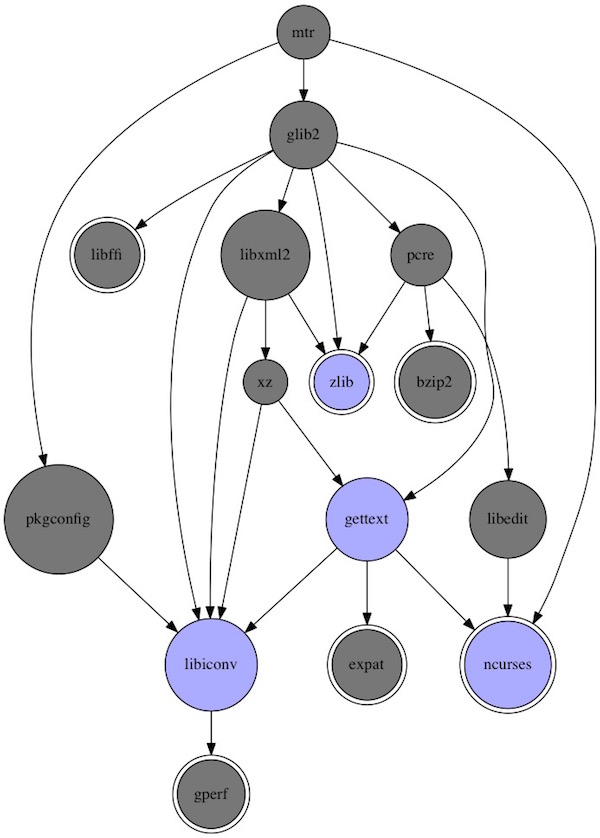
Example graph for mtr on Mac OS X

# convert .dot into png
$ dot -Tpng mtr.dot -o mtr.png

mtr dependencies

SSH-life easier with AppleScript

I love the Mac OS X Terminal and to do SSH with it. With increasing age I forget the many SSH connection variables. But with some AppleScript I help myself. Here now 3 simple examples.

Example 1:

User and target are hardcoded.

on RunTerminal()
    set ScriptCommand to "ssh user@123.456.78.9"
    tell application "Terminal"
        activate
        do script with command ScriptCommand in window 1
    end tell
end RunTerminal

on run
    RunTerminal()
end run

Example 2

Dialog for user and only target hardcoded.

global RemoteUser

on RunTerminal()
    set ScriptCommand to "ssh " & RemoteUser & "@192.168.0.1"
    tell application "Terminal"
        activate
        do script with command ScriptCommand in window 1
    end tell
end RunTerminal

on RunDialog()
    display dialog "Who should it be ?" default answer "root"
    set RemoteUser to text returned of result
end RunDialog

on run
    RunDialog()
    RunTerminal()
end run

Example 3

Dialog for user and list for targets.

global RemoteUser
global RemoteTarget

on RunTerminal()
    set ScriptCommand to "ssh " & RemoteUser & "@" & RemoteTarget
    tell application "Terminal"
        activate
        do script with command ScriptCommand in window 1
    end tell
end RunTerminal

on RunUserDialog()
    display dialog "Who should it be ?" default answer "root"
    set RemoteUser to text returned of result
end RunUserDialog

on RunTargetDialog()
    (choose from list {"192.168.0.1", "example.com", "123.456.678.9"} with prompt "What is your target ?")
    set RemoteTarget to result as text
end RunTargetDialog

on run
    RunUserDialog()
    RunTargetDialog()
    RunTerminal()
end run

After exporting as Executable you can put it on places where you want. Do not forget the appropriate icon!